


Abi Coop
Melissa Richard
Kristen Ryan
Light in the Museum by Jennifer Thomas
Light in the Museum
As the weather in the Northern Hemisphere turns cooler and wetter, we tend to spend more time indoors. For my family this usually entails lots of trips to find light in the museums. Kids love running around the big spaces and interacting with the colourful displays. Living in London, we are spoiled for choice. But even small collections can have interesting items and make for fun days out. Especially if you can match up your children’s interest with that of the museum. For example, recently we went on holiday to a small seaside town in Lyme Regis, England. They have a brilliant display of an ichthyosaurs which rivals that of the much more crowded Natural History Museum in London.
These adventures are worth seeking out and documenting. They can present some great photographic opportunities. However, they can also present challenging conditions. In this article I am going to explain how I handle light in the museum, and what to look out for so that you can make the most of your visit.
Practical considerations
Before we dive into the technical aspects, first I wanted to talk about some practicalities for finding light in the museum. For the most part, museums allow non-flash photography, however, be sure to check any specific requirements before you head out. Tripods usually aren’t allowed. If you have active kids like I do, it helps to have more than one adult to supervise them if you are going to be busy taking photos. If you’re not used to it, taking photos in public with a DSLR can be a different experience. So don’t be surprised if you get some comments or strange looks. However, people are now accustomed to others taking photos with their mobile phones, so it is becoming more normalized. The more that you do it the more that you get used to it.
Check out our course, Finding Inspiration Indoors!
Museums tend to be busiest at weekends and during school holidays. Try to go outside of these times so you will have less crowds to deal with. If this isn’t possible then early mornings and during lunch time should be quieter. If you want to photograph a particular area and there are a lot of people around you have two options. I tend to wait a bit and see if the area clears. Often, I get lucky and I can test my settings and think about my composition in the while I’m waiting. An alternative approach is to take several shots and combine them for a clean final edit in Photoshop.
Gear
You certainly can get some nice photos with a mobile phone, but if you want a higher resolution image and the ability to manipulate the settings, then nothing beats a DSLR or mirrorless camera. Museums are often poorly lit, apart from their displays, so you therefore will probably be pushing your ISO very high. It helps to know what ISO your camera functions best at and how high you can go without introducing too much noise. You can test this out before you go.
The low light situation often encountered indoors requires a lens with a wide aperture for maximum light gathering ability. When I started out, I used my ‘nifty 50’ (Canon 50 mm, f/1.8) because it was affordable, lightweight and had a relatively wide aperture. The downside to this lens is that it is tough to use in confined spaces that museums sometime have for their display cases. I now use my Sigma 35 mm f/1.4 but an even wider-angle lens might be better because I do sometimes feel constrained with it. The other advantage of a wide-angle lens is that you can stay close to your subjects (i.e. your kids). So, if safety is a concern, then a wide angle is a must. I only use the lens that’s on my camera. It’s too much hassle to change lenses when chasing after kids.
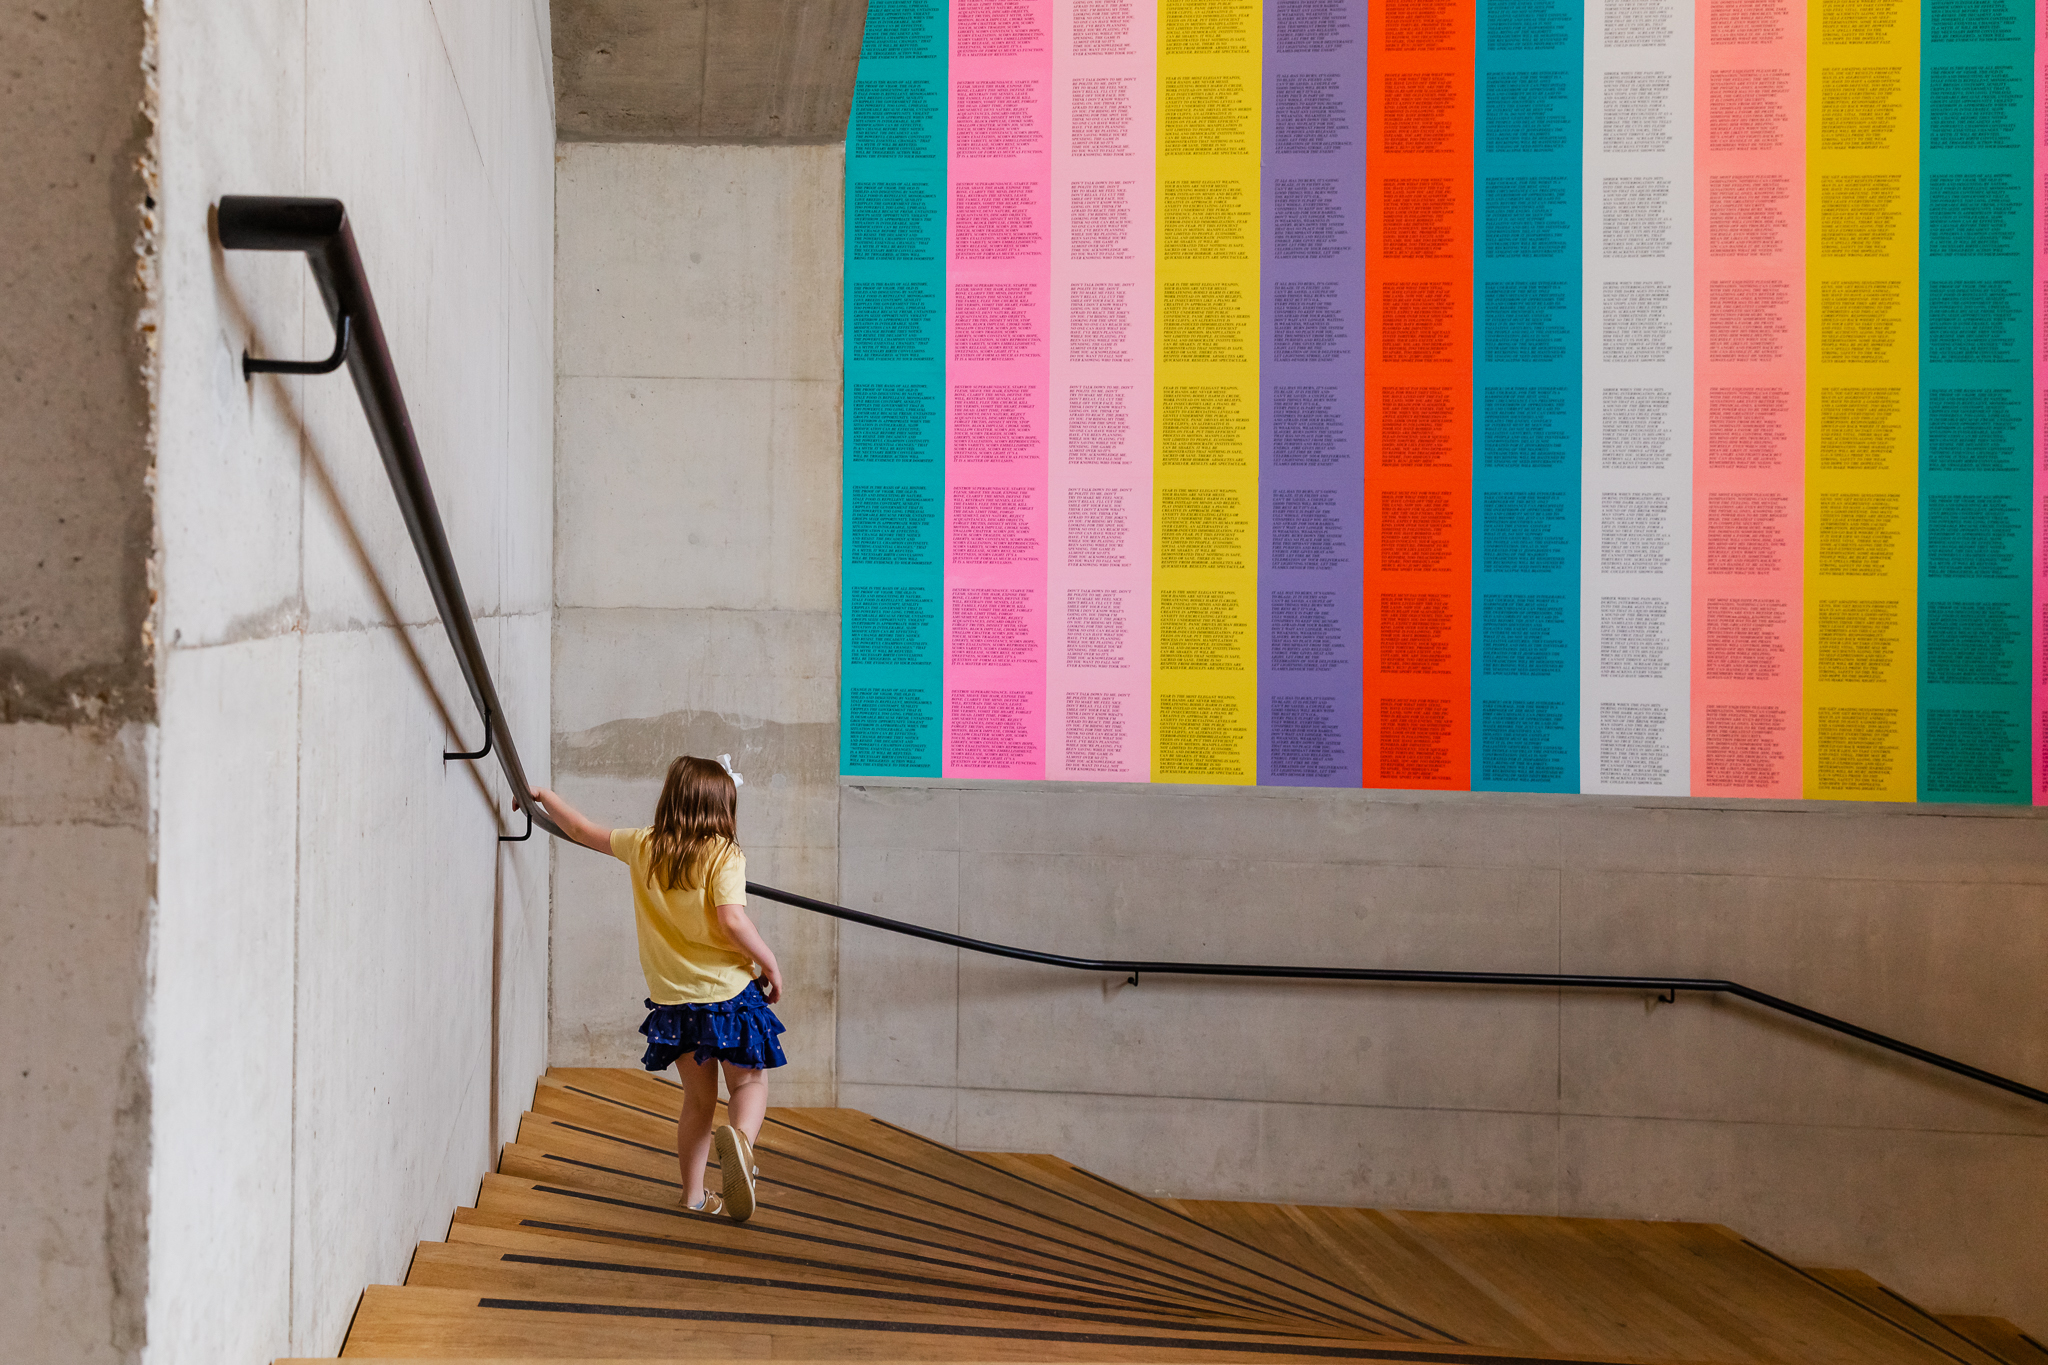
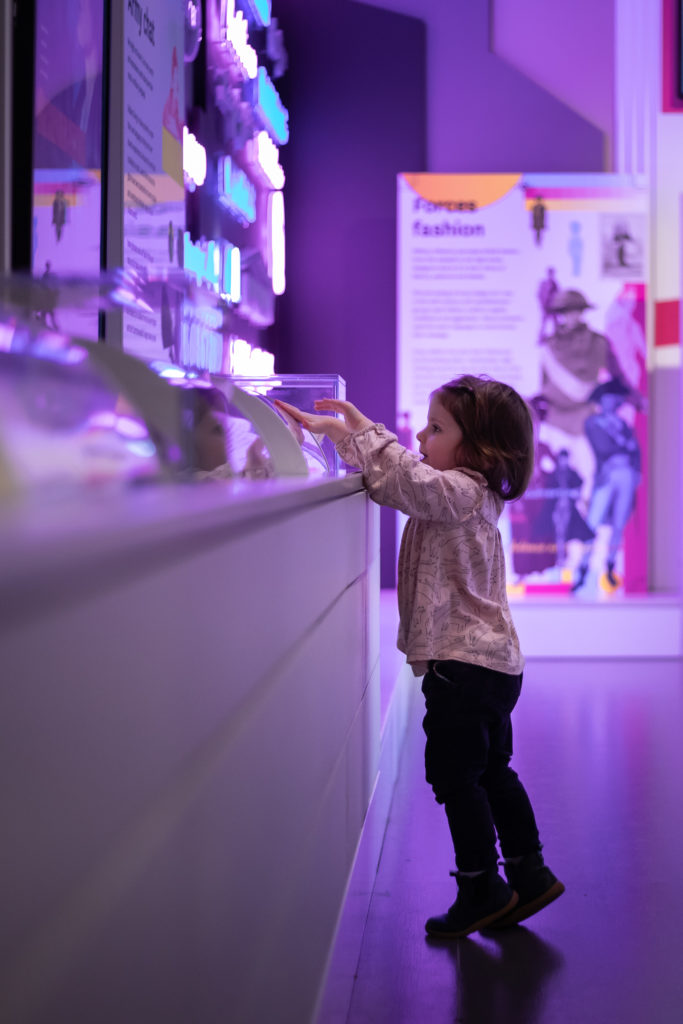
I know that it’s tough to get kids to wear what you want them to but if you have a say in the matter at all, solid warm colours (red, yellow and orange) tend to stand out from busy backgrounds and draw the viewer’s attention. Blue, purple and green will tend to fade into the background more.
Indoor light
The light in the museum is rarely perfect light for portraits. It is important to accept it for what it is and to go with the mindset of capturing storytelling images rather than traditional portraits.
Want to learn more about shooting in natural light both indoors and outdoors?
Check out Natural Light for Storytellers!
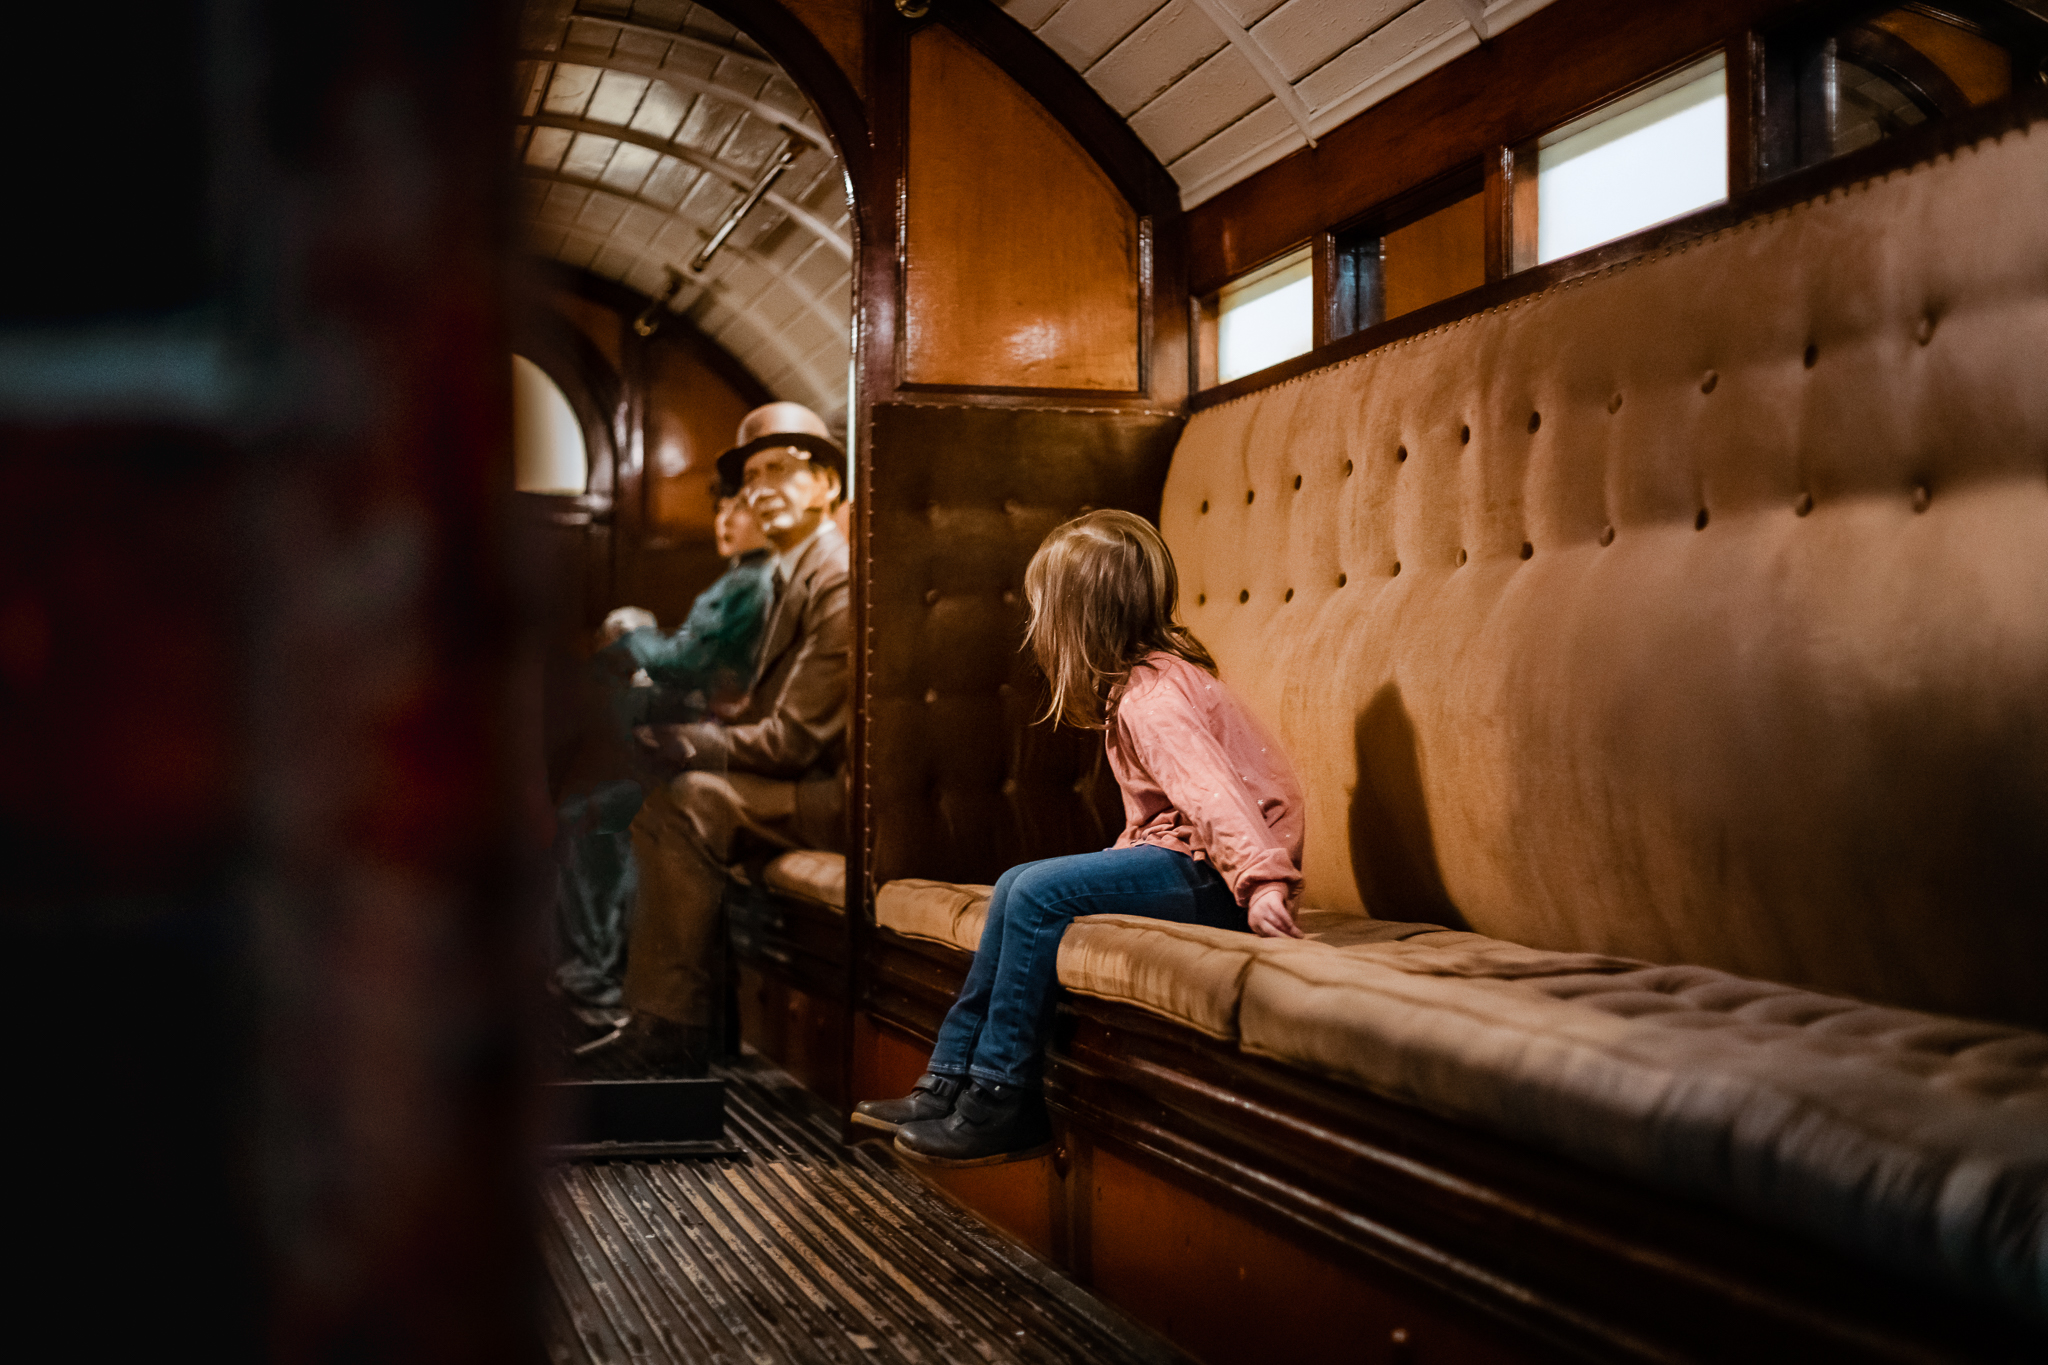
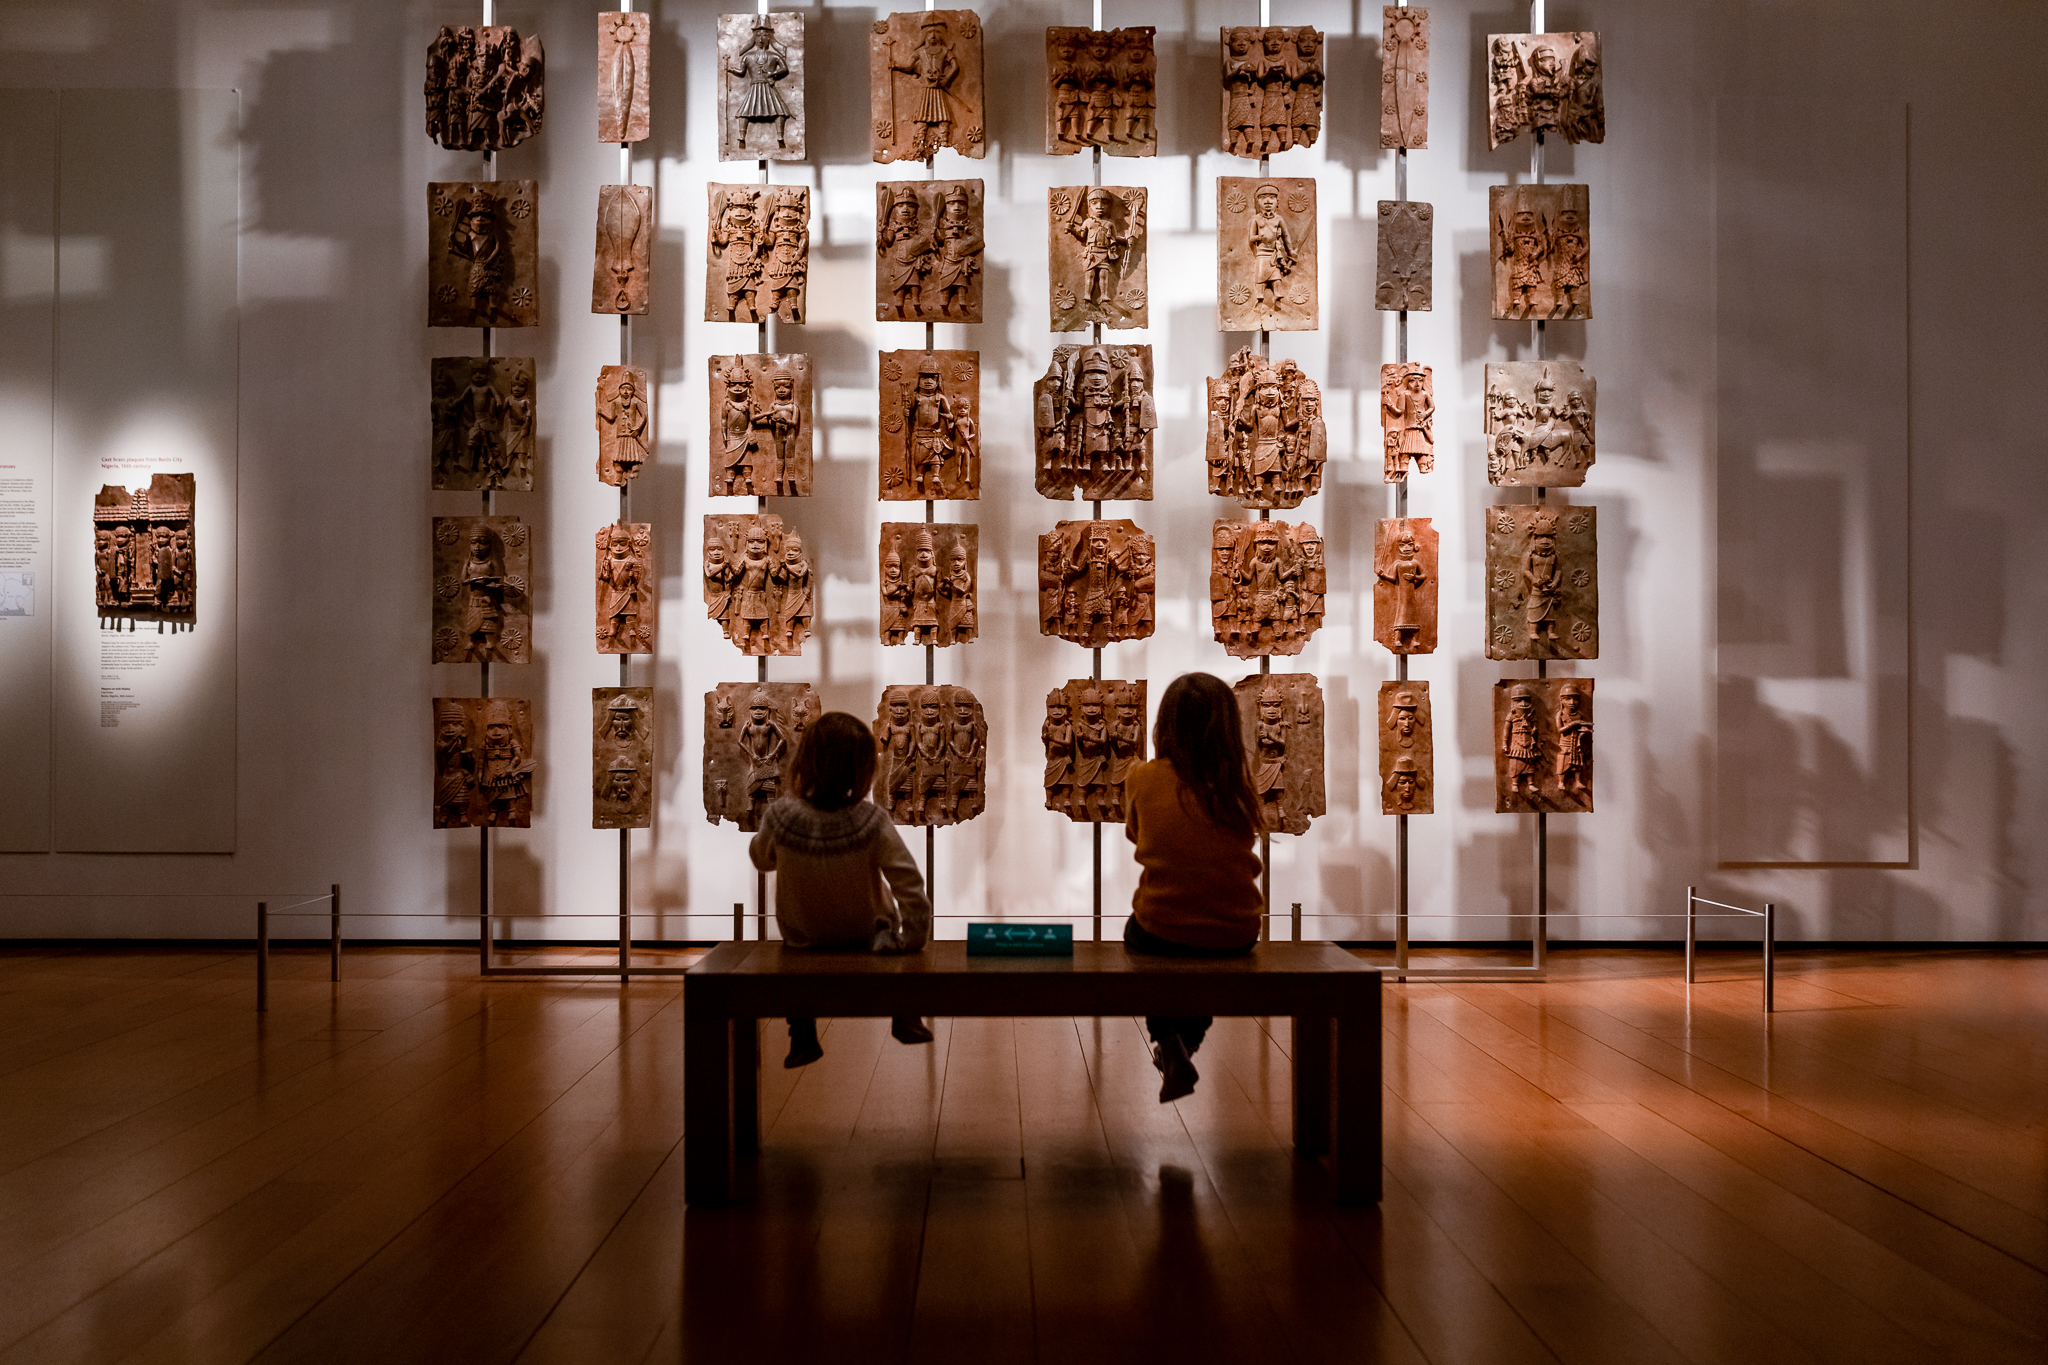
Museums have expertly lit their displays, often with spotlights. This produces strong light falling onto the objects in their collection, which then rapidly falls off into shadow the further you move away from the display. This is due to the inverse square law, which means that light is strongest closest to its source and dissipates rapidly. Knowing this, you can use it to your advantage. First, make sure that you do not blow the highlights in any image by checking the histogram on your camera. If you include the light source in your image, this will get blown out first.
To avoid this, I try to compose my images so that I do not have any visible light bulbs or other forms of lighting. Then you either have to wait for your subject to look towards the light or encourage them to. However, it’s important to avoid them looking directly at any light sources. Instead, you want their face in a pocket of light, facing the general direction of the light source. If you get it right the rest of the room will fall into shadow. This is due to the inverse square law and distractions will be minimised.
One of the downsides to the colourful displays is that you often get funky colour casts. You can either remove them in Photoshop or a similar program or just leave them. I think that they help to tell the story of the place and I often just leave them as they are.
What to look for in capturing strong images
As with any other form of photography, certain visual elements help to draw the attention of the viewer. These elements direct them to the subject and keep them interested for longer.
Learn more about creating images with impact with Composition for Storytellers!

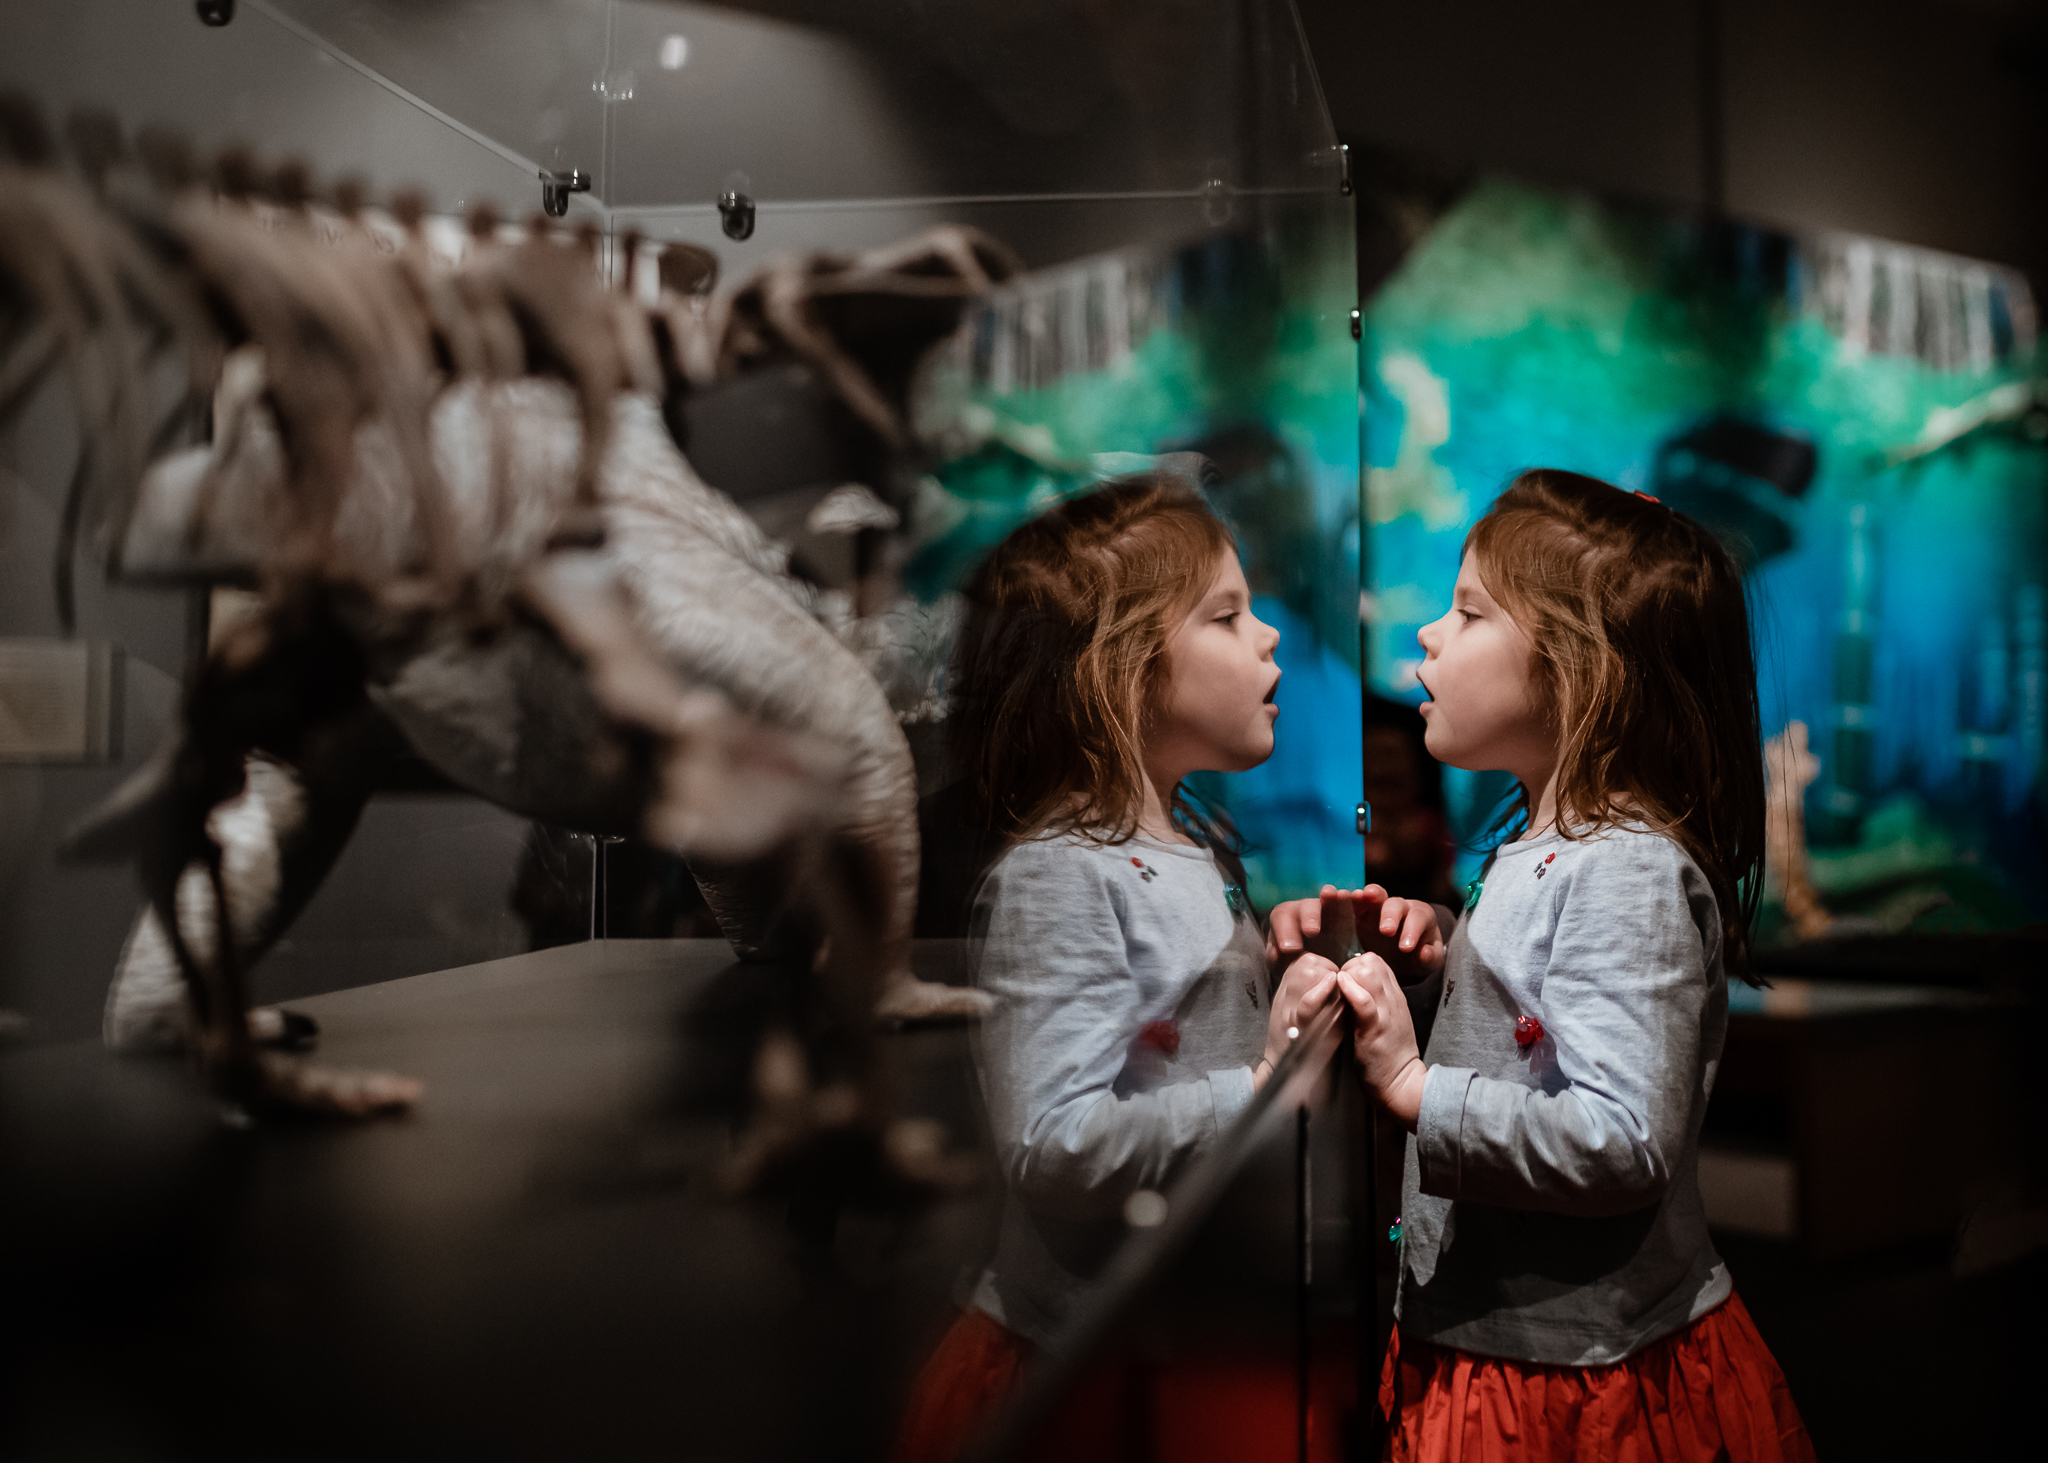
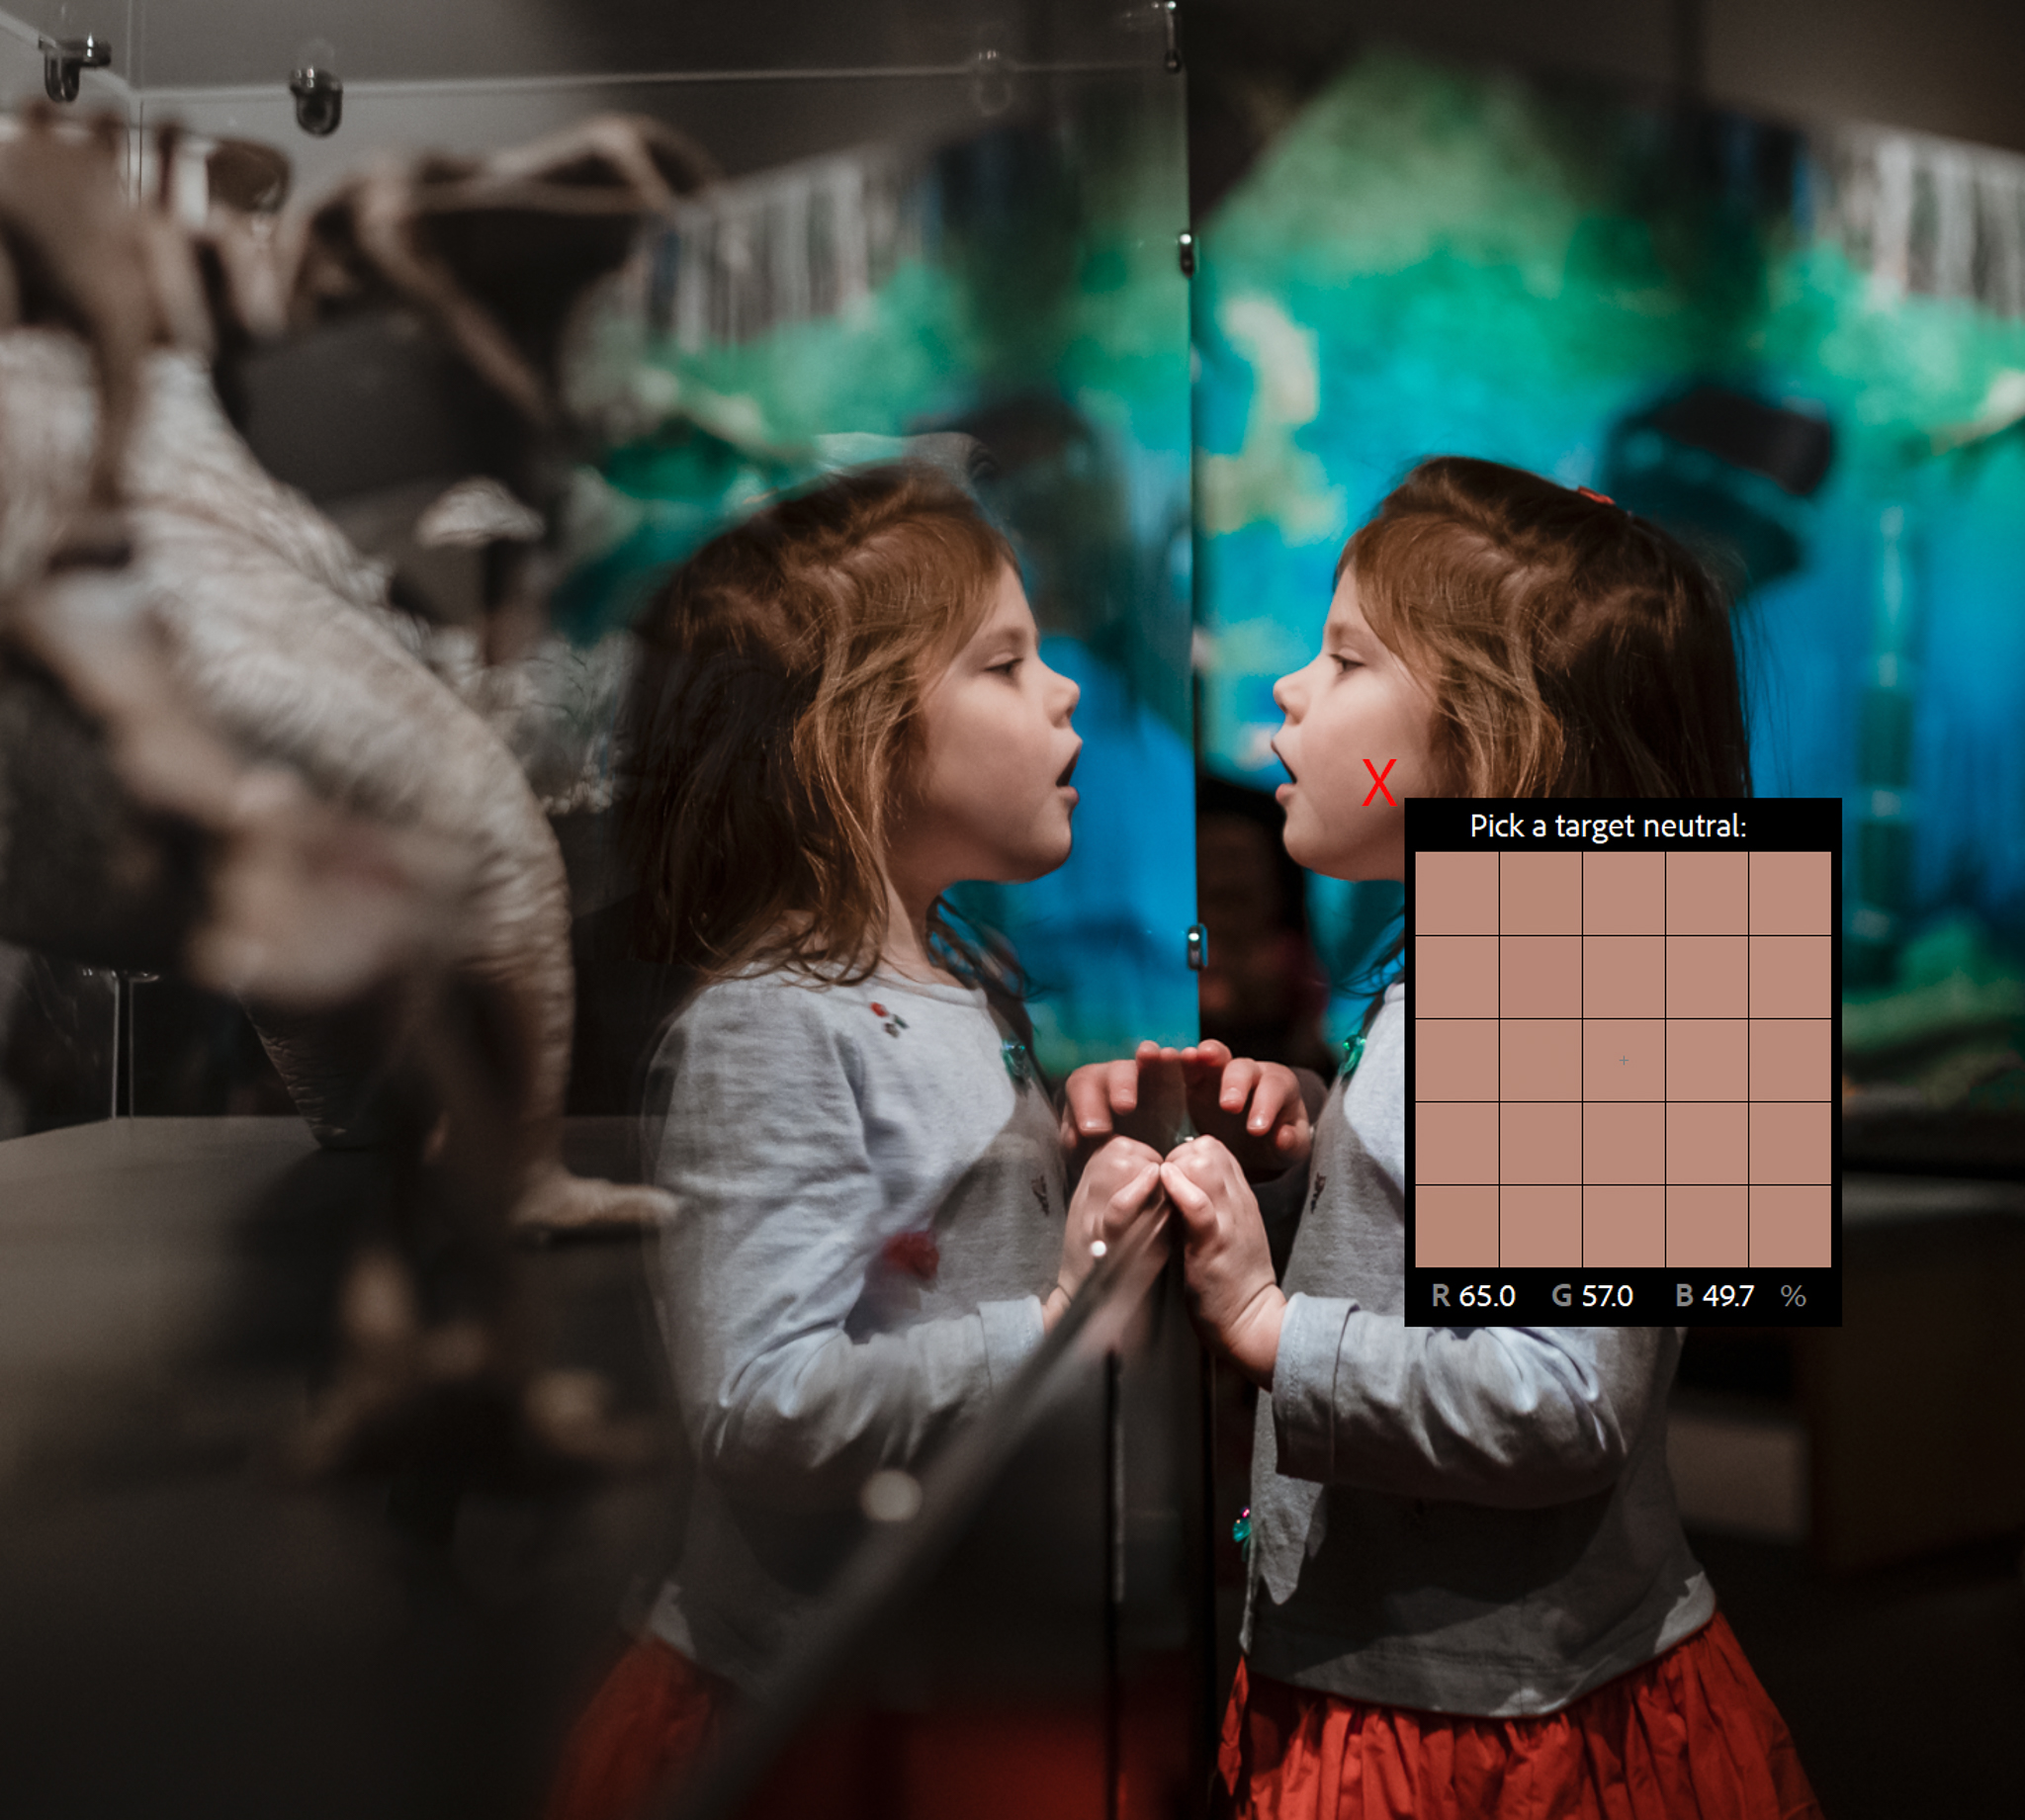
All the glass panels and dramatic light in museum makes them great places to capture reflections. When you have a reflection of your subject you are doubling their visual weight and giving them importance in the frame. To capture great reflections, you need to move around a lot to find the best angle.
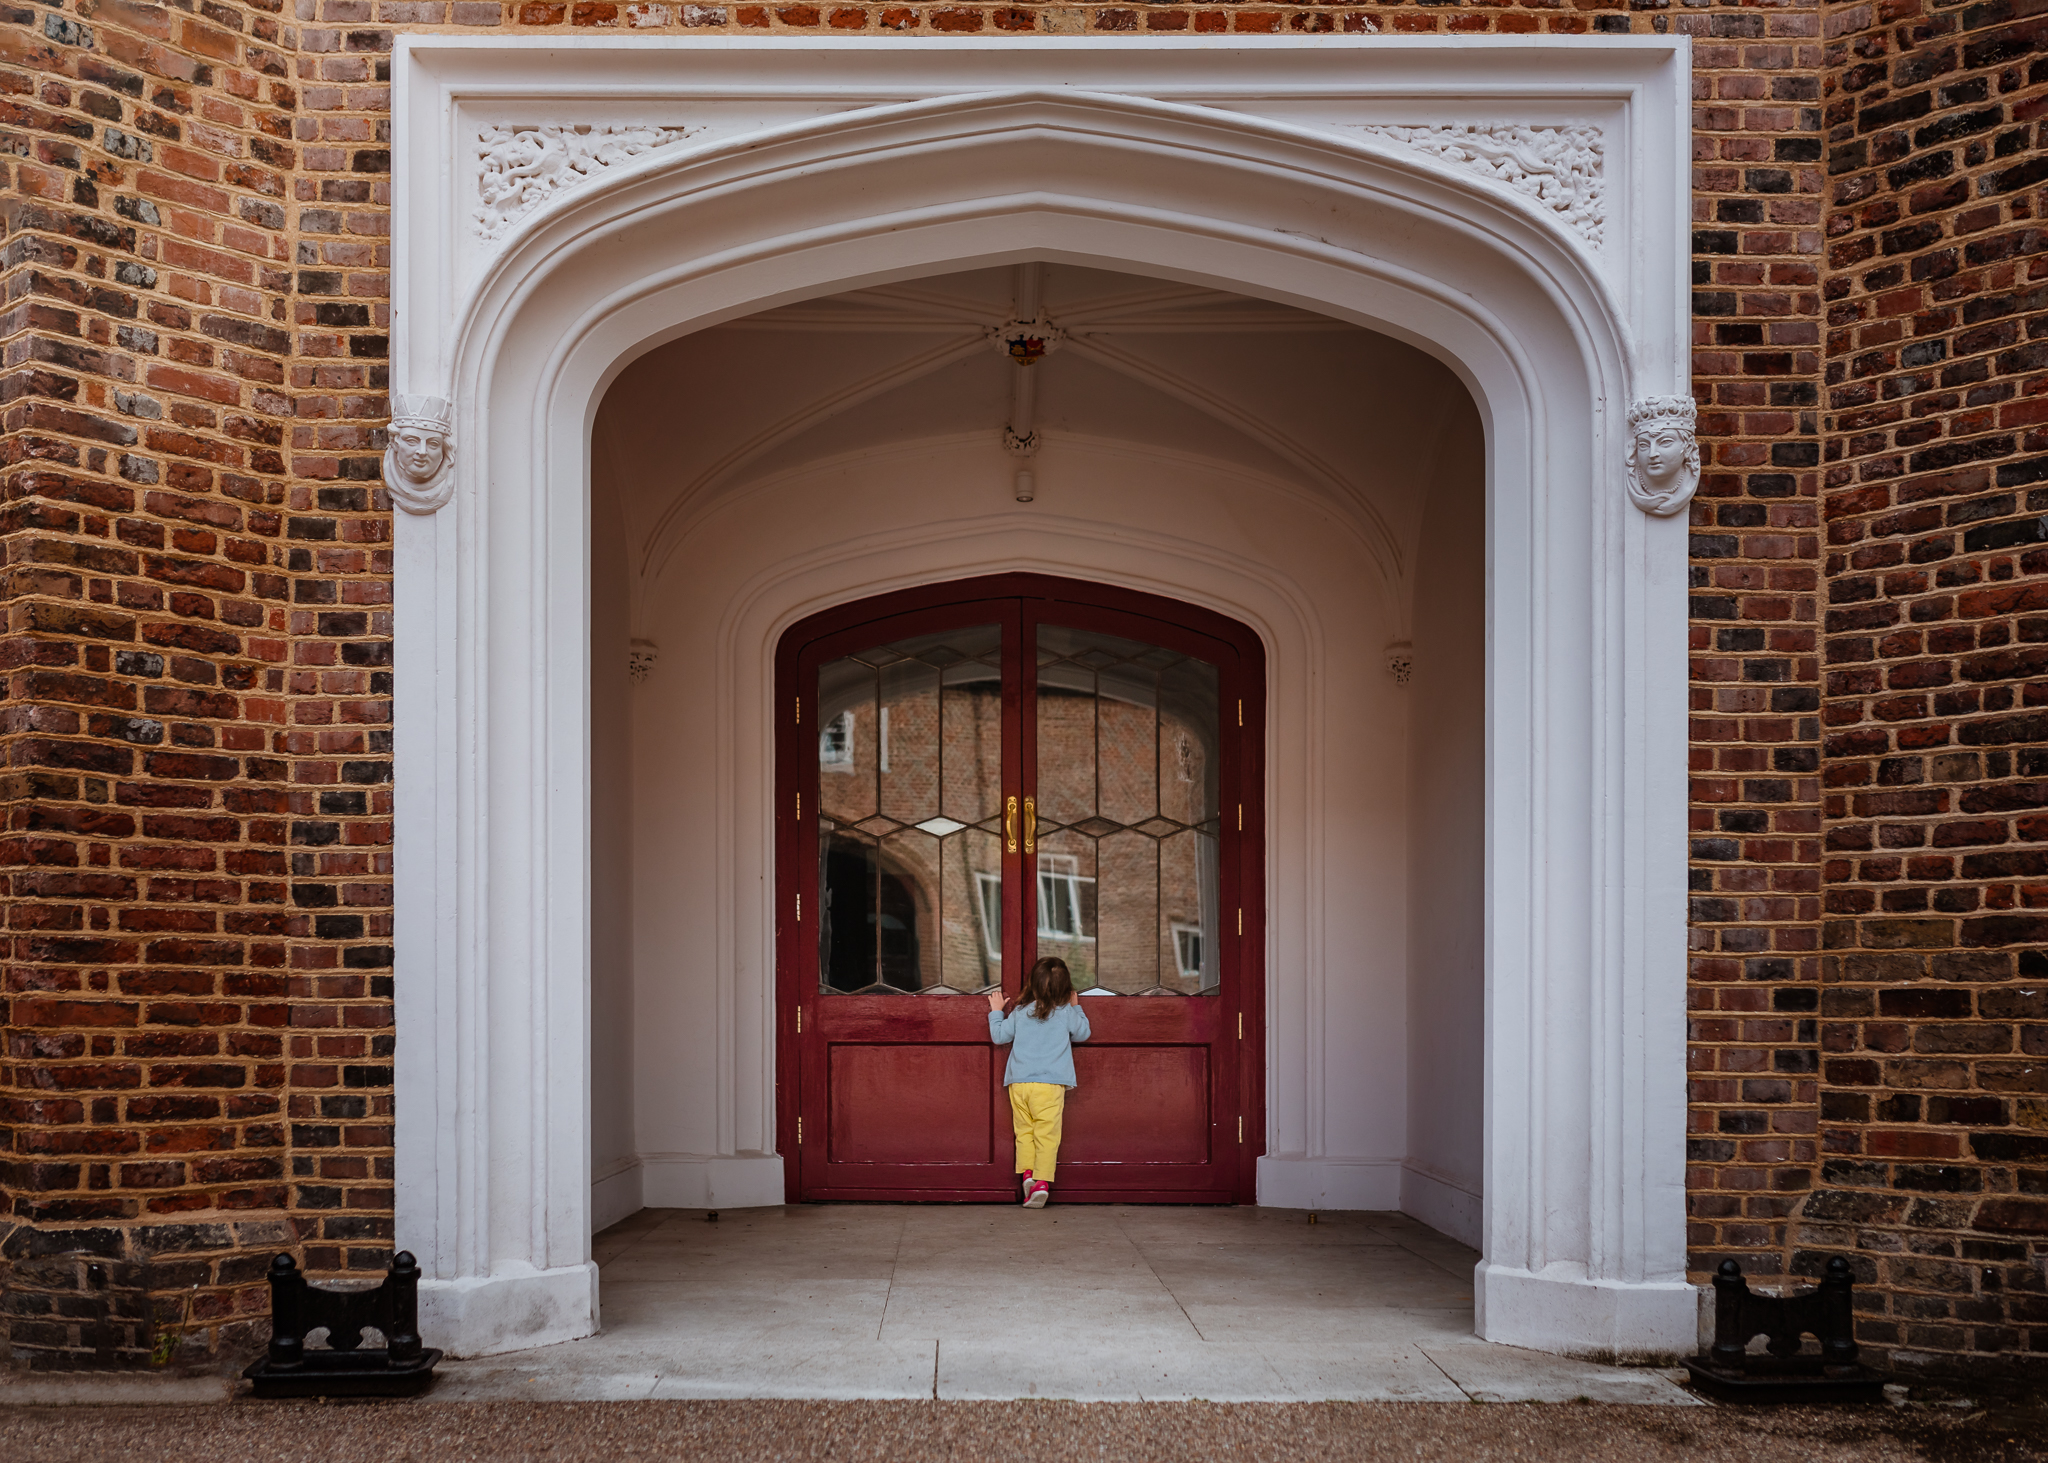
Leading lines and framing opportunities are often found along display cabinets and windows. Both visual elements serve to highlight and direct the viewer to your subject.

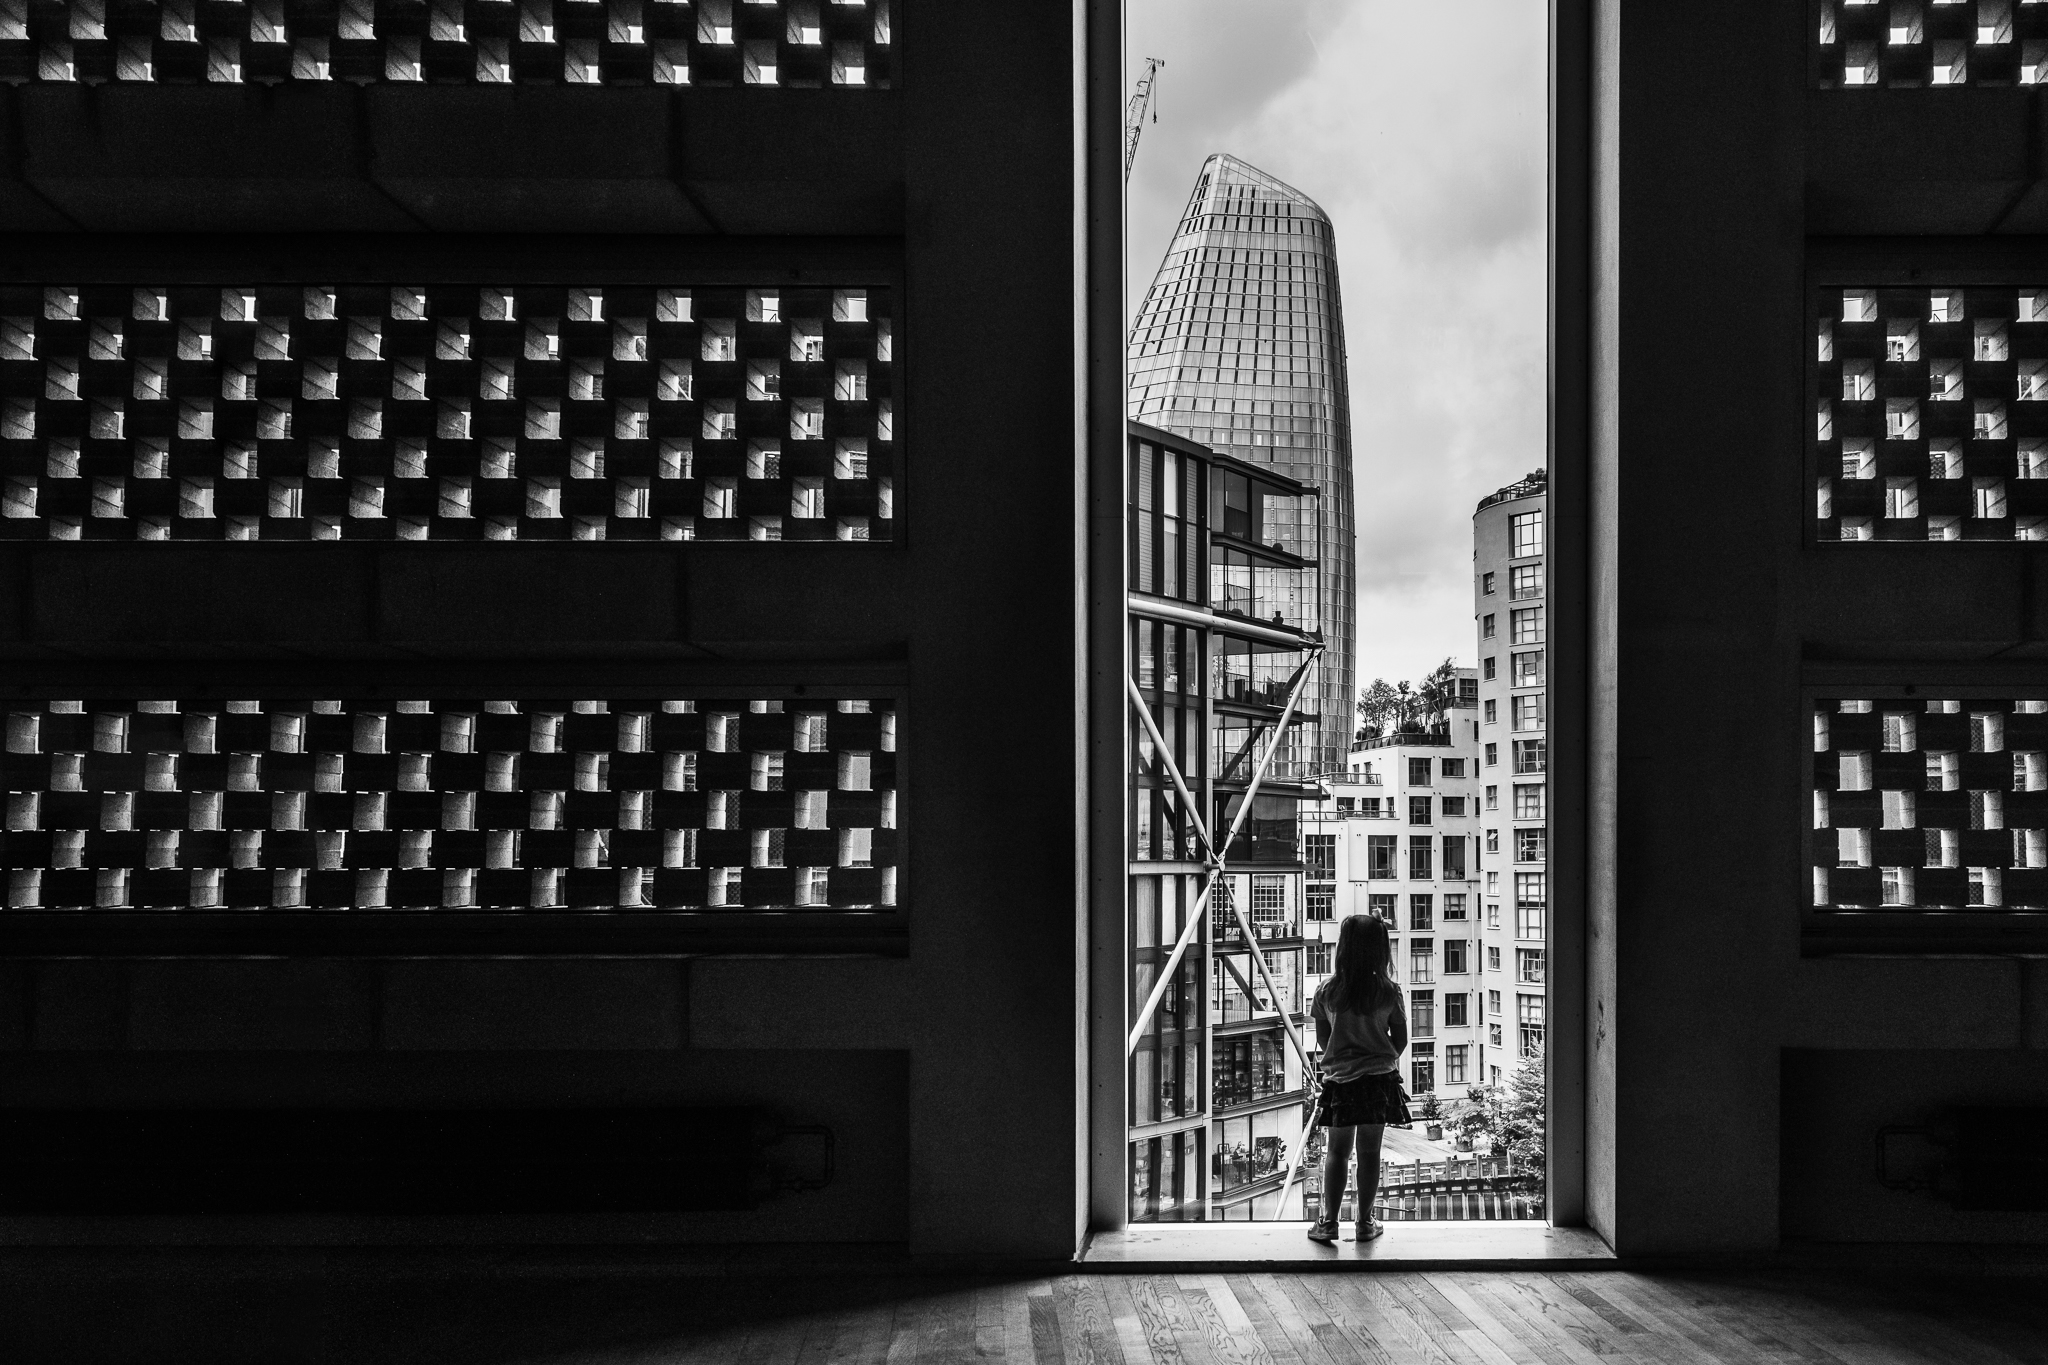
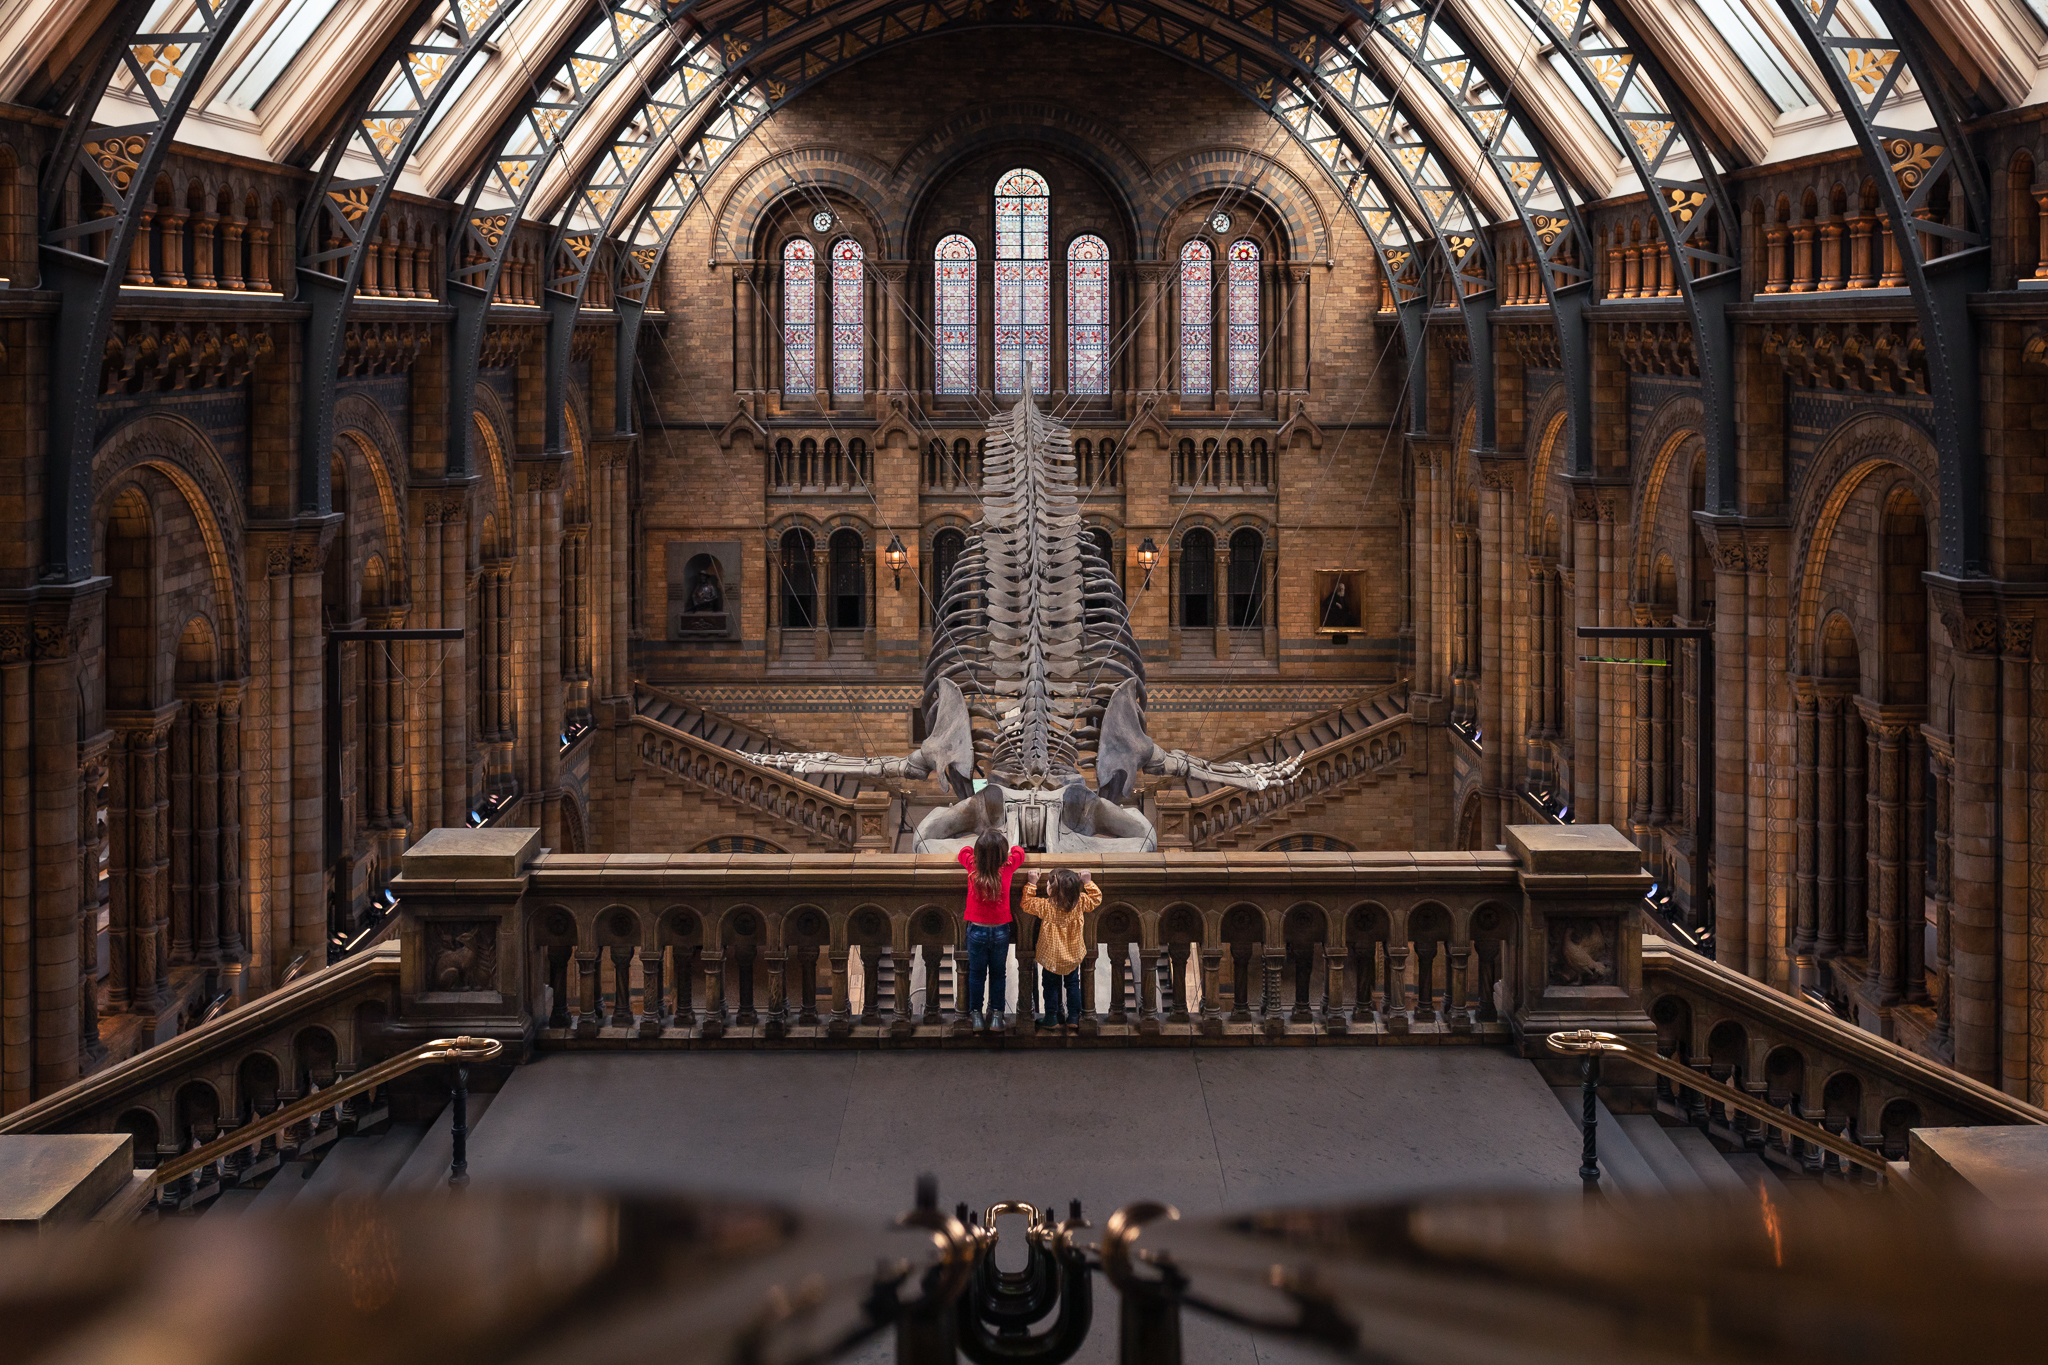
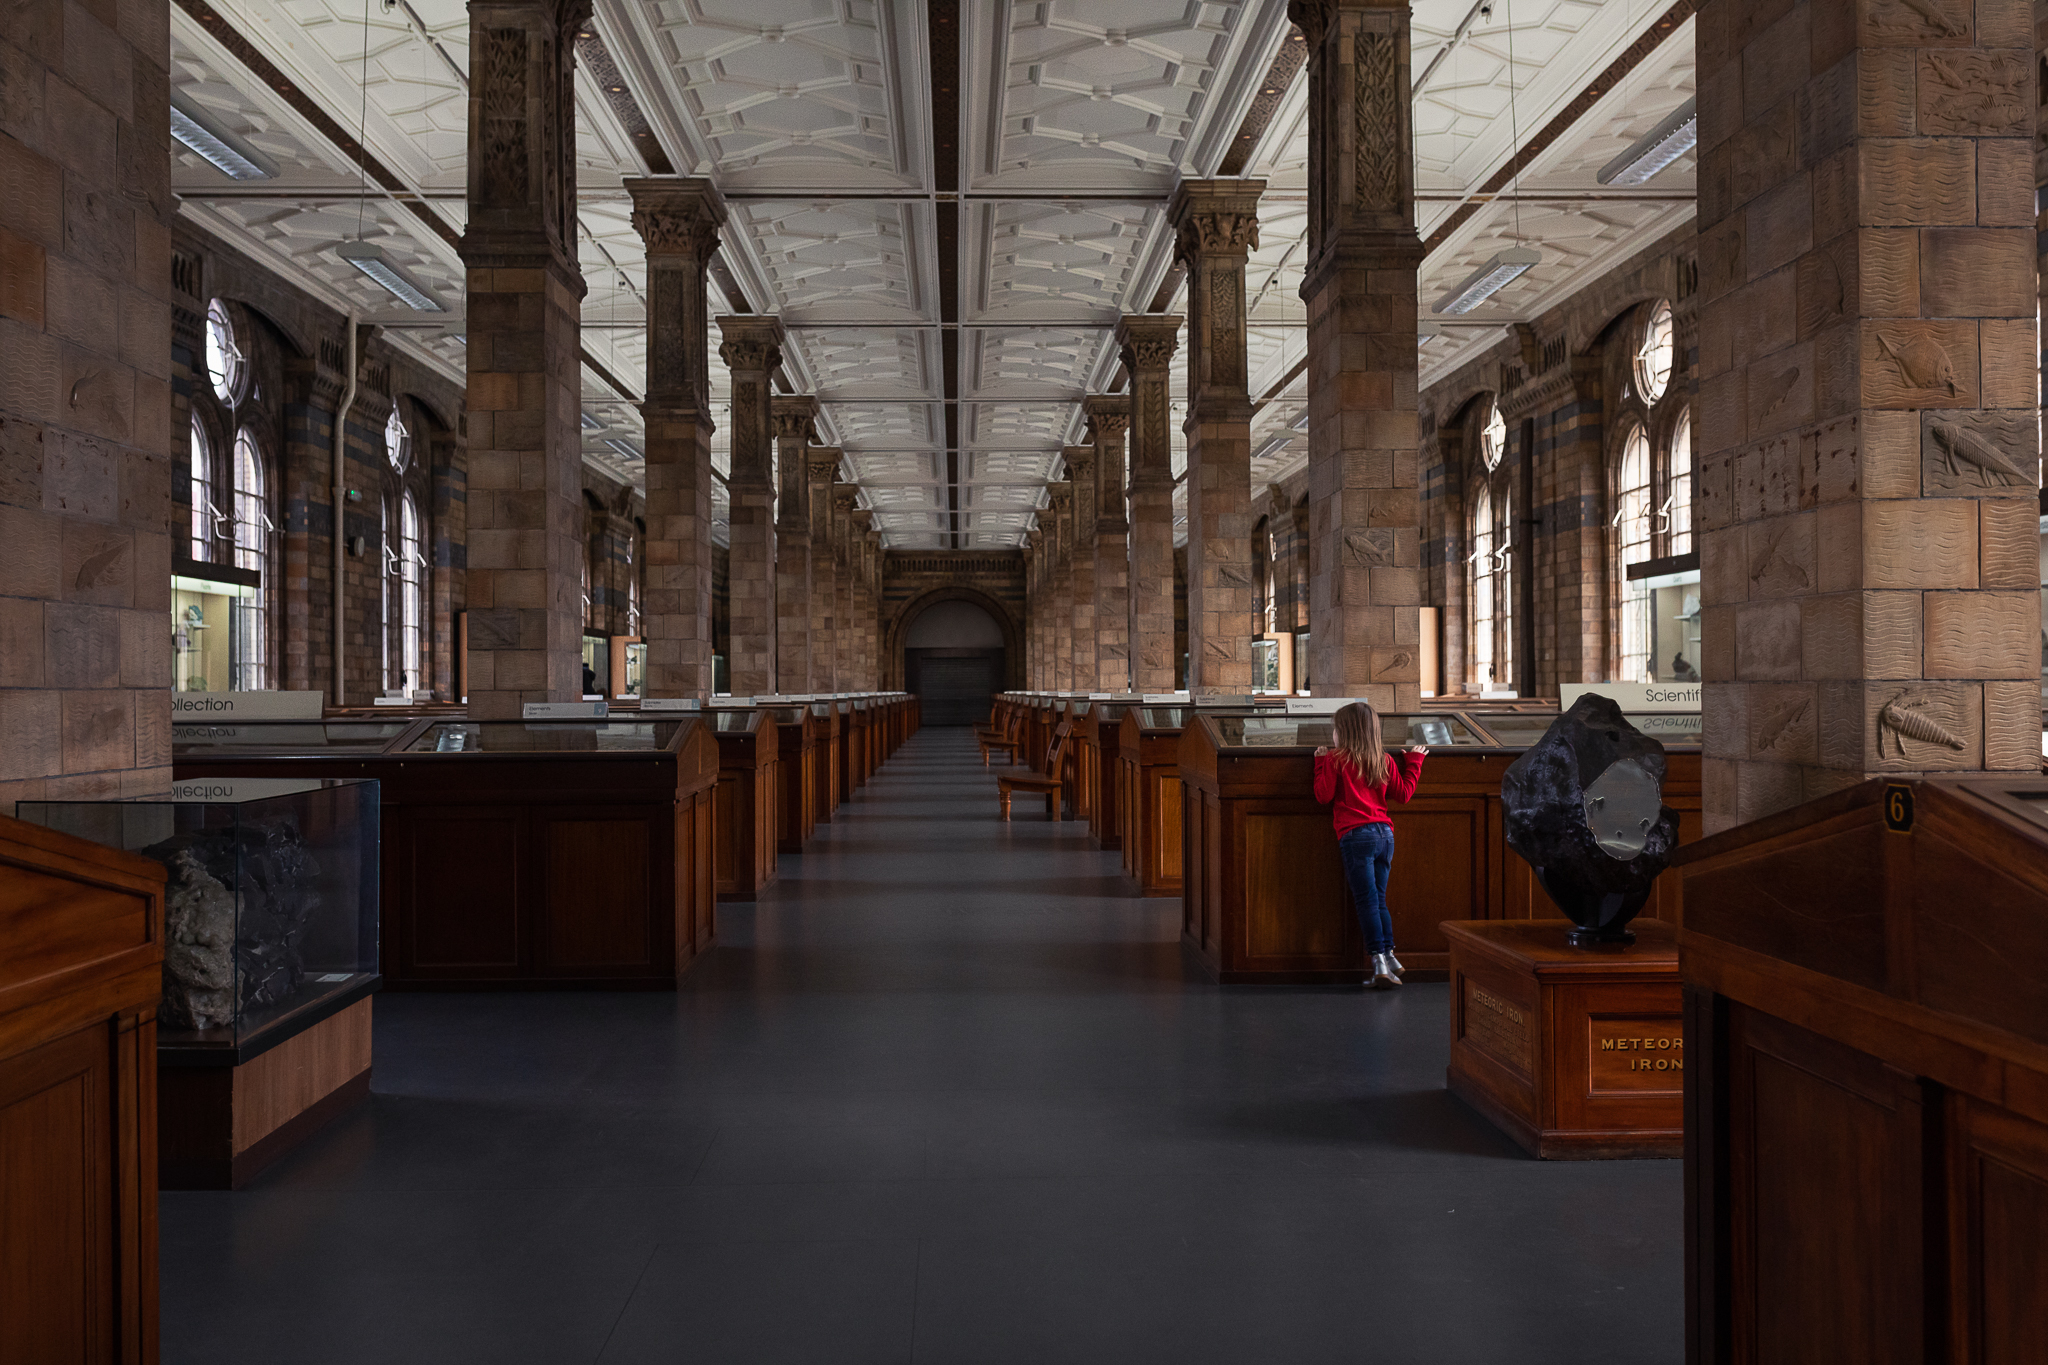
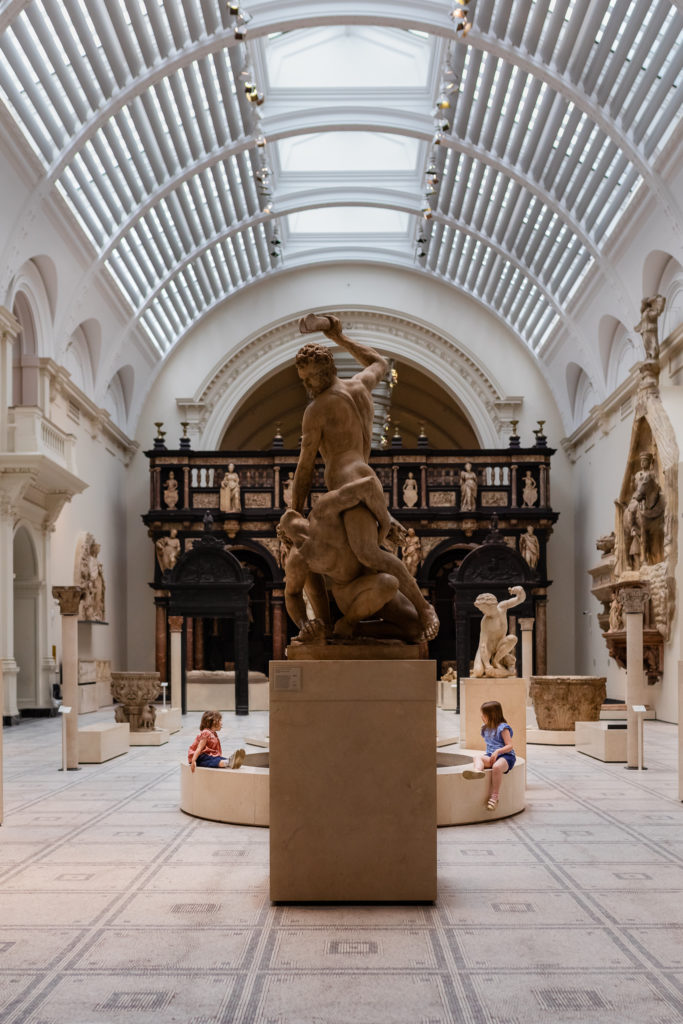
Scale is a great element to capture in large museum spaces. It can be used to show your small children exploring the big world, often in a grand space. I love to capture my children’s sense of wonder and using scale helps to illustrate this. The building itself is also often worth capturing. Look out for repetition, patterns and any other visual elements that catch your eye.
Another theme that I love to photograph is my children discovering the world around them. Keep a lookout for any moments of engagement. Whether its giggling at a silly display or looking on in awe of a real dinosaur skeleton; keep clicking away.
Learn about creating visually appealing images that speak to your viewers in The Photo Narrative!

Post processing
When it comes to editing museum photographs, getting the correct white balance can be very tricky. If the light that you captured is dramatic with a range of tones from highlights to shadows then it might be a good candidate for conversion to black and white.
Alternatively, if you want to keep the colours then I suggest using the skin tone of your subject to set the white balance. I correct my white balance in Lightroom using the white balance selector (dropper) tool to obtain values for the red, green and blue channels. To do this, I hover over a midtone of the subject’s skin with the dropper and I make sure that I have about a 10 to 15-point spread between my red and blue channels with the green channel being an average of the two. If this is not what you have for your values, then you need adjust the temperature and tint sliders accordingly.
It helps to shoot in RAW so that you have maximum flexibility over the editing process. These numbers are for my fair skinned family. Darker skin will have a lower red channel number and a greater spread between the channels (up to 20 points) but the green will still be in the middle of the red and blue channels.
After setting the white balance in Lightroom, I next take the image into Photoshop to remove unwanted colour casts or fix any serious errors in white balance using a hue / saturation adjustment layer. I also use this program to remove any distractions using content aware fill for large areas or the spot healing brush if the area is small. Another helpful thing to do is to highlight your subject using a radial filter in Lightroom, inverting it, set the feather to 90-100 and increase the exposure as needed.
I hope that I’ve inspired you to capture some fun days out at the museum. Enjoy these tips on how to find the light at the museum and make the most of the day!

Your article is great, but your pictures are absolutely beautiful. That museum looks very interesting too, too bad it is so far away!! Keep taking pictures!!!