


Abi Coop
Melissa Richard
Kristen Ryan
Window Light for Moms at Home | By Crystal Sefcovic
Hello there, I’m Crystal. I started my photography journey by taking tons of photos of my kids. Everyday, like all day. But I felt like my house was too dark and I had to be outside to get those fun shots. Now I know that is so not true and we should be giving our home more credit! That’s why I want to share you how I learned to use indoor light to take my family photos to the next level.

Quarantine life has left everyone finding creative ways of keeping up with old life. We can’t leave our house to find those pretty parks and snap photos of our littles. Instead, we are spending our days at home and inside where it is harder to take a perfect picture. And you should still be taking those pictures! Children are learning to walk, hair is growing longer, and beautiful eyes are getting brighter. I truly believe we should be continuing to capture these moments. Even at home. Even without your photographer.
The world has slowed down, but our lives are still going.
We were not prepared to have our beloved photographers taken away from us. They are not in our birthing rooms, they are not in our homes and we are not in their studios. Just beyond the screen, they are still here, and in my case, eager to help. Clients have contacted me the past few weeks to ask how I can help with their photos. One client had her baby when the hospitals first started limiting visitors (i.e. no Fresh 48 session) and now with stay-at-home orders, she sits at home watching her baby grow by the day…without newborn photos to look back on. All of this is understandable. The current world is a scary place, and we need to stay home. That’s why I’ve taken the time lately to help parents and even photographers learn how to find and use that natural light at home.

Geared towards mothers that want to improve their photography skills at home, I’ll talk about 3 types of lighting I use when capturing my kiddos inside. The goal is to show that you can create images to be proud of, and say they got through Quarantine 2020 well documented.
WINDOW LIGHT VERSUS ROOM LIGHTING?
Every time I grab my camera to take a photo of the kids I always take the minute to turn every single light off in the house. Even the TV. Our Amazon Alexa is hooked up with the lighting system so I just yell “ALEXA, turn off the main floor lights”, and the room goes dark. Instantly, all the warm yellow color (tones) from the indoor lighting are gone! You want this! Open up those window curtains and let the natural light of the day flood the room. Taking the time play with lighting will really help make the image more appealing to the eye.

Lamps, room lights, and TV lighting will turn your images yellow and add unnatural colors to skin tones and the overall image. If you are shooting with an iPhone and not a DSLR, it will be hard to correct this in a photo editing app. That is why it is better to fix your lighting before you take your photo.
Natural window light leaves the skin with a natural creamy and illuminated look. This is something you want to have!
BEST TIME OF DAY.
Lamps, room lights, and TV lighting will turn your images yellow and add unnatural colors to skin tones and the overall image. If you are shooting with an iPhone and not a DSLR, it will be hard to correct this in a photo editing app. That is why it is better to fix your lighting before you take your photo.
Natural window light leaves the skin with a natural creamy and illuminated look. This is something you want to have!

SIDE LIGHT
Side light is when you limit the direction of light to one side of your subject. Draw a line down the middle of your face, all the way down to your feet. One side of the line will have more light and brightness, and the other will have more shadow and darkness. This is side lighting. It can add a creative and dramatic look. This is my favorite lighting to use! I use this lighting for self-portraits and sitting portraits for my family or subjects.
FRONT LIGHT
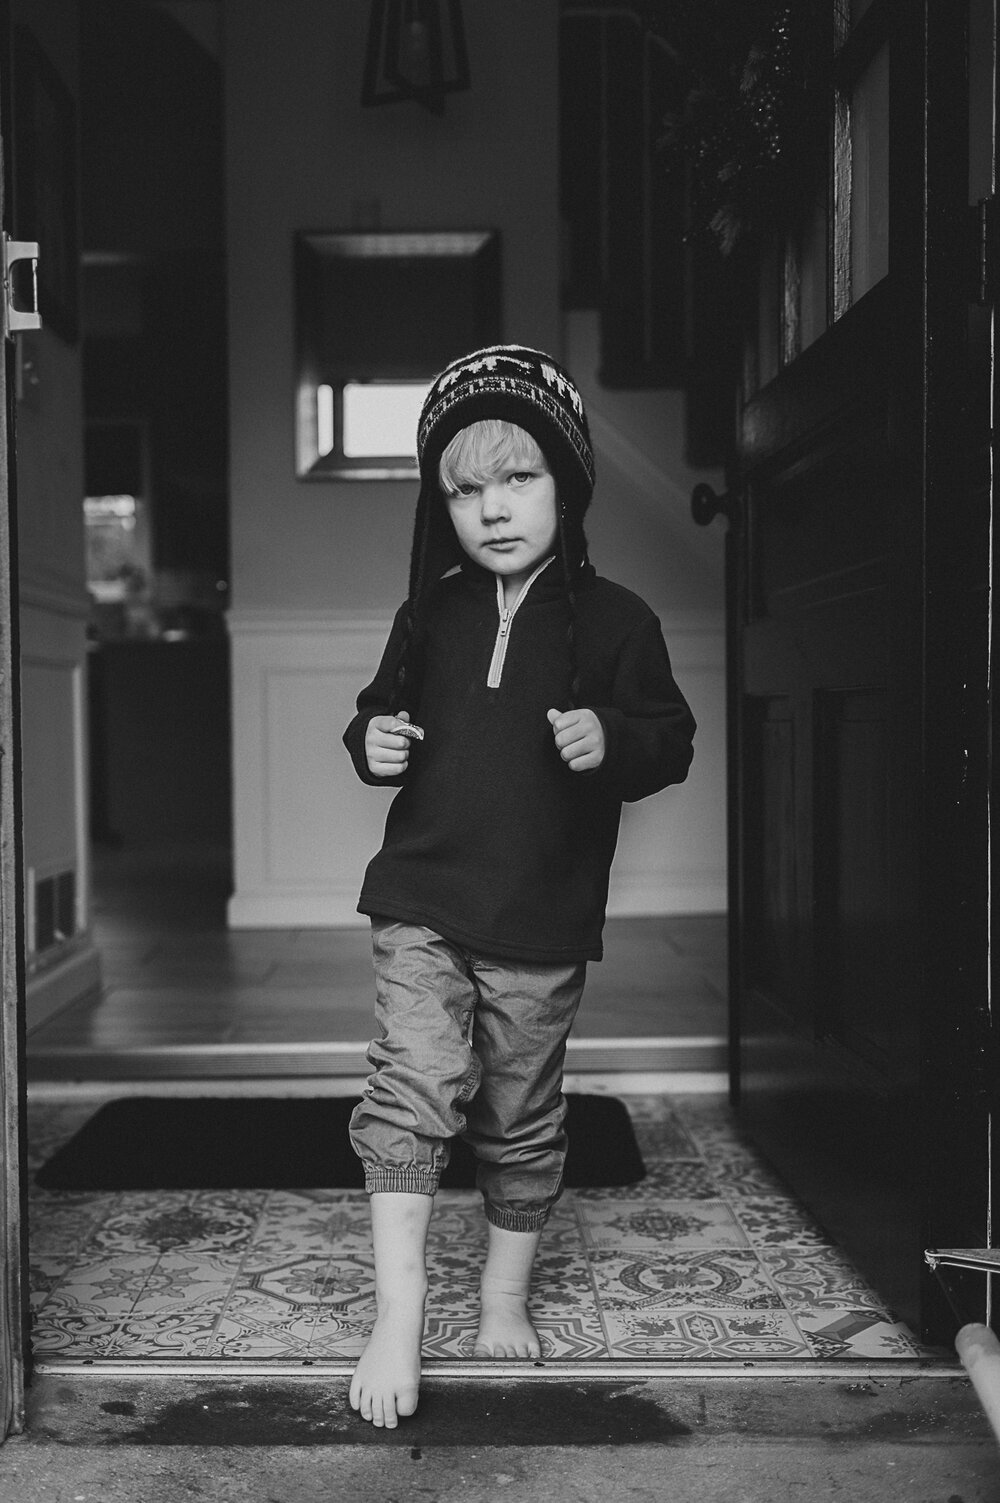
Front light is what is considered more “friendly” light. It will give your subjects skin a creamy and soft look throughout. All you do is face the light full on. That’s right, just turn your subject to face the window. Sit between your subject and the window, leaving the window behind you. Every bit of light will hit the front part of your subject, minimizing shadows throughout. I love this light for Instagram stories, FaceTime, or with my kids.
BACK LIGHT
Then there’s … back lighting. Hah! Can you tell it’s not my favorite. Well, I do love it for outdoor during sunset, but not so much indoors. This type of lighting is when the light is coming from behind your subject illuminating their back. Back lighting tends to wash out details in the face and make an image a bit hazy. Yet, you can get some creative silhouette images here.
BUT MY HOUSE IS TOO DARK

Most people think the lighting in their house is not great. We are accustomed to artificial lighting illuminating every part of a room. When you turn those light sources off so much darkness appears. Don’t be afraid of the dark! The light is there. If you have a window you have light! Photographers use different levels of light to get some pretty creative shots. You can do this too. Play around at home and see what you come up with! Trial and error is part of every photographers process.
TRY THIS AT HOME

Here is your homework. Turn off every ceiling light, desk lamp, and tv. Open up the curtains and shades in all your rooms. Study the light and the way it moves around your house. Find that soft indirect light coming in. The window can be big or small, multiple or one, it doesn’t matter (this is where creativity comes), and sit your subject close to it. Take a picture using the different directions of light mentioned above. If it’s too bright, move your subject further from the window until you get lighting you like.
In the end, images taken of your children should be taken the way YOU like them to look. Don’t let this quarantine stop you from feeling like you can’t get quality photos at home. The light is there!