Abi Coop
Melissa Richard
Kristen Ryan
HSL Adjustment Layer in 5 Easy Steps | by Allison Corinne Davis
May 4, 2021
HSL Adjustment Layer in 5 Easy Steps
An HSL (Hue, Saturation, Luminance) adjustment in Photoshop is arguably one of the most useful tools in portrait photography. You can use it for everything from color correcting minor accessories like earrings or belts, to completely changing the color of a dress or sweater. Most frequently, I find myself using it to remove redness from little pink noses during outdoor cold-weather sessions. For the following tutorial, you’ll only need to be familiar with how to use the paintbrush tool and the layers panel, and I’ll walk you through the rest. Here is how to use an HSL Adjustment Layer in 5 Easy Steps.
1. Open your image in Photoshop.
I personally like to make all my Lightroom edits first (color grading, white balance, tones, etc) before I move to Photoshop for what I refer to as “refining” edits such as this.
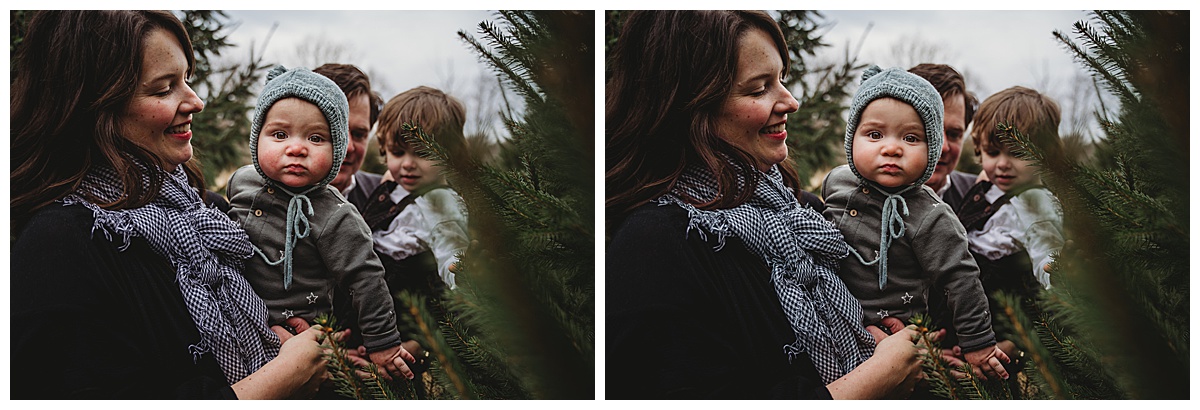
As a reference point, this is the “before and after” for what we’ll be working to accomplish. Note the reduced redness on baby’s cheeks and nose, and the toned down blue of mom’s scarf.
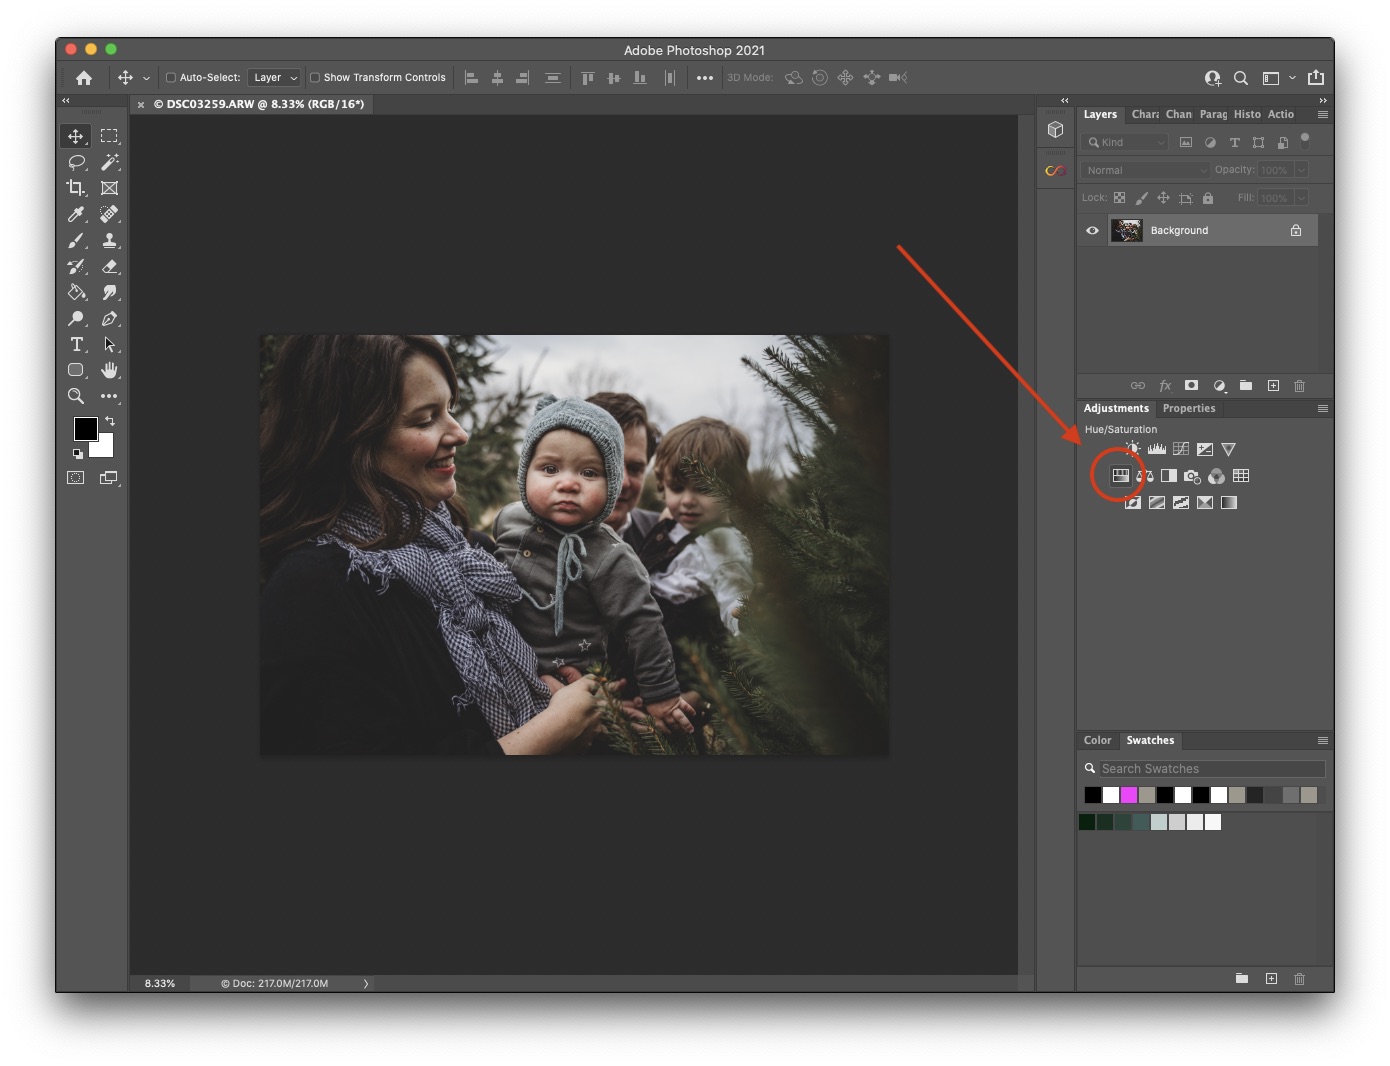
2. Click the Hue/Saturation icon on the Adjustments panel
This will automatically create the adjustment in a new layer, along with a layer mask.
3. Define the mask.
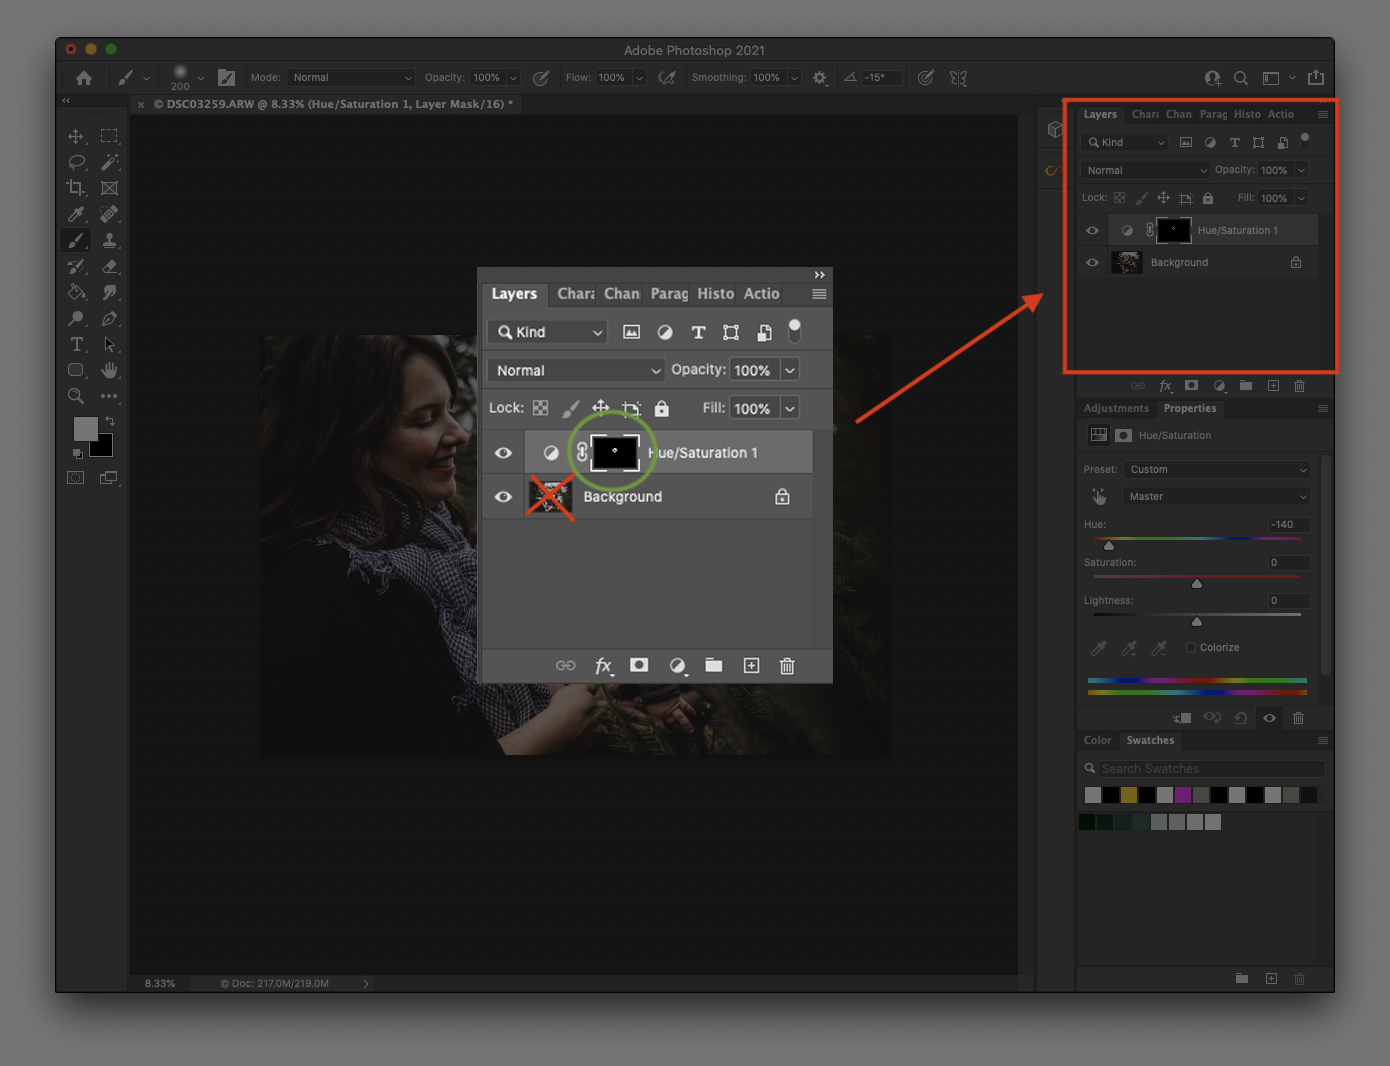
When you create a new adjustment layer, a layer mask is automatically created at the same time. You’ll use that same layer mask to mask out the area you want to adjust. Remember black hides the adjustment, and white reveals it, so for my example, you’ll want a black background, and to paint on it with a white brush. Since the mask automatically loads in “reveal all” (completely white) you’ll want to either invert it (CMD + I on Mac or Ctrl + I Windows) or fill it with the black paint bucket tool. Make sure you’ve selected the correct layer and mask, and then also make sure you’re painting on the mask, not the image.
Here’s a closer look at what you should select in the layers panel. You’ll know the mask is selected when you see the white highlight box around the mask.
4. Start painting white on the areas you want to adjust.
Since you’re painting the mask, not the image, you’ll be doing it blindly — I’m usually ok doing it this way, and then refining after I’ve made the adjustments, but you may find that you prefer to do it with more guidance, in which case you may want to make an “extreme adjustment” so that you can see where you’re painting. Slide the color slider all the way to one end (in this case, showing the painted area in blue) to help you see where your adjustment is being applied.
Depending on the adjustment you’re making you may want to use a softer brush (i.e. for red noses where you want a lot of blending) or a harder brush (i.e. for objects where you want a defined outline.)
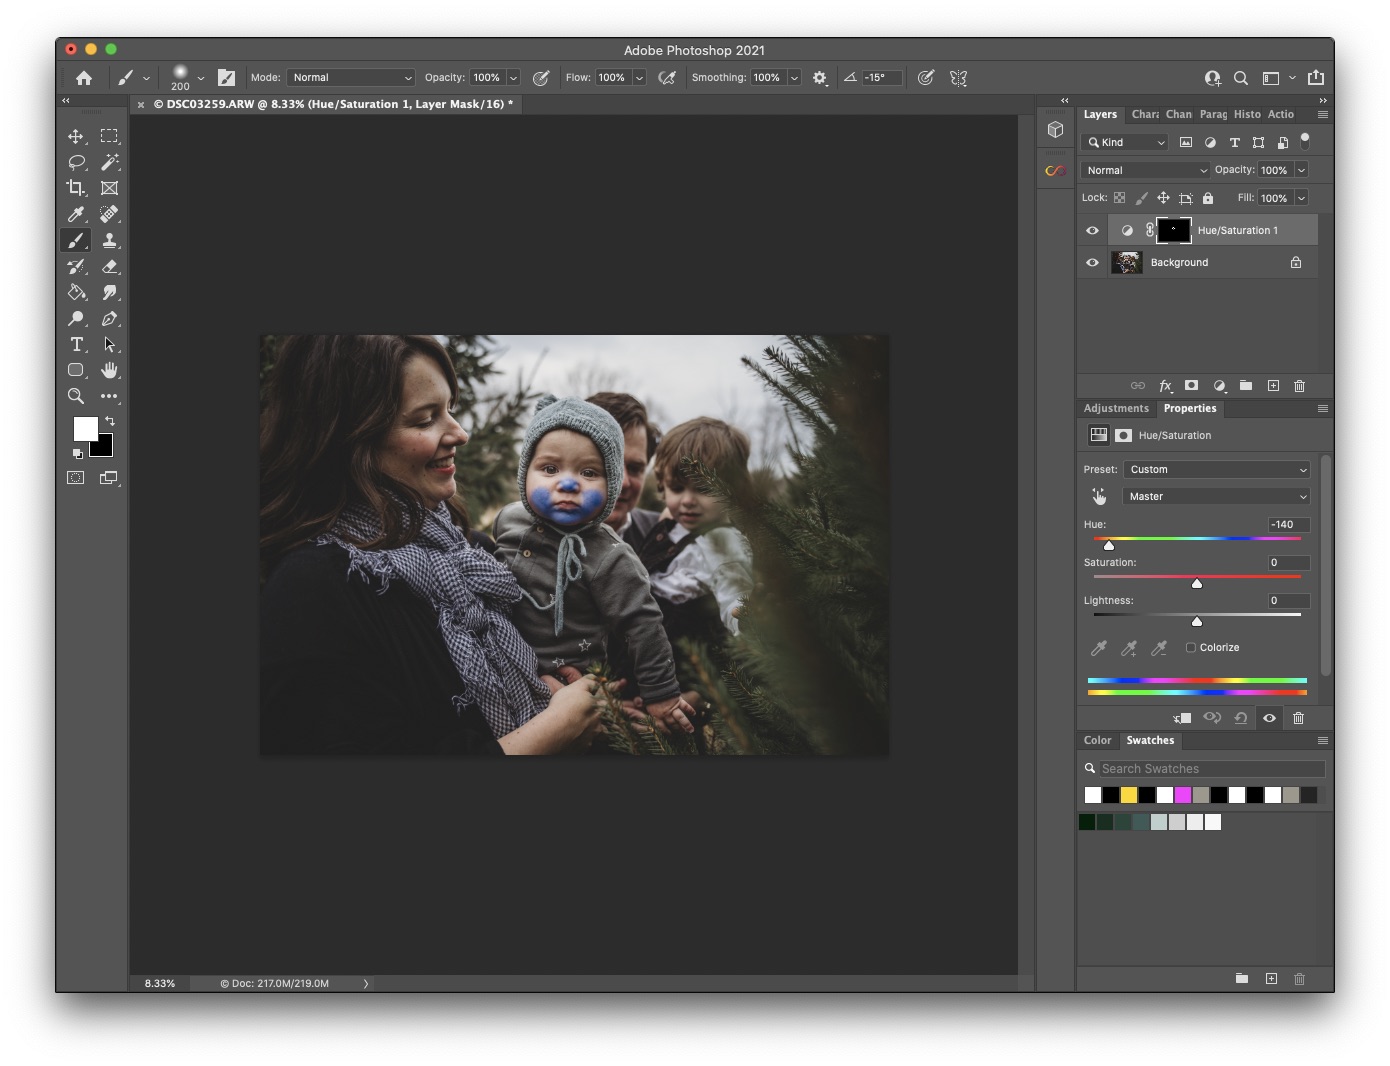
5. Make the adjustment.
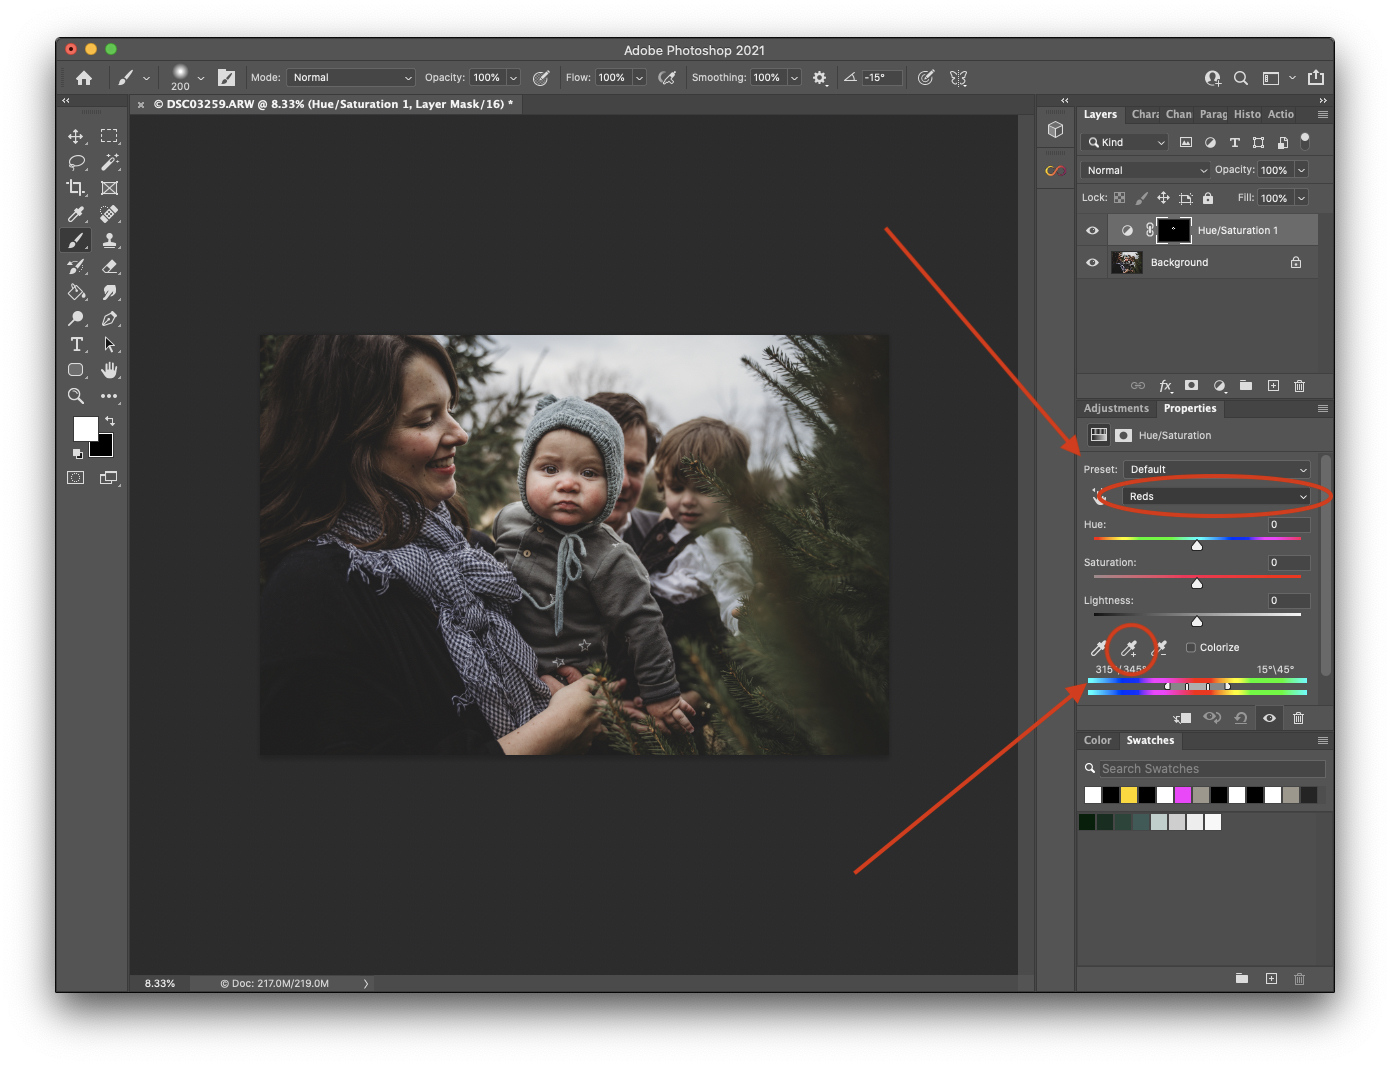
If you’ve used the “extreme adjustment” to help guide your painting, you can toggle the “default preset” option in the panel to reset the adjustment you made.
You’ll then want to select the color you’re aiming to correct, either from the dropdown menu, or with the dropper tool towards the bottom of the panel. To use the dropper tool, simply by click on the area of the image with the color you want to change (i.e. the red nose.)
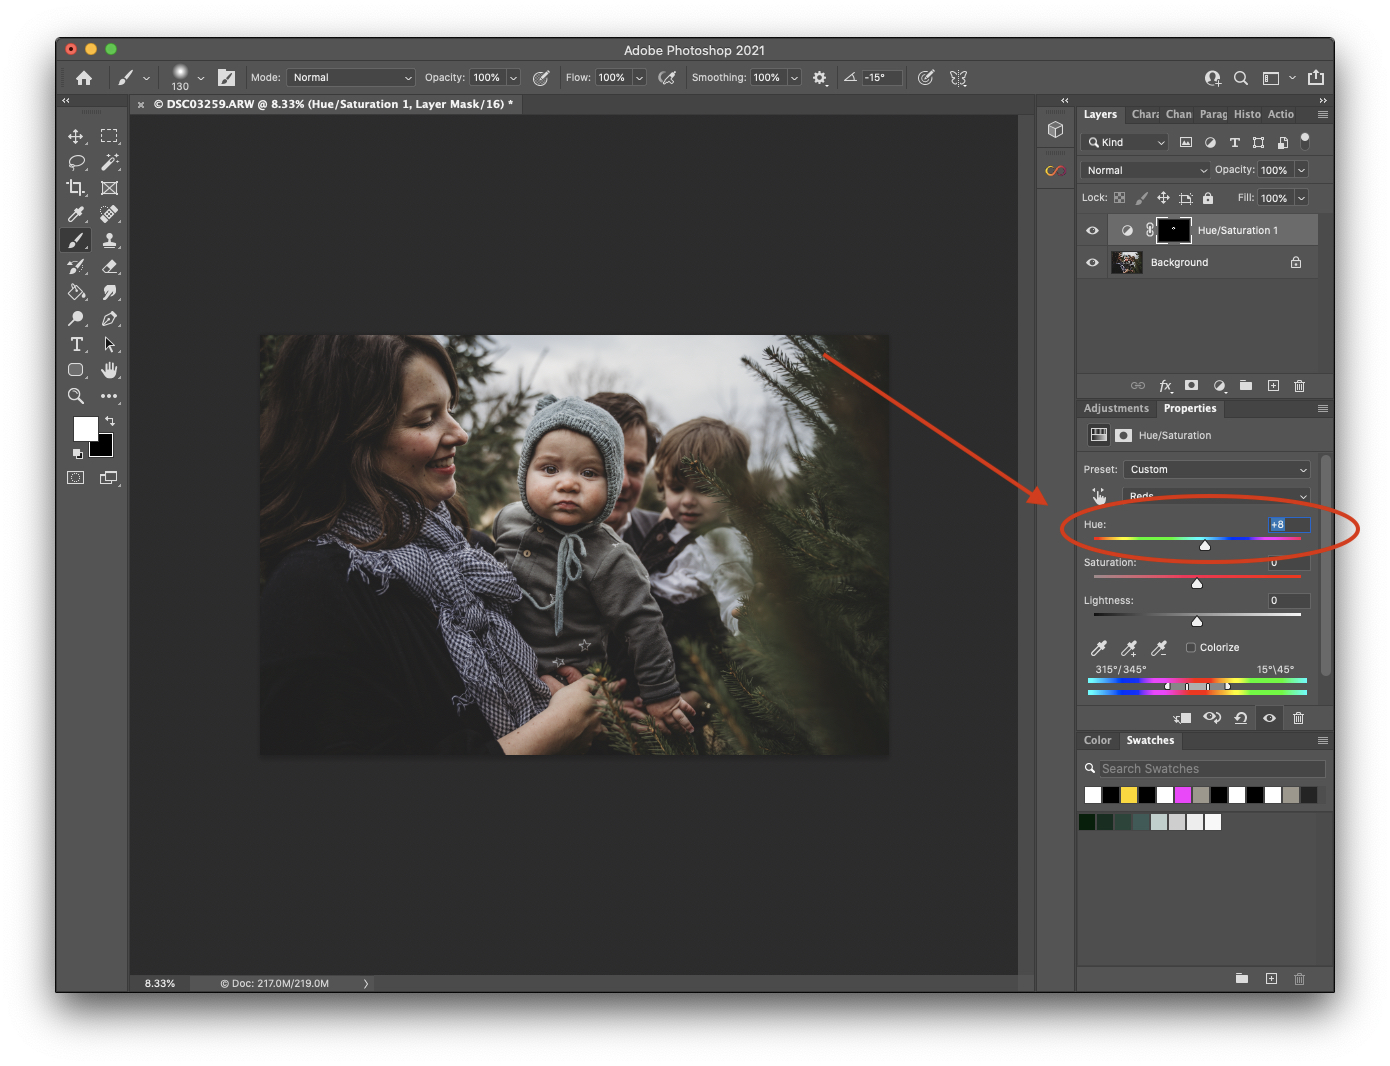
You can correct the red in skin tones by sliding the Hue slider to the right. You can make more controlled adjustments with the numerical value box just above it. For this particular adjustment, I increased the hue +8 to neutralize the reds.
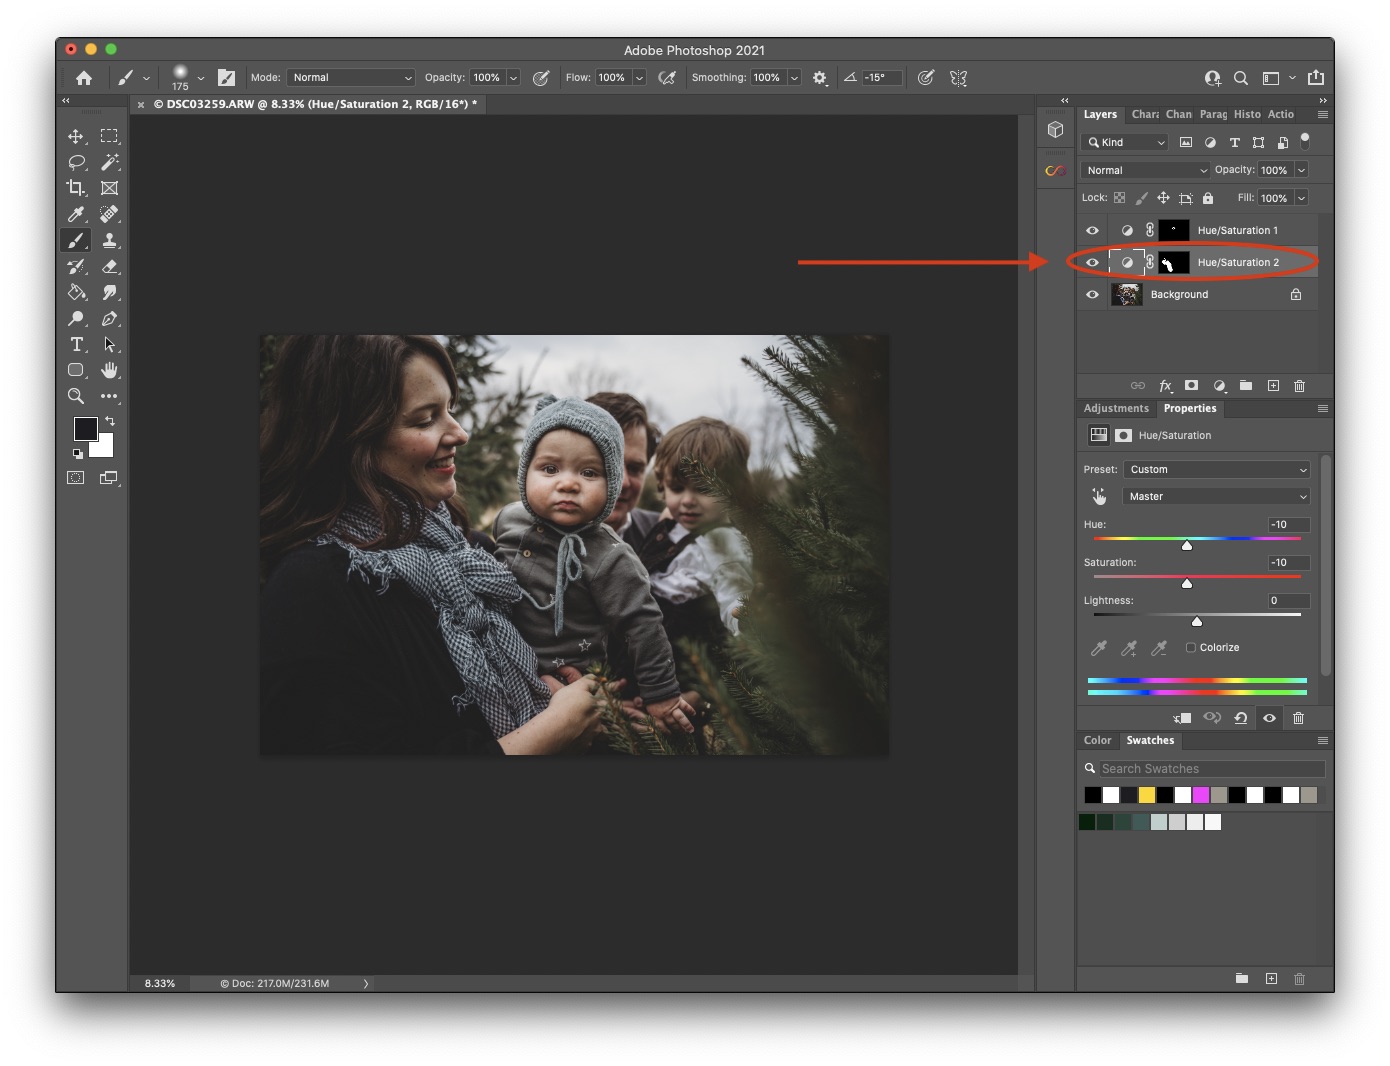
If I wanted to make further adjustments to the image – for example, maybe I want to tone down the blue in mom’s scarf – then I simply create a new adjustment layer and repeat the process. (In my example photo, I’ve exaggerated the adjustment to highlight the change I made to the scarf- in the final image, it was toned back down a bit)
And here again are the before and after photos. I also applied a smidge of skin refinement to baby’s face in the final image to even out some of the texture.

Want to Learn More About Editing? Check Out These Courses!
Fearless Photoshop
Watch Us Edit In Lightroom
A couple bonus tips:
Bonus tip #1:
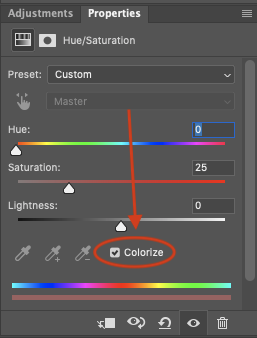
Tick the “Colorize” option if you want to change a black/grey/white item to be in color.
Bonus tip #2:
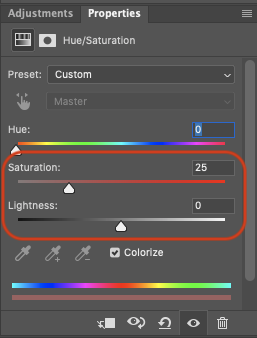
“Saturation” and “Lightness” are particularly useful when changing item/object colors. I rarely use these for skin tones though.
Bonus tip #3:
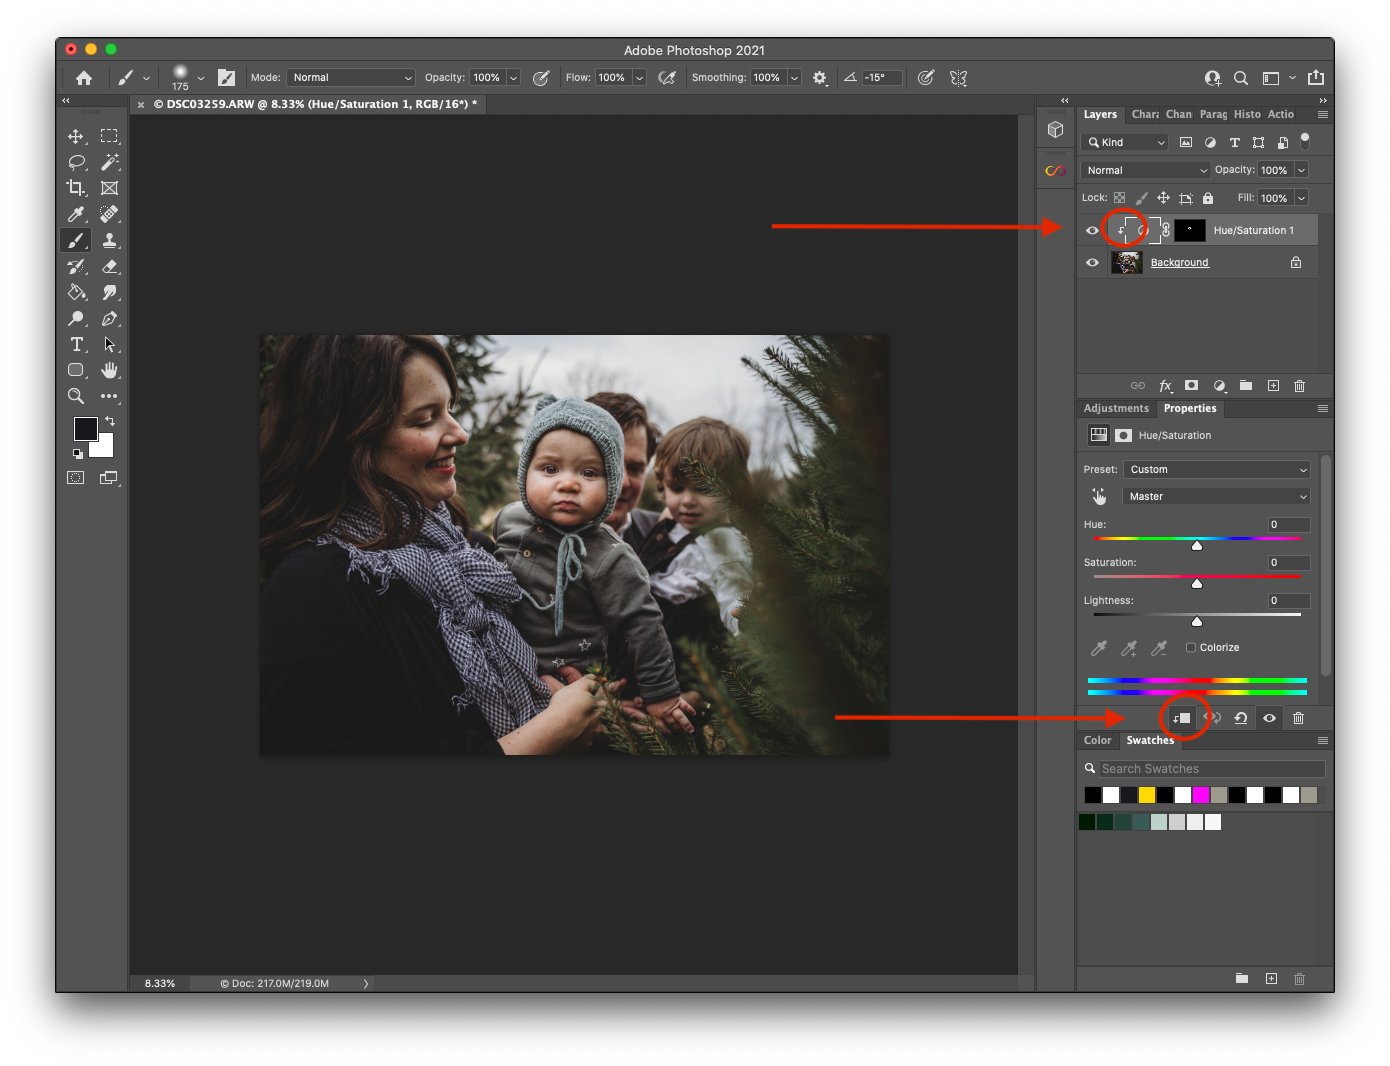
If you have multiple layers but only want to apply the adjustment layer to a single/specific layer, click the layer you want to adjust, create your adjustment layer, and then click the “drill down” icon which applies the adjustment only to the layer directly below it. You’ll see a down arrow appear on the left of your layer panel to know it’s been enabled.
