


Abi Coop
Melissa Richard
Kristen Ryan
Beautiful Photos During Renovation Chaos | by Samantha Deakin
Beautiful Photos During Renovation Chaos
Let’s be honest, most of us don’t live in a perfect show home. We have little people who think that it’s their sole purpose in life to rush through each room like whirlwinds. And they destroy everything in their path. I seem to spend my days off work tidying a room. Then, no sooner have I moved into the next room… the first one looks like a bomb has hit it again! You’ve all been there. I used to think that in order to take beautiful pictures I would need to completely gut the room in question. This just made me miserable. Well let me share a few secrets with you, but don’t tell a soul….promise?? I’m going to share how I take beautiful photos during renovation chaos!

Want to know how I managed to achieve this studio-style image in my gloomy home? Read on to find out more!!
In Summer 2020, my family moved into a ‘new’ home. I use the term loosely, because although it’s new to us, in fact it’s a 17th century farmhouse. My children are the 5th generation of the family to live here. My home looks like it hasn’t had any work done for years! Around the same time we moved, I bought my first DSLR camera. It was a pre-loved Nikon D3200. Prior to this I had never even held a ‘proper camera’! I would pore over all the gorgeous portraits that I would see my peers posting on Facebook and exclaim over their gorgeous kitchens and amazing light and airy bedrooms. I began to wish that I had never moved from my totally renovated, previous home. Luckily, in those early days, there was plenty of opportunity to learn outdoors as the British weather in the Summer was occasionally dry.
Fast forward a few months and the nights were beginning to draw in and the days were too cold for me to drag 4 kids out into the woods everyday. I needed to find a way to take photos in my dark, messy house, with it’s ‘antique’ carpets and wallpaper. People tried to convince me that I should be taking documentary style photos that embraced the chaos. They said that I would look back in years to come with fondness of memories of the babies learning to write their names in the dust. But I really don’t think they grasped the magnitude of works that were required in this house! Every room had these crazy patterned carpets, dingy wallpaper and ugly fireplaces. There was also the question of my partner who insisted on leaving tools and materials and paperwork on every surface and in every room.
The answer to this dilemma was making light and shadows work in my favour! I also had a few other little tricks.
Here are some ways that I managed to get plenty of photos that I love using what I have available:
Change Your Angle
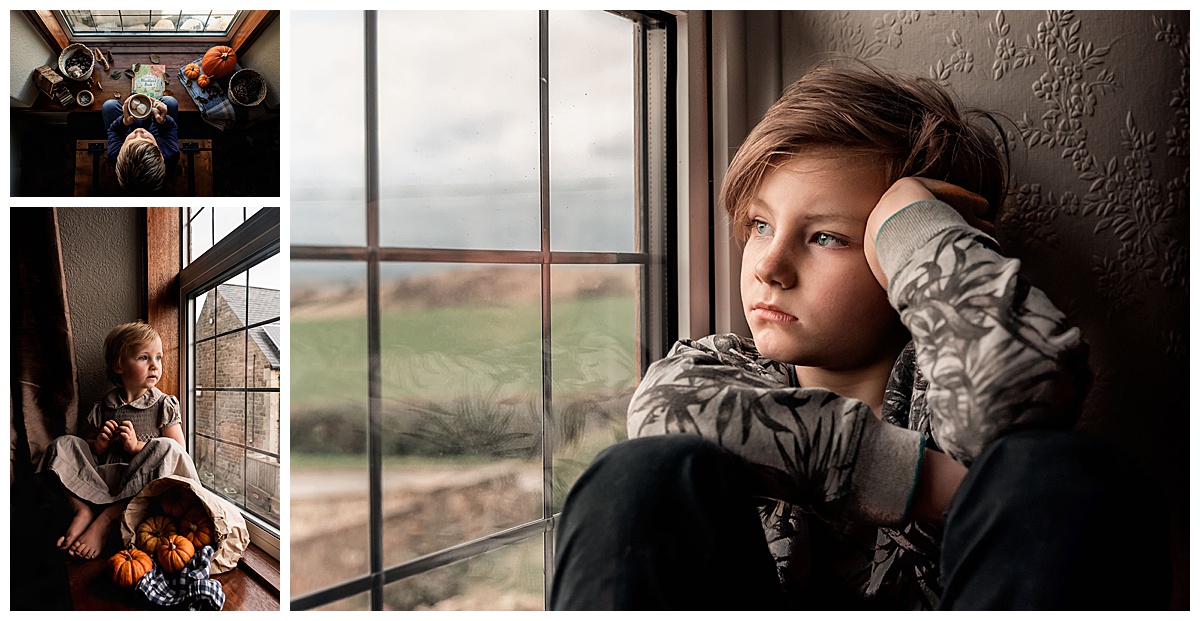
Try shooting from above or below. Or move off to one side so that the clutter may not be as obvious. A little bit of chaos is childlike and can add to the storytelling.
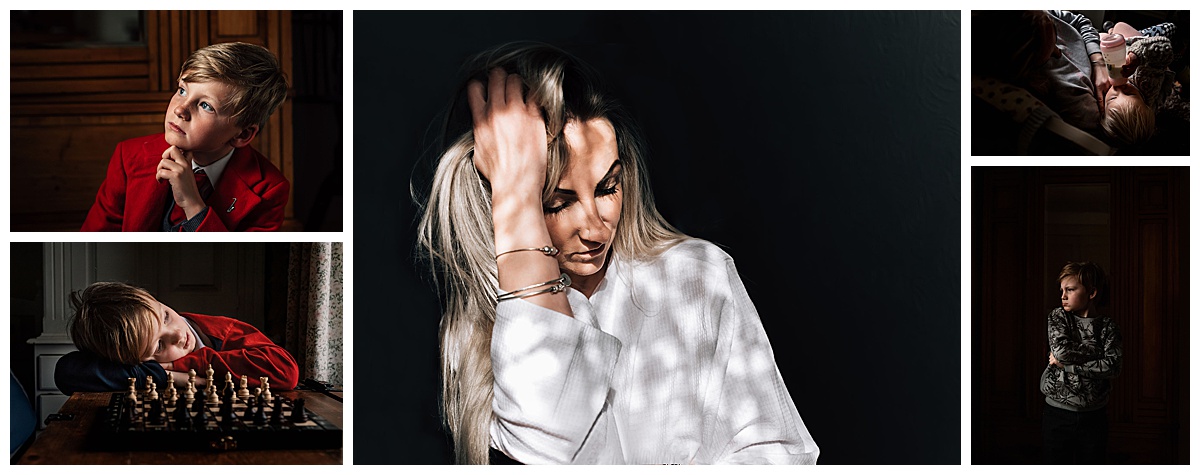
In these examples, I got down really low with my camera almost on the floor and tried shooting from different angles. I used a wide aperture to really show the layers in the frame. The toys in the background and foreground add to the story. In one, if you look closely, you can see a Christmas decoration. This tells us that the sleepy little girl has had so much fun playing with her Christmas gifts from Santa and that she has exhausted herself and has dropped off amongst her toys. The story just would not have been the same without the toys all around her.


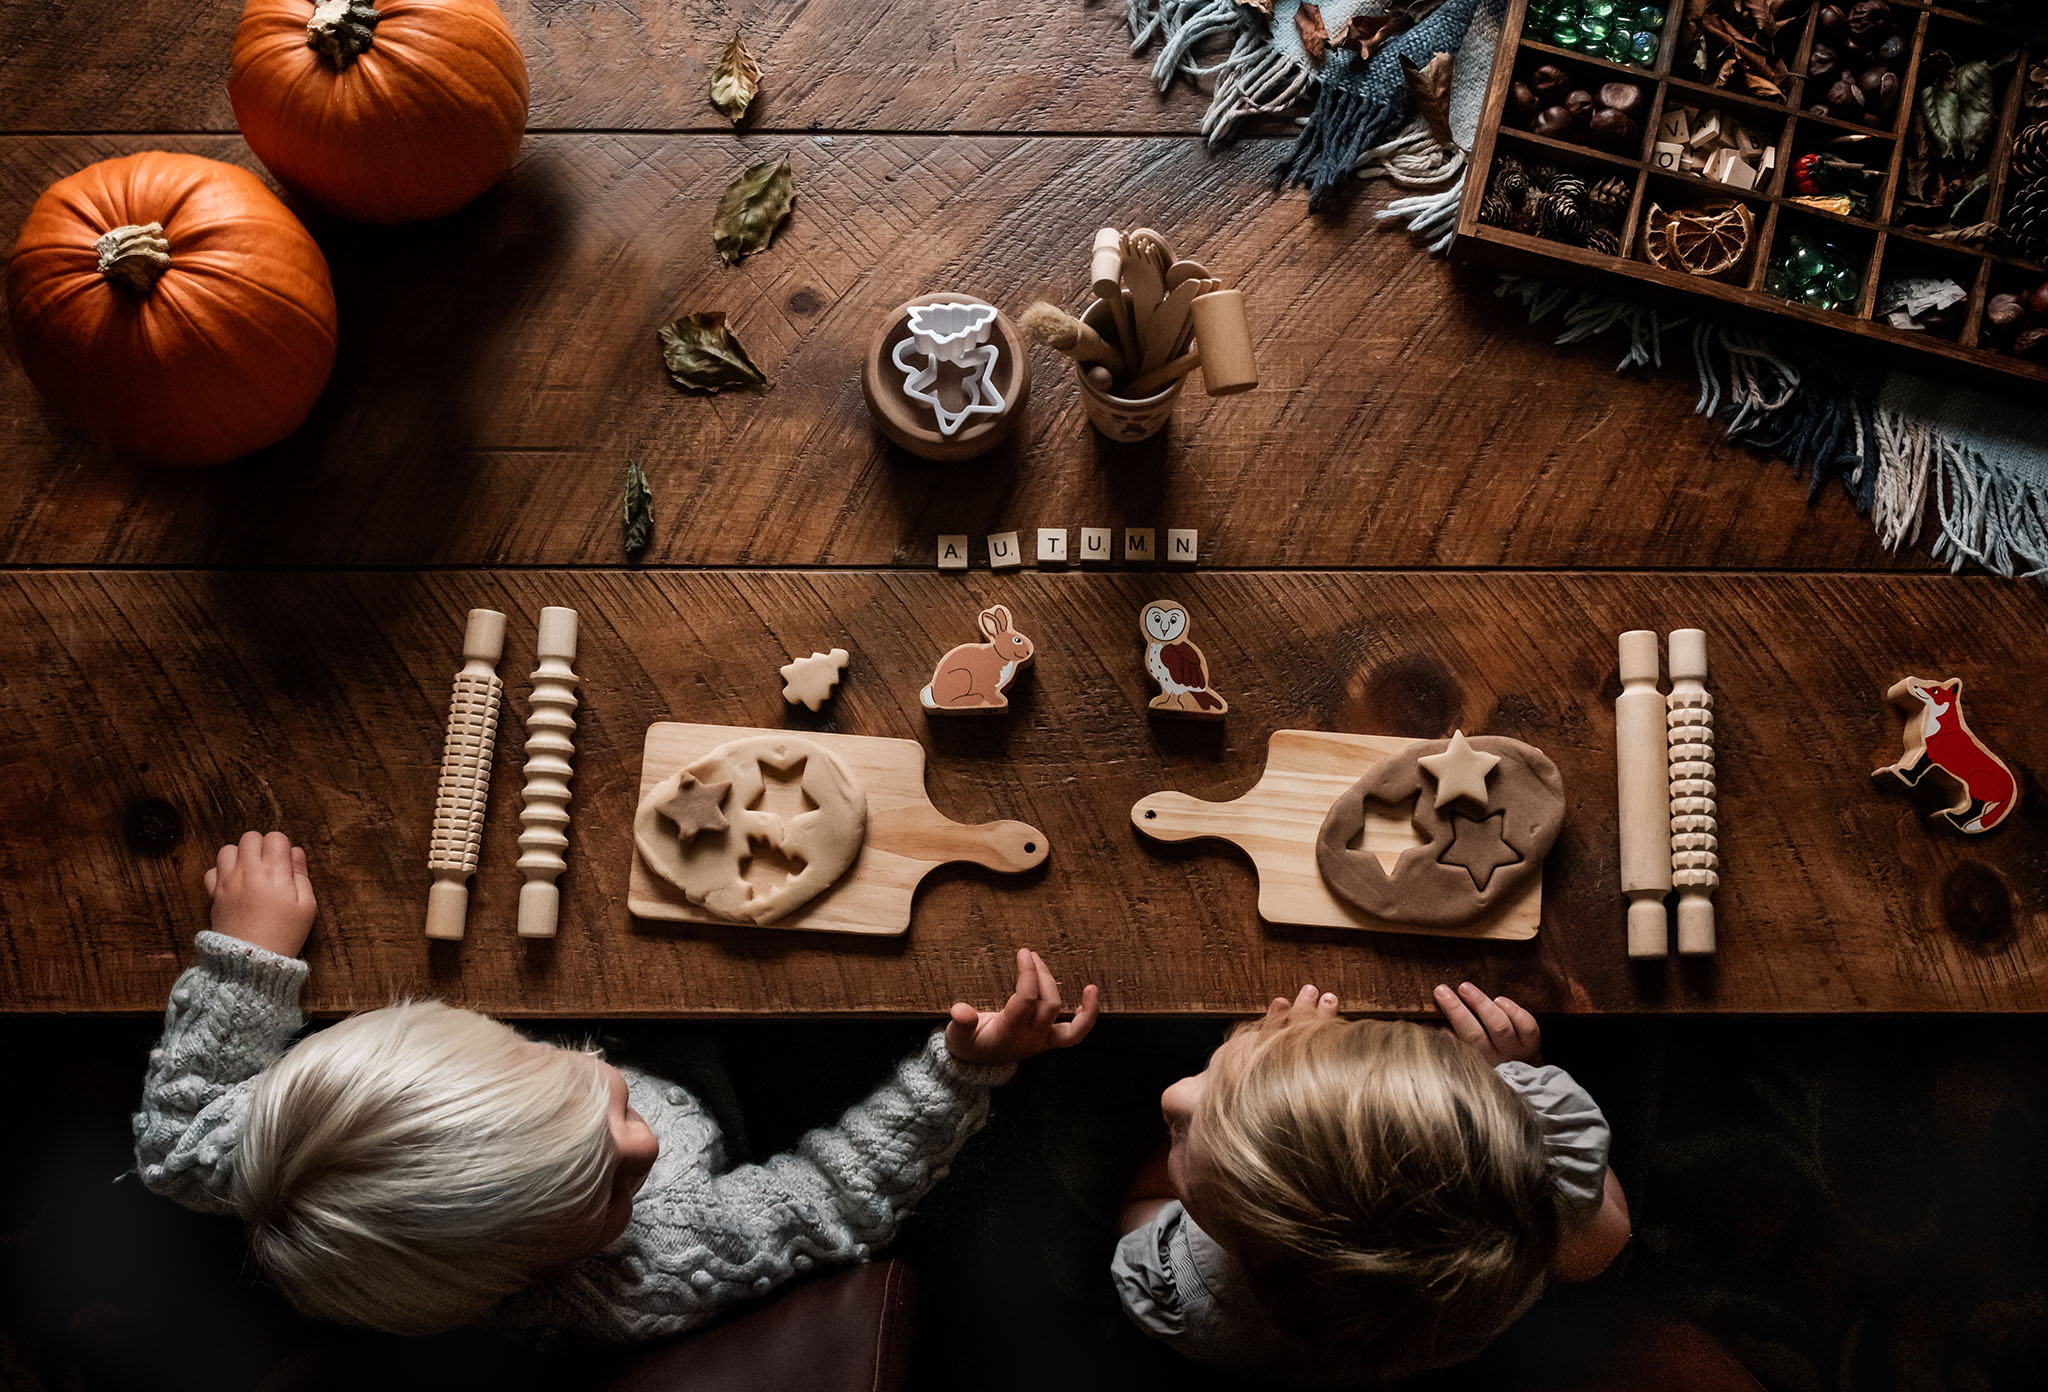
Below, I shot from above the ‘dining room’ table. Health and safety beware as I was standing rather precariously on top of a bar stool behind the kids!!

Zoom in! No… Even Closer!
Focus on all the small detailed things you love about your child. Their mucky little feet when they’ve been playing bare-foot, their messy faces after spaghetti bolognaise, their little hands when they roll the dice or pick up a jigsaw piece. Remember that the closer you are to your subject, the narrower your depth of field will be. Compensate by narrowing the aperture of your lens.
Want to learn more about capturing details? Check out our course, Minutiae!


Make the Theme Work in Your Favour
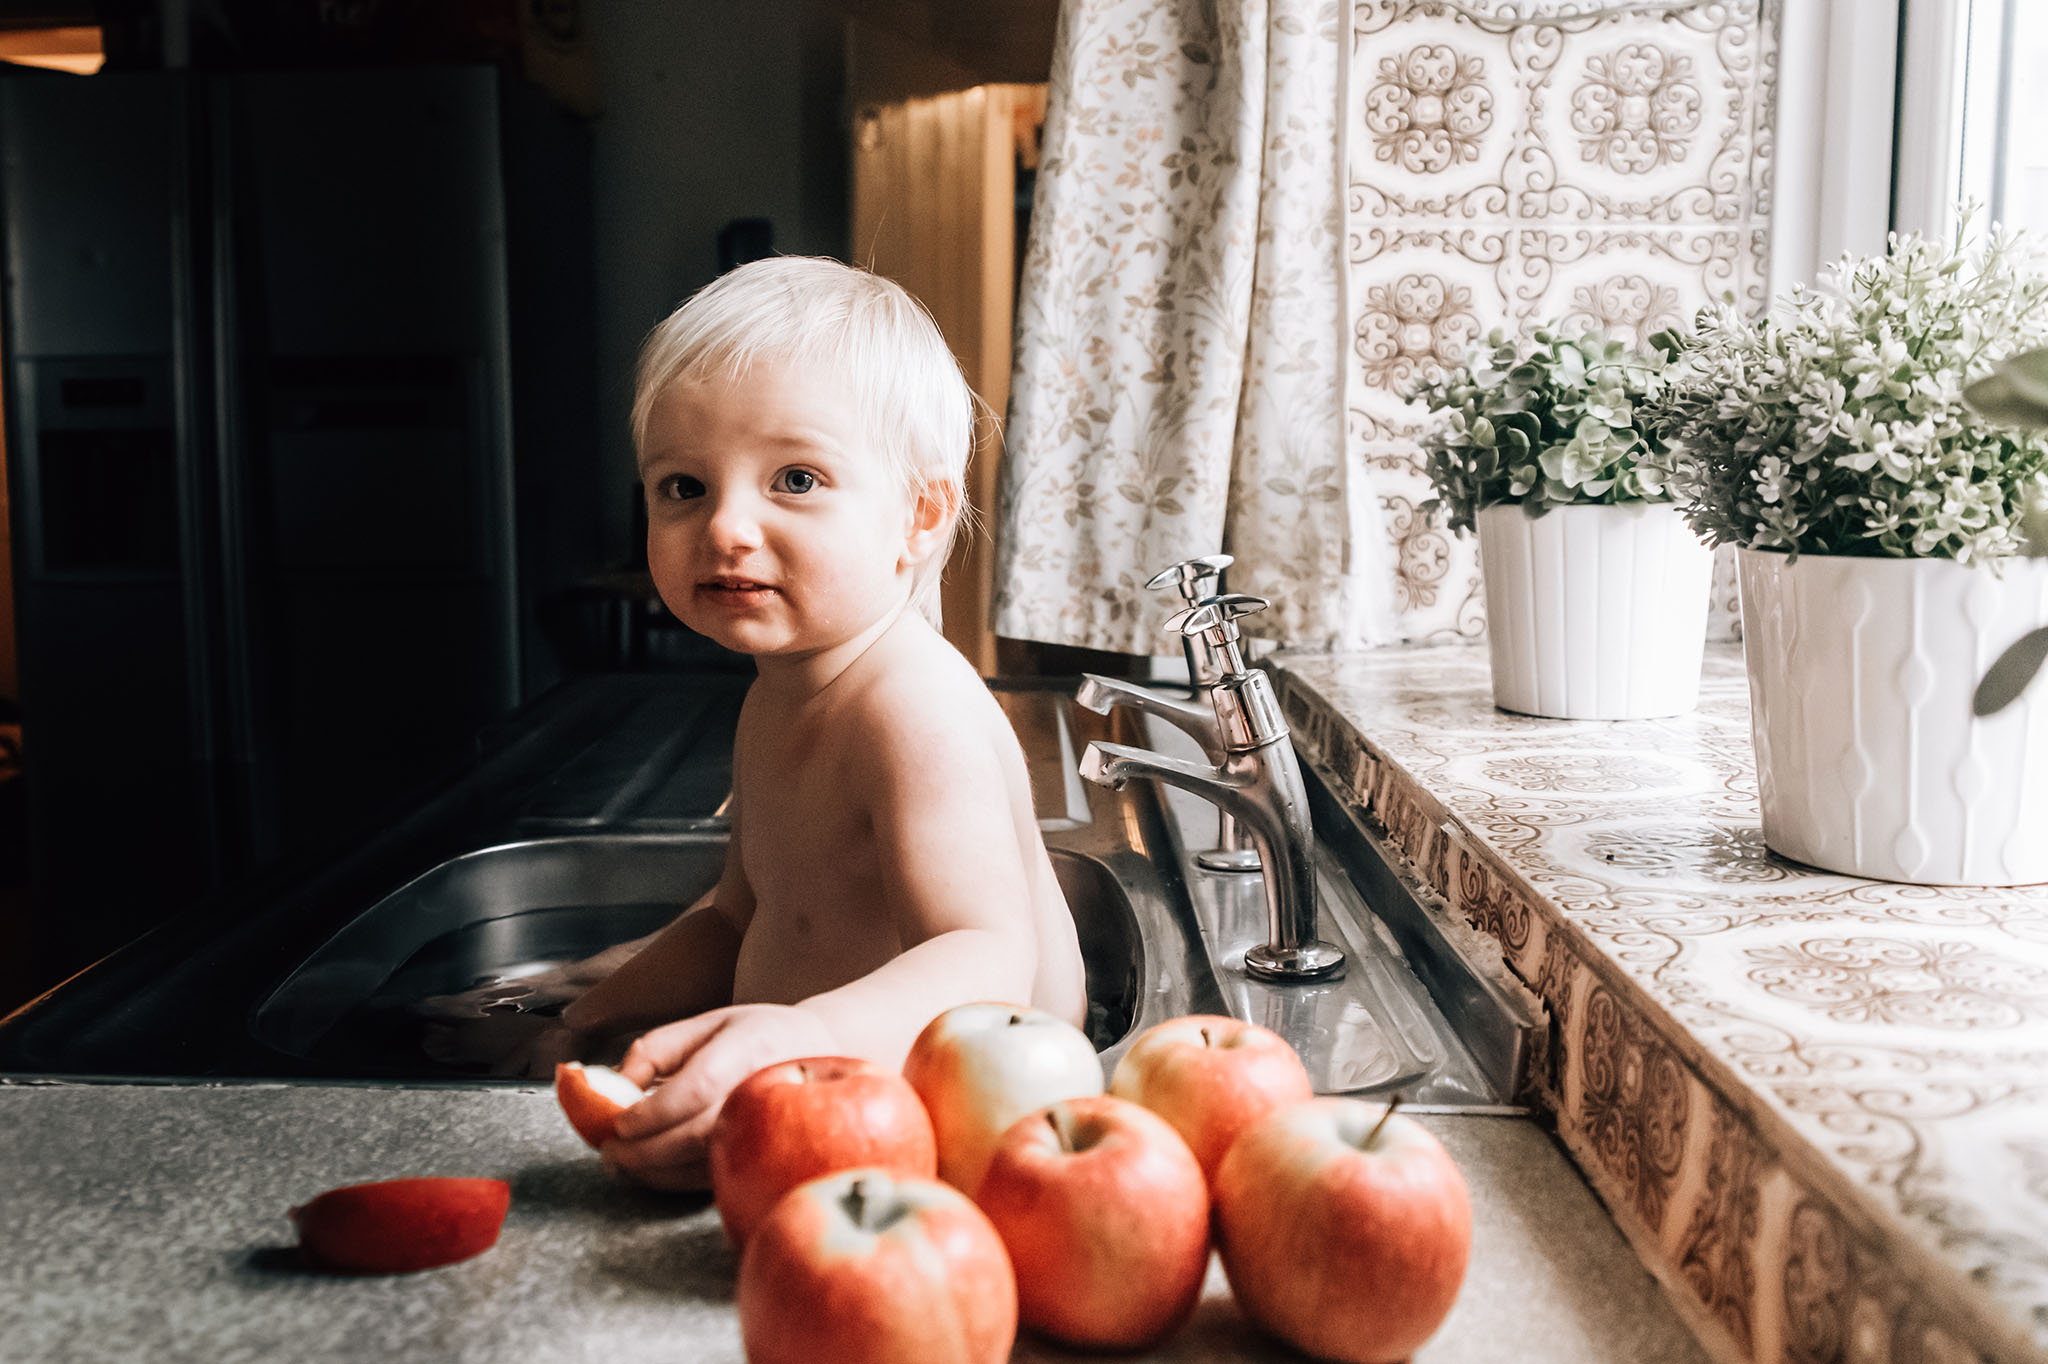
I’m not a massive fan of the vintage tiles (I know some people think they are gorgeous), but in these photos I really think they lend themselves well. I also waited for the time of day that the light would come through this window to make the most out of the settings I needed. I’ve used a vintage-feel preset to help me with a starting point for these images. I also like to darken the background using a graduated filter in light-room. This is something I do A LOT in my editing to draw attention away from the room and onto my gorgeous offspring (Ok, I know, I am biased).
On this occasion I did clear all the paperwork (I could strangle him at times) off the worktop and window sill. You will see I didn’t quite get it far enough away. But time was not on my side as the girls were getting tired. These days, I would get creative in Photoshop and have a go at ‘cloning out’ these areas or using the ‘content aware fill’ functions. But back then, I knew nothing of this wizardry!

Play With Light
Sometimes you can disguise an area by using the window light cleverly. If you expose for the highlights, you will find the shadows just melt away! This can be enhanced further in post processing by dropping the shadows even further or adding manual adjustments using the tools in Lightroom. My favourites are the graduated filter and adjustment brush in Lightroom or the levels layers in Photoshop to achieve this effect.
Become a Master of Light with Natural Light for Storytellers!
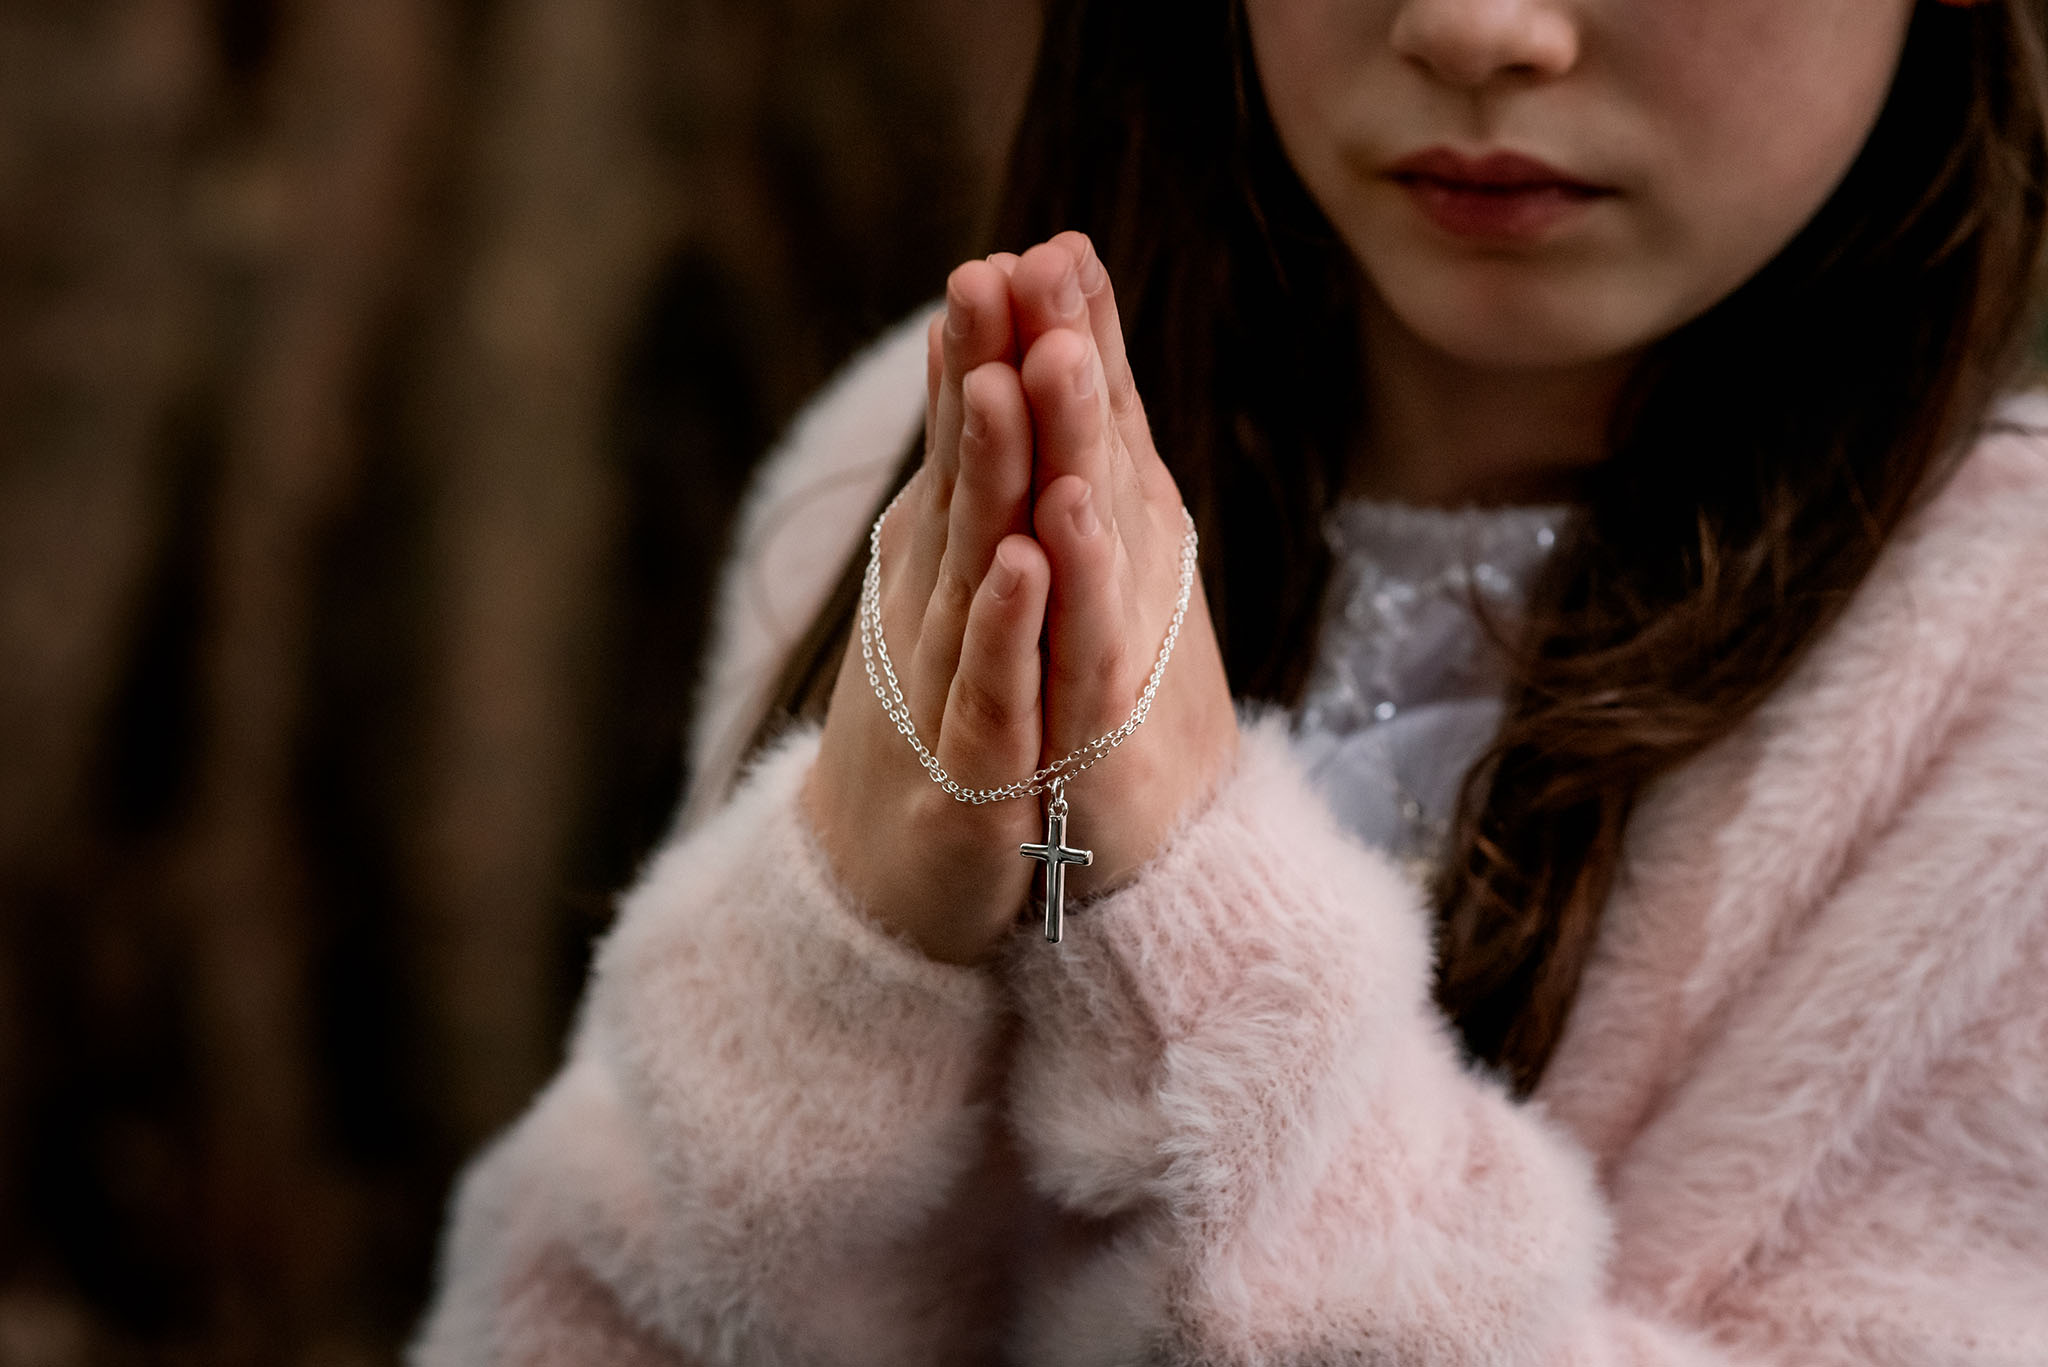
This image was taken in a similar way using window light and positioning to achieve a partial silhouette. The subject stands at the side of the window with you directly opposite them and metering for the highlights means that everything else falls into shadow.

Get Close to the Light
Get close to the light source and focus on area you love. In this case the window. One great thing about this house is that, although they need replacing as they are freezing cold. The windows and ledges are soooo beautiful. I use them a lot.
Create Your Own Backdrops
The photos below were taken in the ugliest rooms.
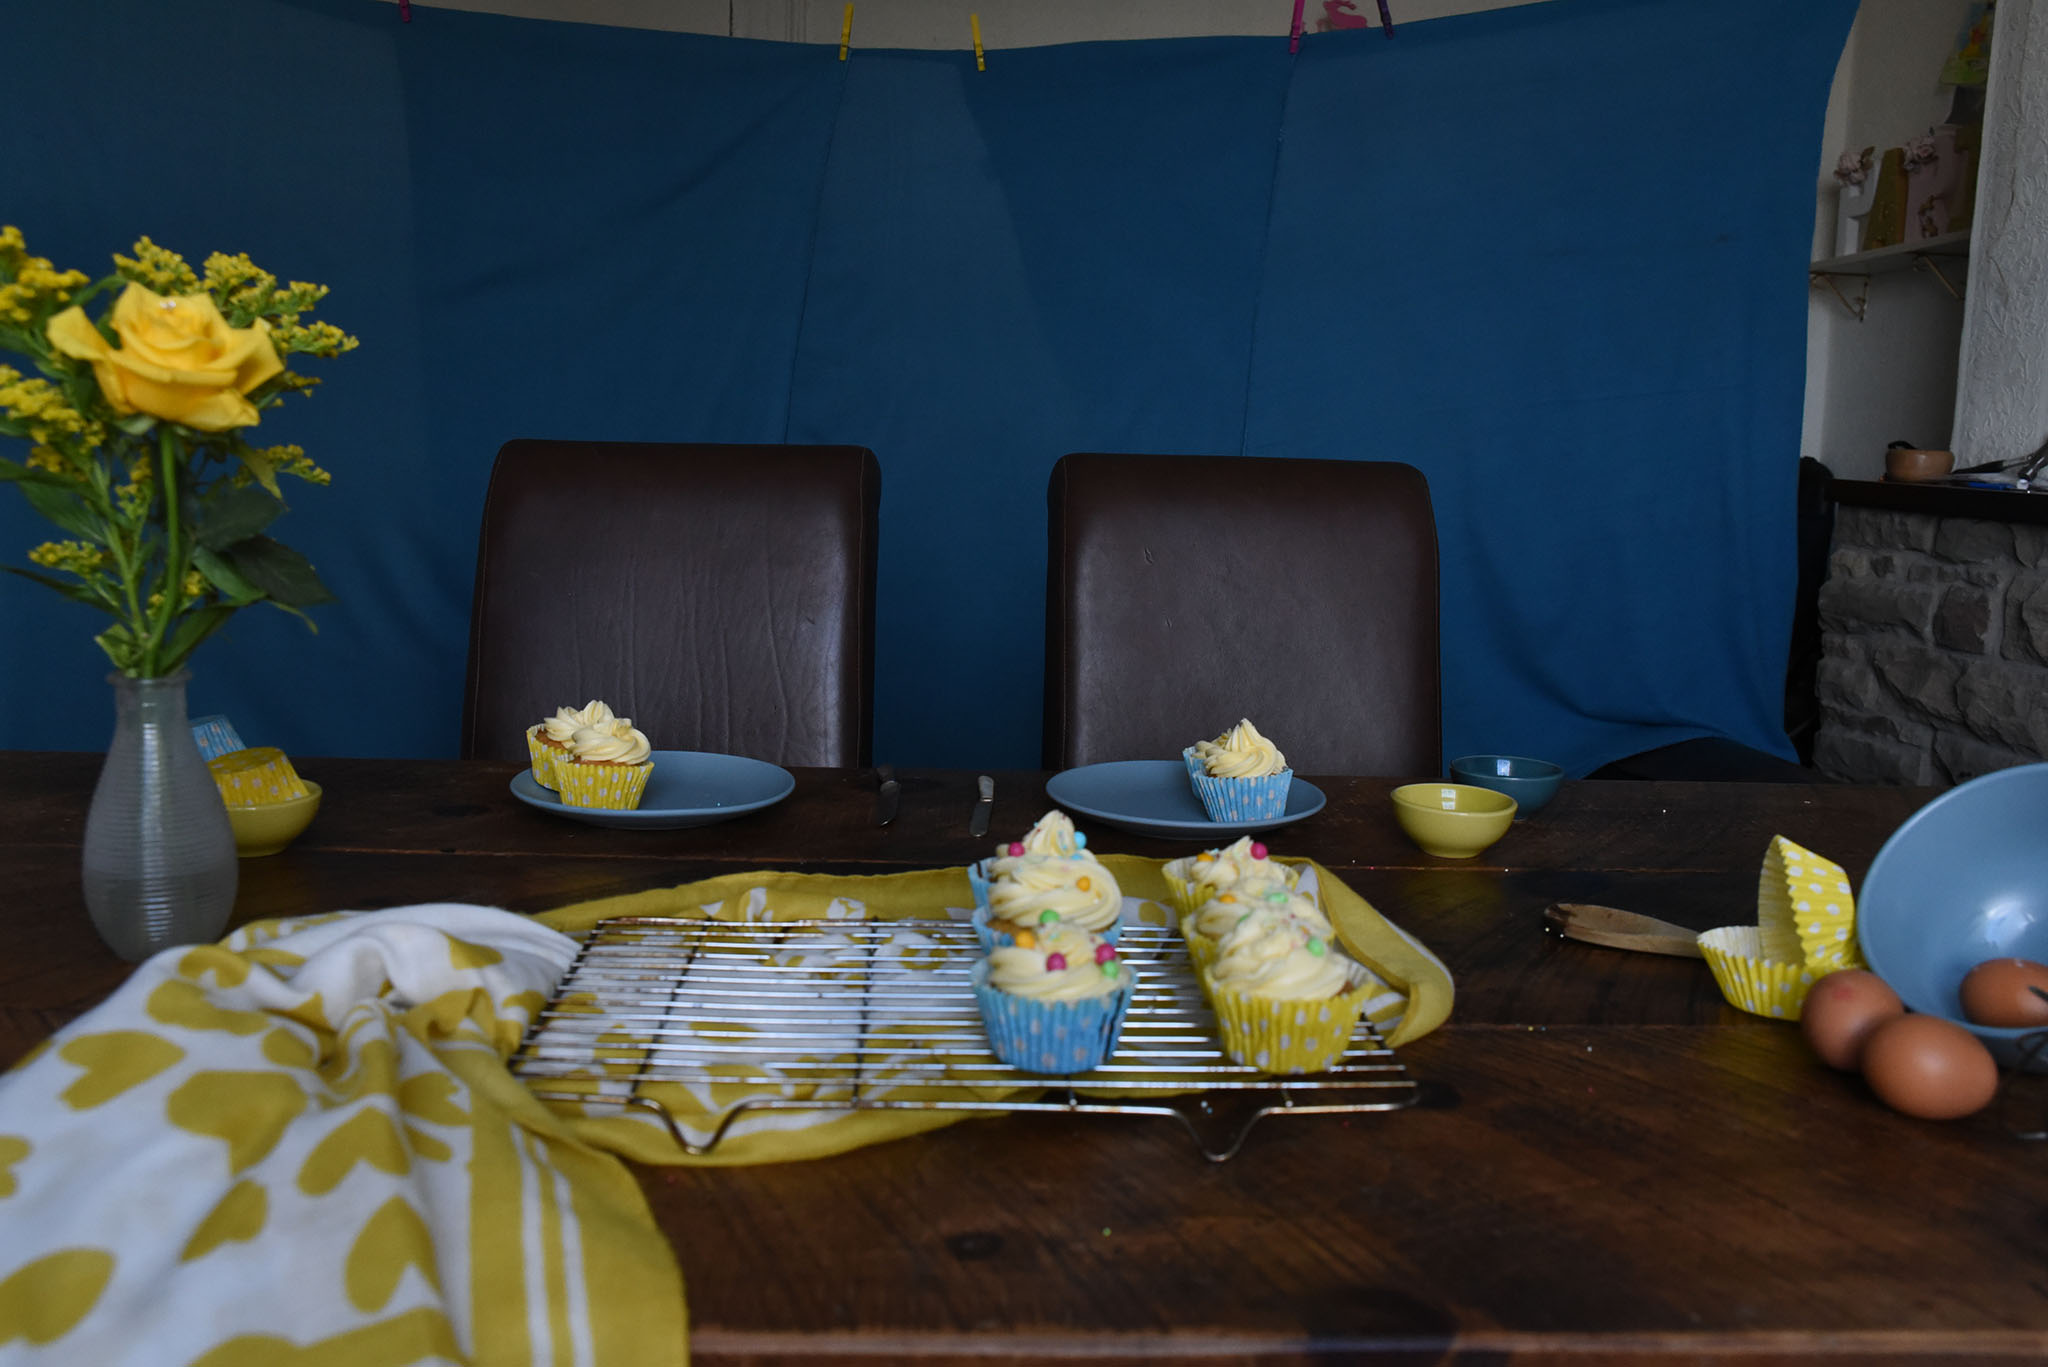
For these shots I purchase some cheap fleece blankets from Poundland (this is the UK version of the Dollar Store I’m guessing) – fleece because it stretches so easily and doesn’t crease making it ideal for this purpose. I also dragged my dining table toward the window.
I fixed up two Command hooks – one at either side of the room and stretched string between them, winding them and pulling tight. The, I pegged them to the washing line I had created. It was a bit of a faff and I did use heavy objects at the bottom to help weight out the creases. But with a little bit of post-processing I was able to create my own beautiful blue wall!

I did a personal project last year called ‘The White Project’ which was very much out of my comfort zone (being a predominantly ‘dark and moody’ photographer (the style….. not me personally!!) I love to push myself out of my comfort zone at least once every 6 months. The last attempt was far less sucessful and involved me trying to emulate the amazing Megan Bogg’s holiday vibes whilst on our family holiday in Cyprus. I love her style soooo much!! Let’s just say that I ‘crashed and burned’ with that one and ended up keeping almost none of my photos as I hated them all!! The White Project was a much greater success. My goal was to create a 3×3 collage to go on my wall when the house is finished.
These ones were taken in my youngest daughter’s bedroom.
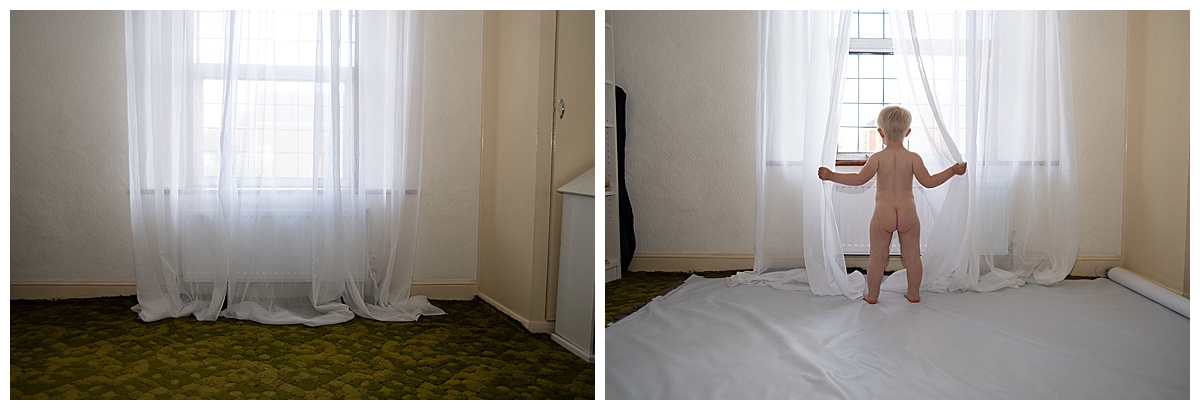
I went to my local haberdashery and purchased several meters of white muslin material at a few pounds per meter. Since I can’t sew, I literally ironed and tacked them into place so they could be slid onto the curtain pole. I was at a loss for the fake ‘flooring’ to disguise our gorgeous grass-green carpet. The man in the haberdashery suggested a wipe-clean material that people use to line the inside of cosmetics bags. I was sold!!! He even gave it to me on the roll so I could store it away after use for another day.
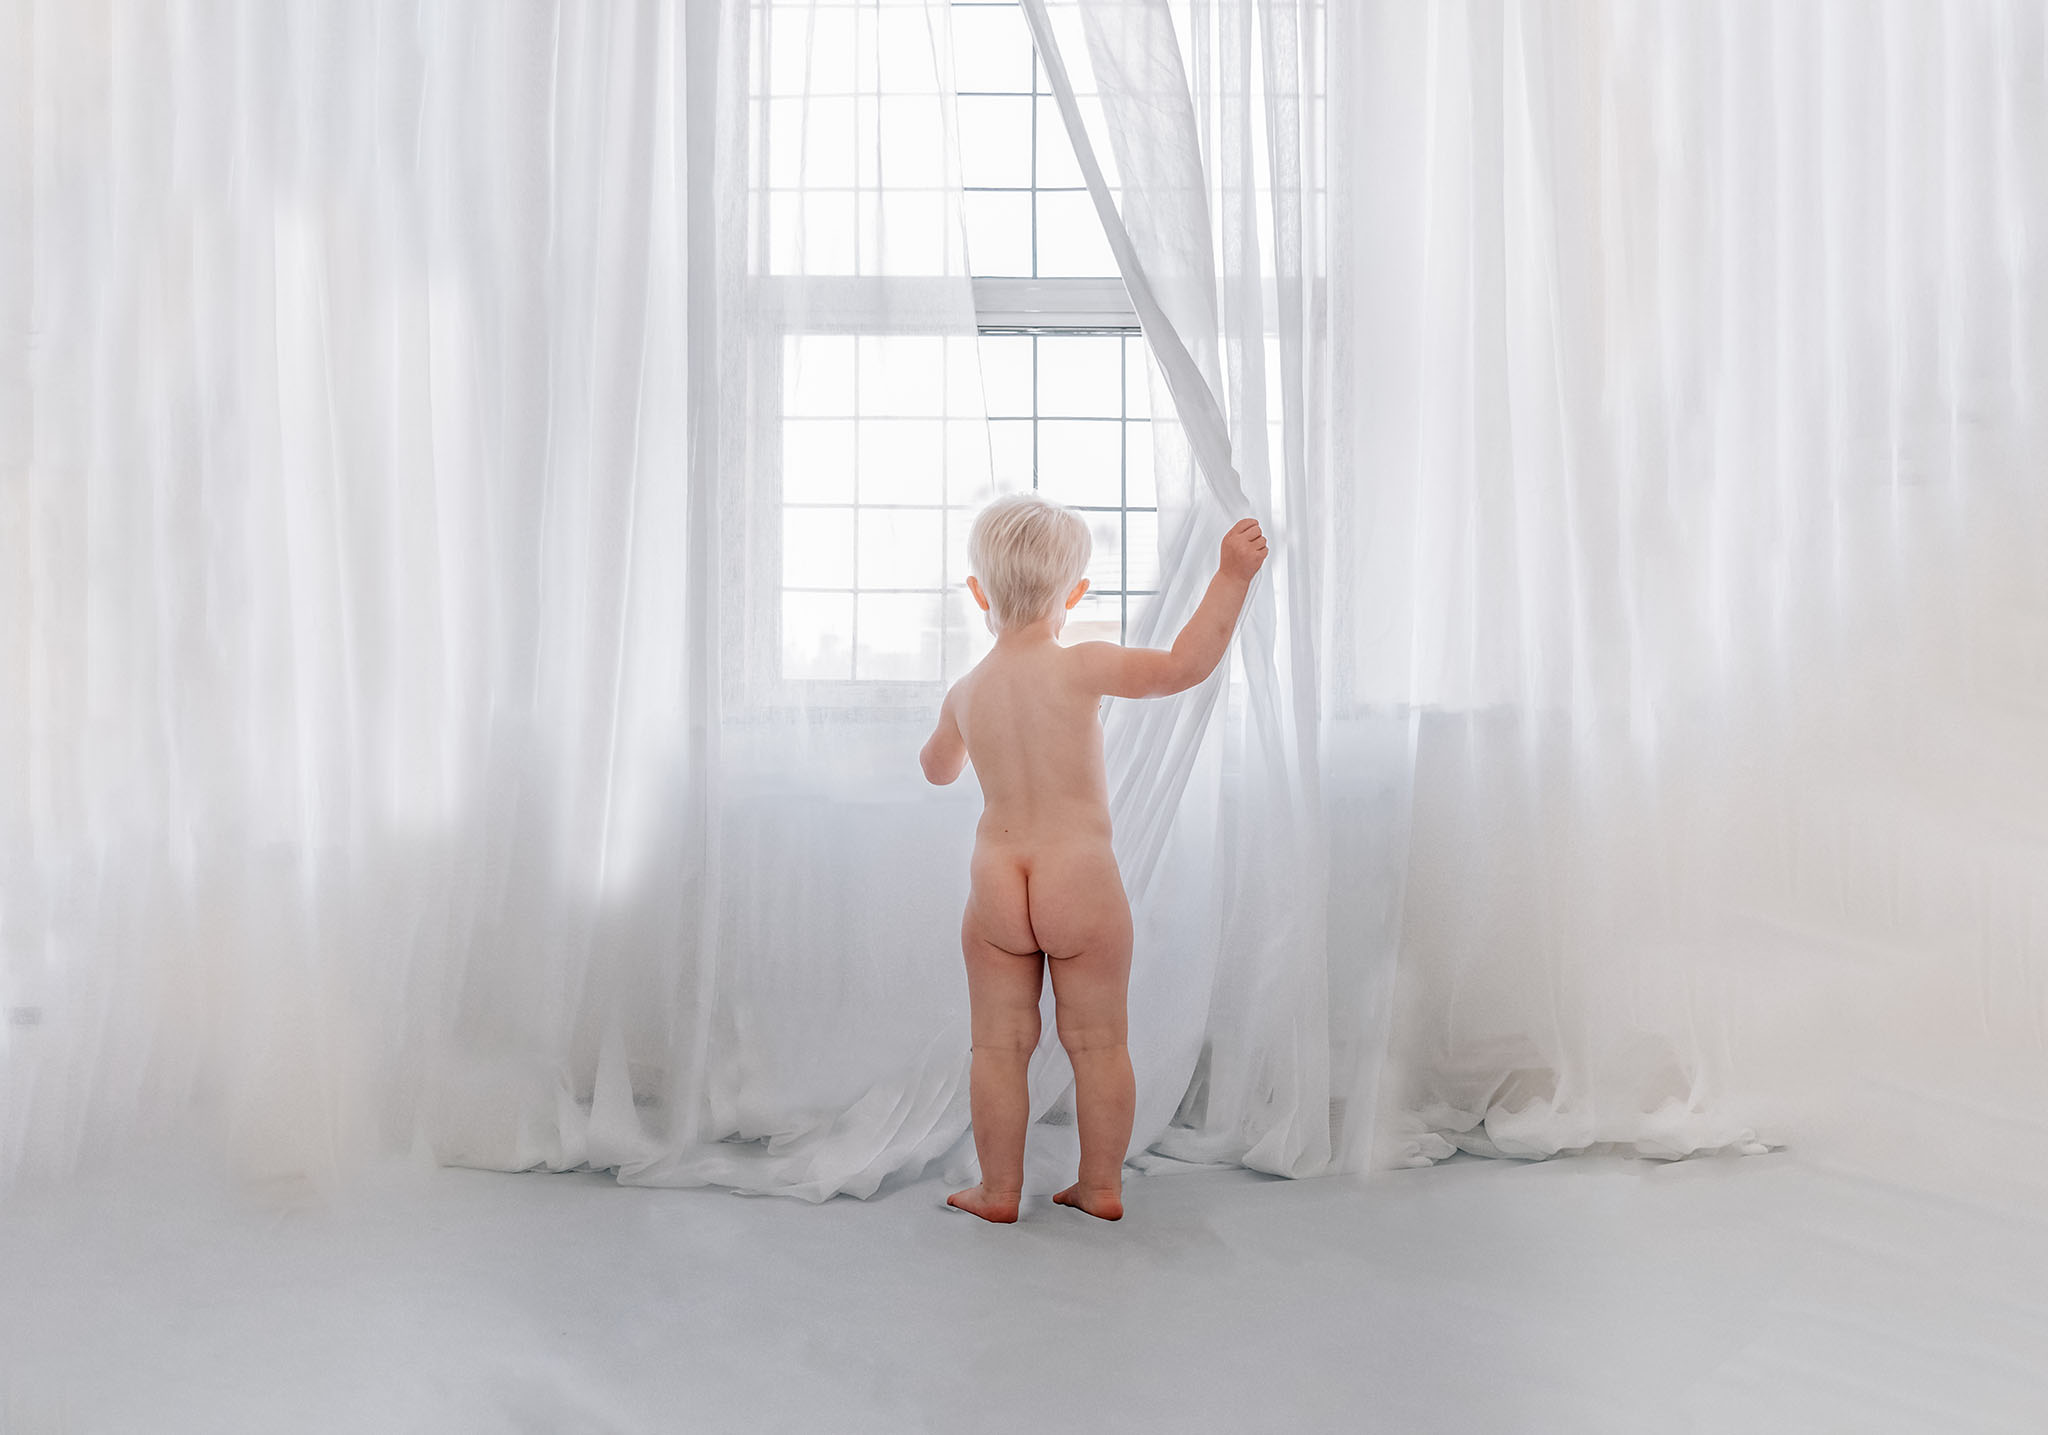
I used OCF to help light my subject and give me further control over my lighting. These images stretched my newly-found Photoshop skills to their limits. It gave me great practice at content-aware filling and cloning as well as using the dropper tool to select colours to fill in problematic areas. I shot these images over the course of a few days. My goal was to focus on their details as well as the wider angles. This is something I like to do a lot of in my photographs.
I would love to hear what you think of my ideas and please do show me if you create anything using the tips I have found useful. I am always looking for new ideas to try myself as this house is going to be a loooong project. So if you have tried any other techniques out, I would also love to hear about them.
For more inspiration, follow Samantha on Instagram!
So remember everyone…. Leave the mess and get clicking create those memories because “Cobwebs be quiet and dust go to sleep – I’m rocking my baby and babies don’t keep”
What a fantastic article! So helpful to help others create great images in their homes regardless of what it looks like.