


Abi Coop
Melissa Richard
Kristen Ryan
Outdoor Family Self Portraits | with Melinda McIntyre
Outdoor Family Self Portraits
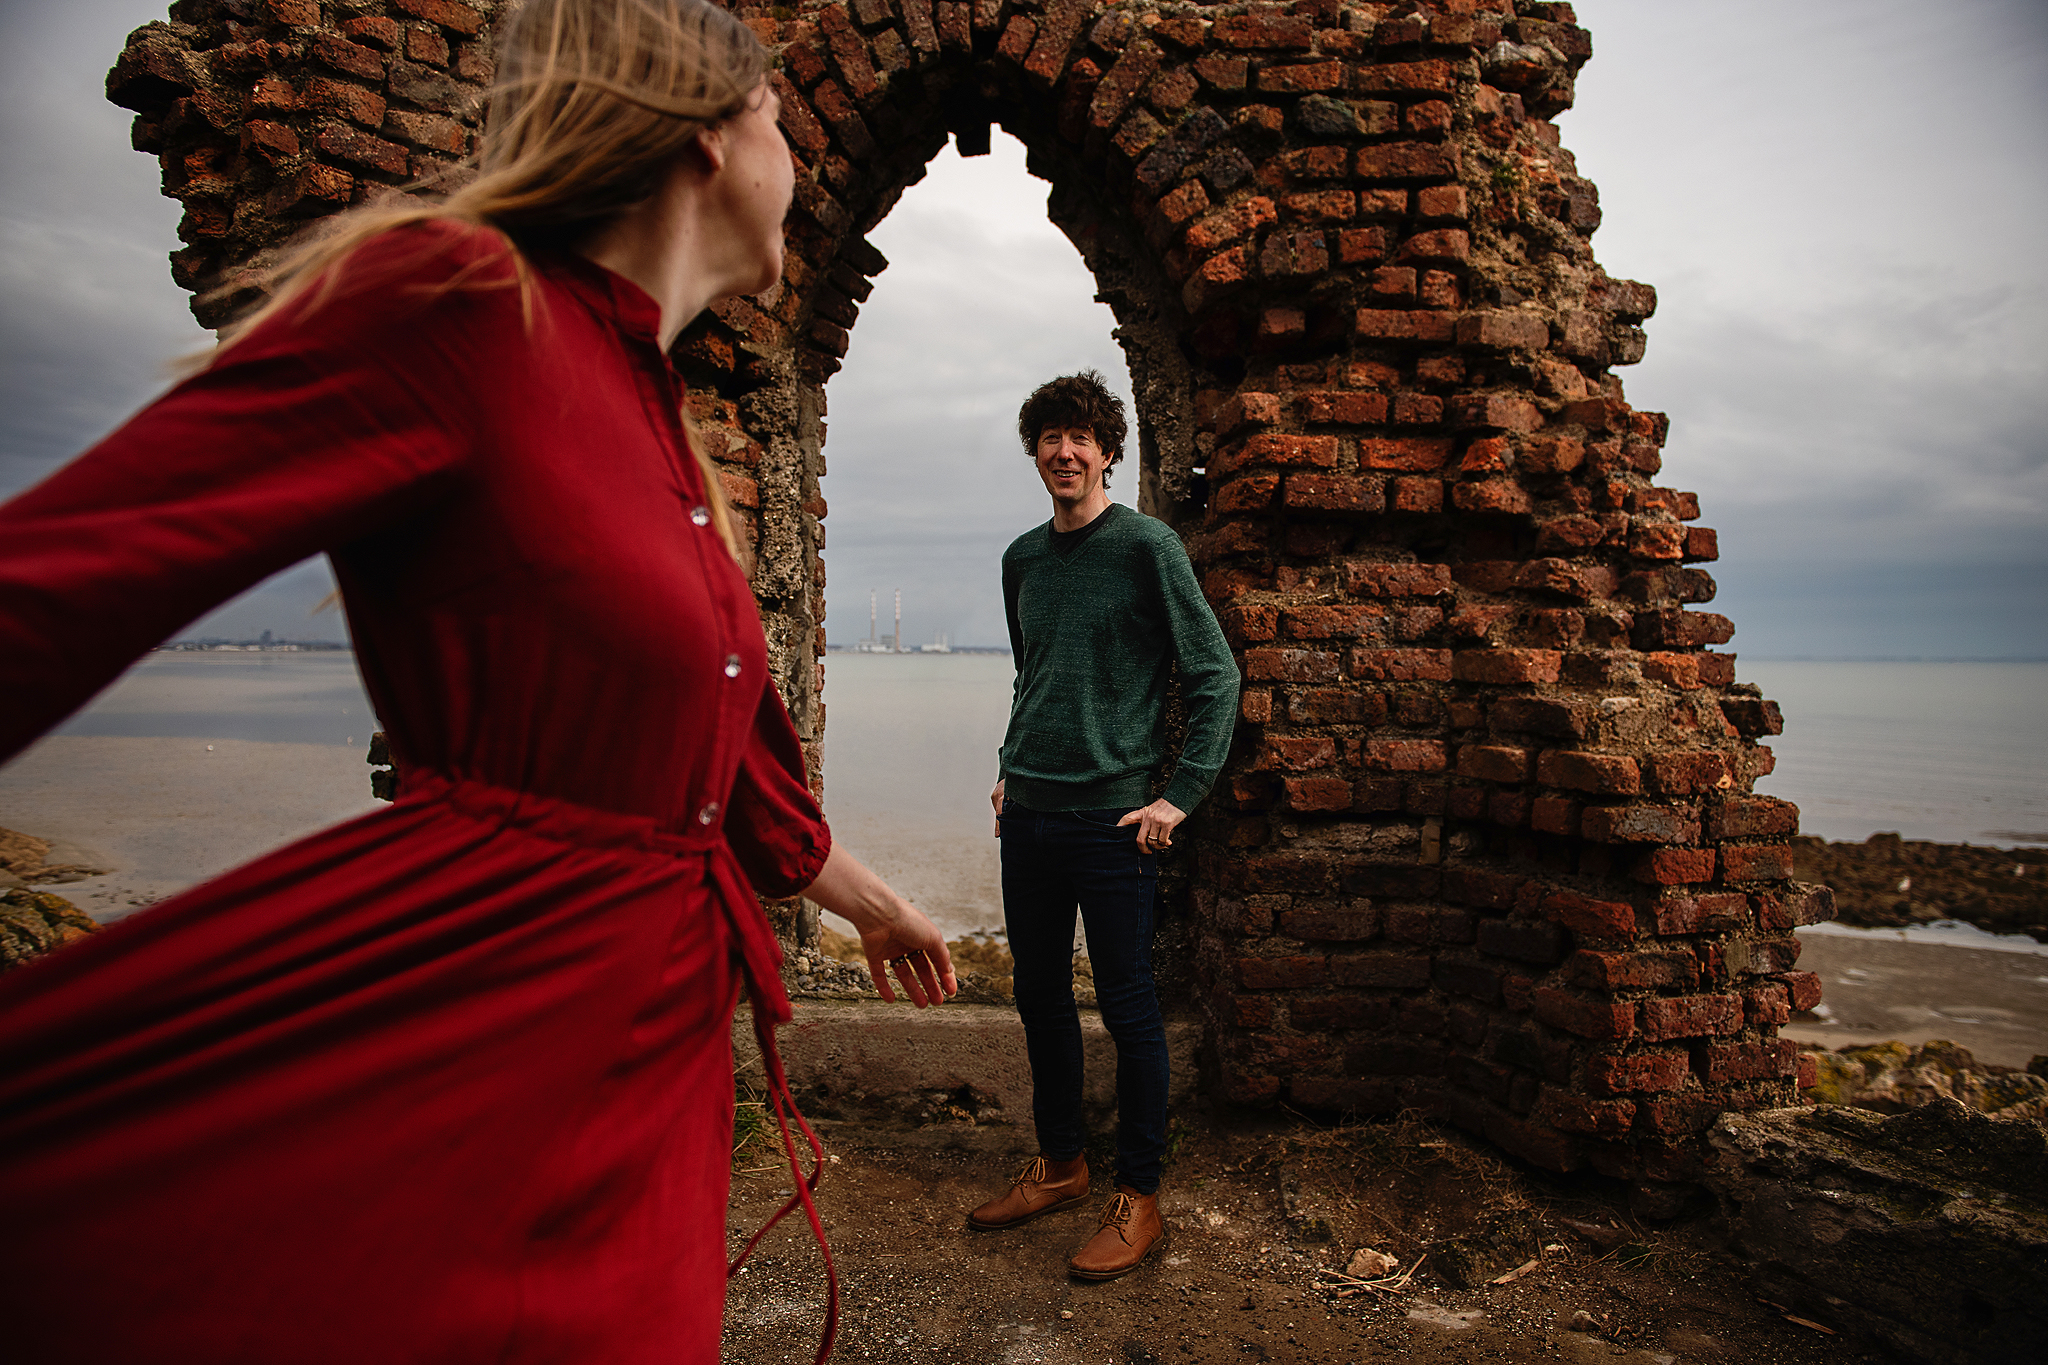
The year 2020 upended plans for everyone. One of our grand plans had been to go to Iceland and have our family portraits done. I wanted to update our gallery wall of us from over four years ago. Unfortunately, that didn’t happen. Then Ireland went into lockdown for month after month and I still wanted family pictures taken. And so, as our time in Ireland grew short and with the knowledge that we were moving in just a few weeks, I decided to do our family portraits myself. Along the way I learned some valuable lessons. I thought it would be helpful to pass them along to anyone else who was going to need to go the route of outdoor family self-portraits.
As you may know, my family is no stranger to doing self-portraits – I’ve been including myself in our family portraits for almost two years now, to make sure I get in the frame as often as possible. The main difference this time, however, is that my prior work was almost exclusively within our own home where I could control the lighting and environment to some degree. Taking images outside is a whole different ball game when you are both subject and photographer.
Here are my top tips for an outdoor family self-portrait session. Some of these suggestions will apply for any on-location photo shoot. I’m really going to focus on the unique challenges when you’re photographing yourself along with your family.
Learn more about capturing family sessions in our workshop, Connected!
First, plan what you can but be prepared to adjust and try again. Let your family know that this may take more than one attempt. Pick out a wardrobe for everybody as you would any family session, but remember this is for you – hopefully to proudly display on your wall for years to come. Make sure everyone is wearing clothes that you want to see, and try to envision what shots you want in advance. I knew I needed to get enough variety to fill 14 slots to update my gallery wall. I also know what colors I like, and so I dressed the kids accordingly.
Total transparency, we actually had to take the pictures two days in a row. My first session I ran into some technical difficulties.I discovered that I strongly disliked the way the kids got lost in the scene due to some unexpected harsh light. I also disliked that their clothes were too close in color to the environment. So, I changed their outfits and we went back out when there was more cloud cover.
Learn more about shooting in different kids of light with Natural Light for Storytellers!

Location
Scout your location and make sure you can set up the tripod on a stable, safe place. Remember, your camera won’t be in your hands, and you may not be able to move your camera and tripod around over rough terrain to get different angles. Visualize in your head where you want your family to be and then see if there is a good spot for the tripod. This isn’t too difficult if you are using a field, but I had rocks and water, which made things a bit more difficult. Also, make sure that you have some open shade if the weather is going to be sunny. Getting back light images with the tripod and your family is a bit trickier because you can’t make those small adjustments to the height of the camera in order to avoid too much haze.
Tripod
I use a Manfrotto travel tripod. It works fine as long as I double check the legs to make sure that they are in place. Always double check the legs, as I have learned the hard way. Know your tripod’s limits and how much wind it can handle, and try to find a sheltered area if possible. While you are setting up the tripod make sure that the kids are distracted. This was one of the hardest parts, because I would ask the kids to go into a location but then need to get the tripod set up. This is something we don’t usually think about when we’re holding the camera – we can direct and shoot and get spontaneous and planned images all in rapid succession. But when you have to set up the tripod just right and then get yourself into the frame, it takes more time and planning.
By the time I had everything ready my son was bored. When I had my kids distracted by my husband or by throwing rocks into the water it helped a lot. We as photographers are used to keeping other kids happy while we are shooting – keeping your own family happy while trying to get the technical stuff set up is extremely exhausting. Enlist help as you can – it will make everything go much smoother.
Trigger Release
I generally use the intervalometer on my Nikon set up to take 7 images 1 second apart. If you can take burst images like this, it is extremely helpful so that you can swap heads and faces later as necessary (about half of my images had at least one face that needed to be swapped out). Since you aren’t looking through the viewfinder to know exactly when to hit the shutter release, capturing multiple images in succession is key.

SOOC 1 & SOOC 2

Final image. I really wanted one with a bit more movement – but was having difficulty with the camera being on the tripod.
I also needed to use my phone as the trigger for a few of my shots. For this image, for example, it was at least a three-minute scramble over rocky crags along the reflecting pool to get from my camera back into the frame. This was far too long to rely on the camera’s internal timer. For this set, I used my phone as a remote trigger. My phone is very finicky (it disconnects from the camera easily) and will only take one shot at a time. But you can see what you are getting in the image and you don’t have to run back and forth. After composing the shot, I set a 3 second timer on the phone. Then I just put the phone on the ground. I edited the phone out of the shot later.

I had the phone down by my foot – I edited it out in post.
Patience
As I’ve said before, an outdoor family self-portrait session may take longer. There is more technical set-up involved, and rushing back and forth between camera and scene. The temptation is there to go fast. Don’t skip things you would routinely do when you’re taking photos of somebody else. Take your time, make sure that you get the shots that you really want, and check that they are in focus.
The first day we went out, I tried to keep things quick but regretted it later. The sun was extremely strong by 9 in the morning and my camera decided it didn’t want to focus on our faces. But I didn’t notice until we were done and back at home. I ended up with about 3 usable full family images. This was not enough for my gallery wall. And so, the second day, we had an overcast day and I continually zoomed in on the back of the camera to make sure that the camera was focusing where it needed to focus. I still got a few that were definitely not in focus, but I caught it as it happened vs later at home.

My husband is not in focus! Thankfully I caught it and redid the image.
Edited version of two images put together
Priorities & Rest
Remember which shots are most important to you. By the time I was finished getting full family images I was a bit exhausted. Making sure that the kids are happy and making sure the camera is set up right and everything else is just hard. But I remembered I wanted some images with just my husband and myself, the kids by themselves, and each of us with the kids separately. For the images with the kids and myself I had my husband hit the trigger. That way I wasn’t needing to run ragged back and forth between my kids and the camera. And since the camera was already on the tripod I knew generally what I would get with the shot. If you have help and can get even a tiny break, do it.

Manage Your Expectations
I honesty love doing self-portraits. They are super fun to do. I like figuring out how to add movement, framing, and all the other things to get great photos of all of us. I could spend hours doing family self-portrait sessions. My kids on the other hand are not always that excited about it anymore. When I didn’t need them, I let them go and play and then would call them back in when it was their turn. If you know that your kids will not last for an hour, take the shots that you really want first. That way, if it goes downhill at least you have a few.
Also, if you can’t get enough full family portraits, then switch it up and concentrate on getting images of the kids playing. Or of other members of your family without you in the frame. It may not be exactly what you hoped for, but those types of images will make a beautiful wall gallery all together.

Know When It’s Time To Finish
We’ve been doing these for a while so my family knows what to expect, but we all have limits. I kept pushing my kids until they said no more. At that point we packed up everything and went and got treats. They did a great job being patient with me, and I was happy with what I got.
Editing
When going through the images I deleted the for-sure out of focus pictures. This is when those burst shots will come in handy. If I didn’t like the face of one of us, (which happens, because you can’t see what kind of face everyone is making), I would have another image that was similar and could switch out faces as needed.
Tying It All Together
Did I get all the images that were in my head? No. My son has his eyes closed in one and I couldn’t fix that. But I still love the shot and will use it. I did end up with over 25 images that I love. Also, I got multiple full family images that I can choose from. Additionally, I got 5 lovely images of my husband and myself, and a few of each of us with the kids individually. And we ended on a happy note. We had memories of a fun time at the beach as well as some great photos.
Family photo sessions take time, patience, and work. But they are so worth it, and the more often you can do them the easier it gets for everybody. As we were leaving, my son double-checked to make sure I had gotten all the images I needed. He knew this was important to me, and now we will have a beautiful selection of images from Ireland hanging on our wall.

