Abi Coop
Melissa Richard
Kristen Ryan
Landscape Composition | by Abi Coop
Landscape Composition
Compositional Tools for Making a Strong Landscape Image
Here are some tools to use for making your landscape images stronger and more visually compelling. An image works well when it is pleasing to our eye. Our eyes like to be told what to do and be guided through an image. So, we can include various things within our photograph that serve this purpose. We “read” an image from left to right, so unless your landscape image features a famous place that will look wrong, you can try flipping it to see if it looks better the other way around. Which of these images do you think flows better?
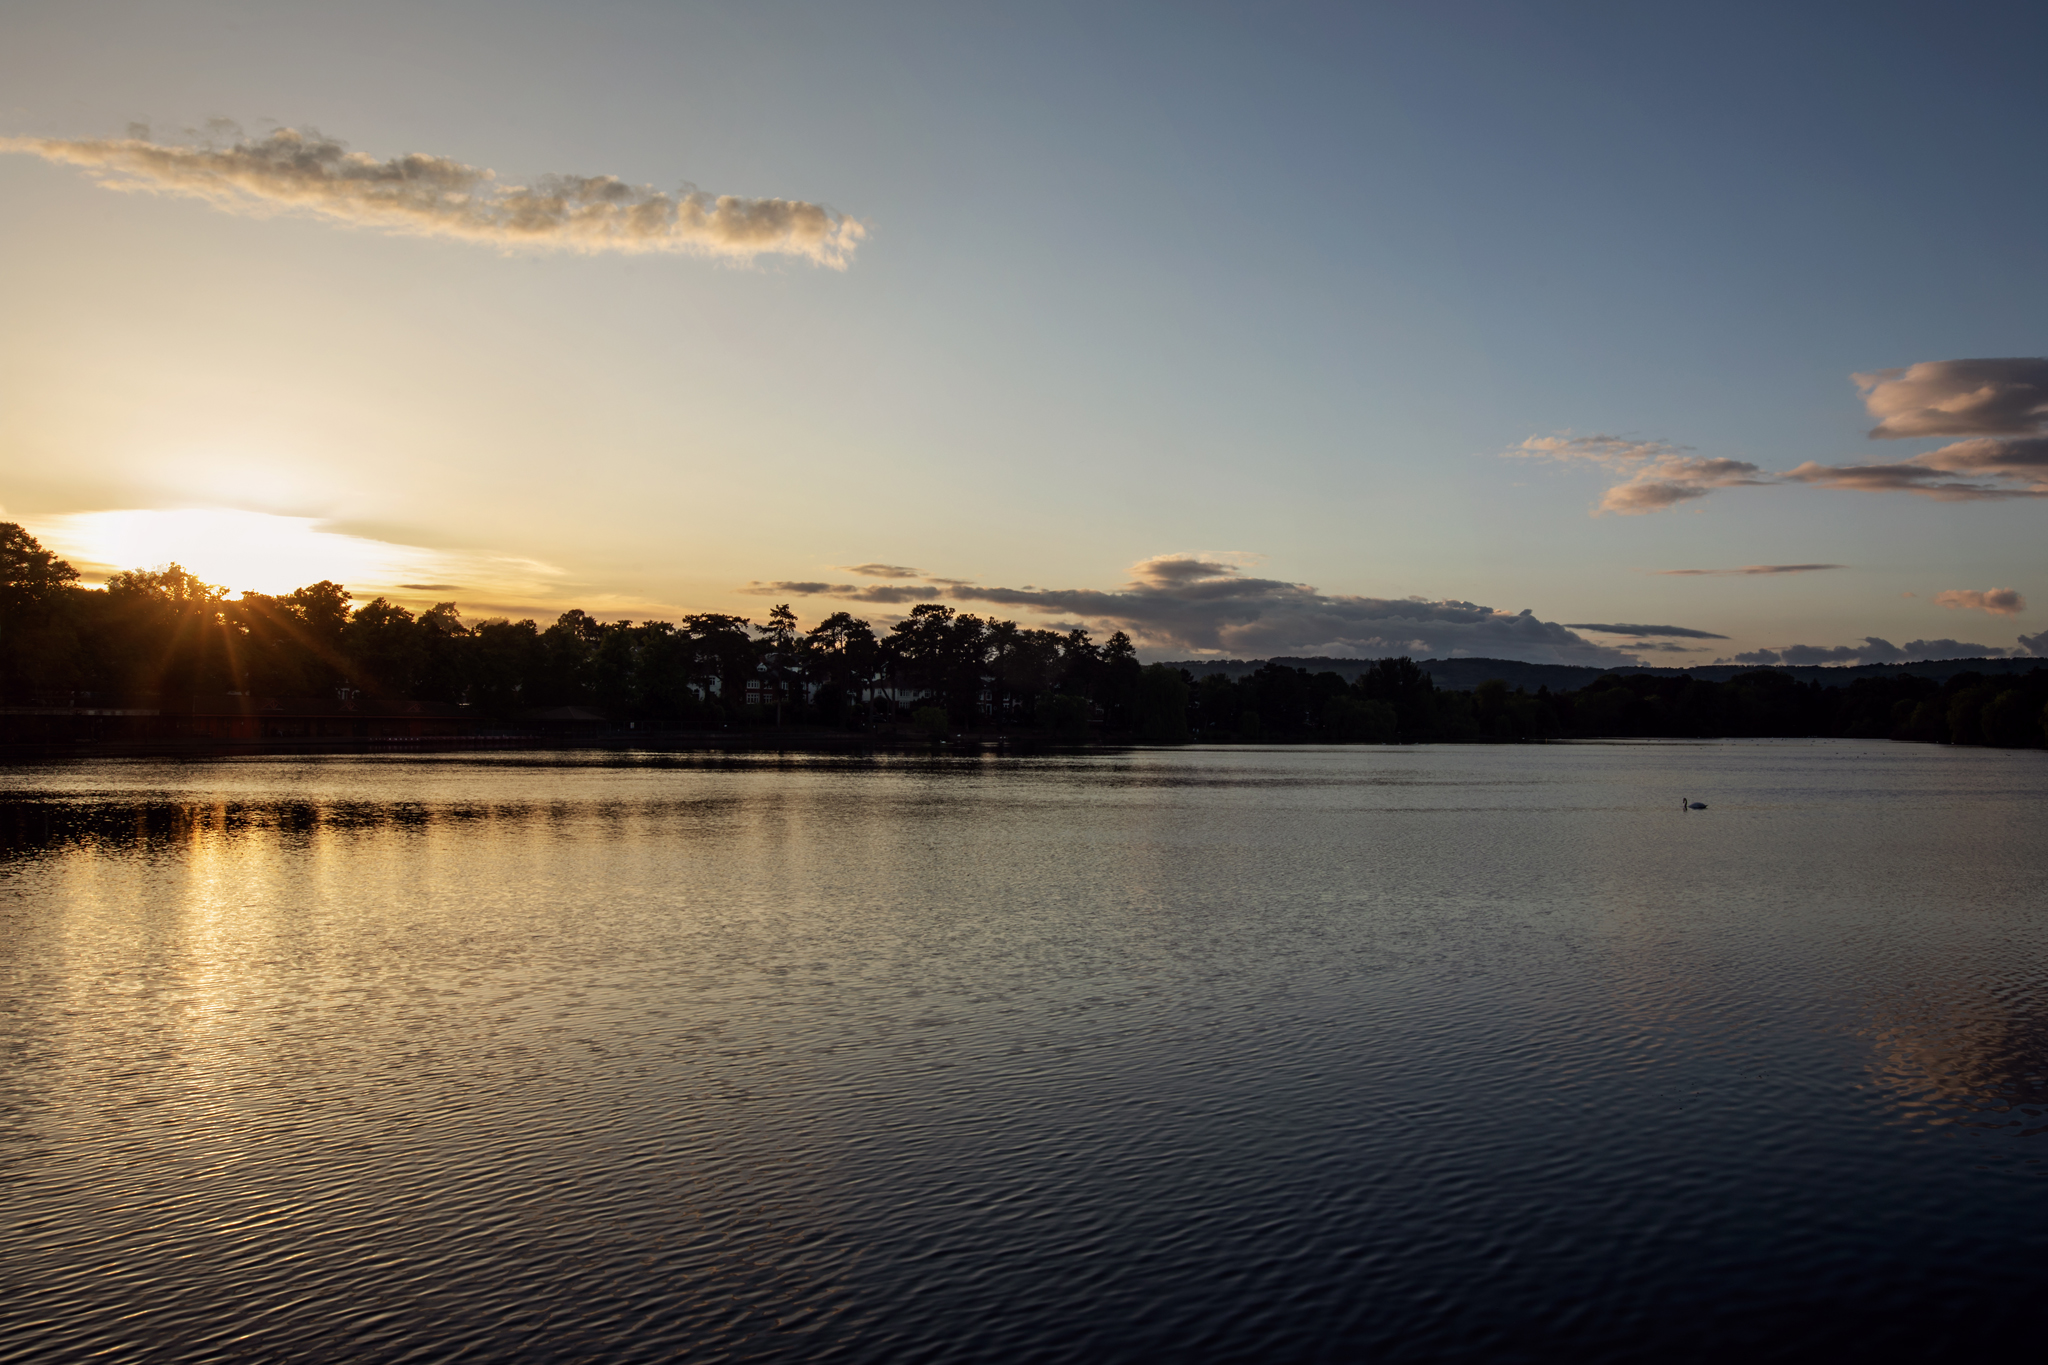
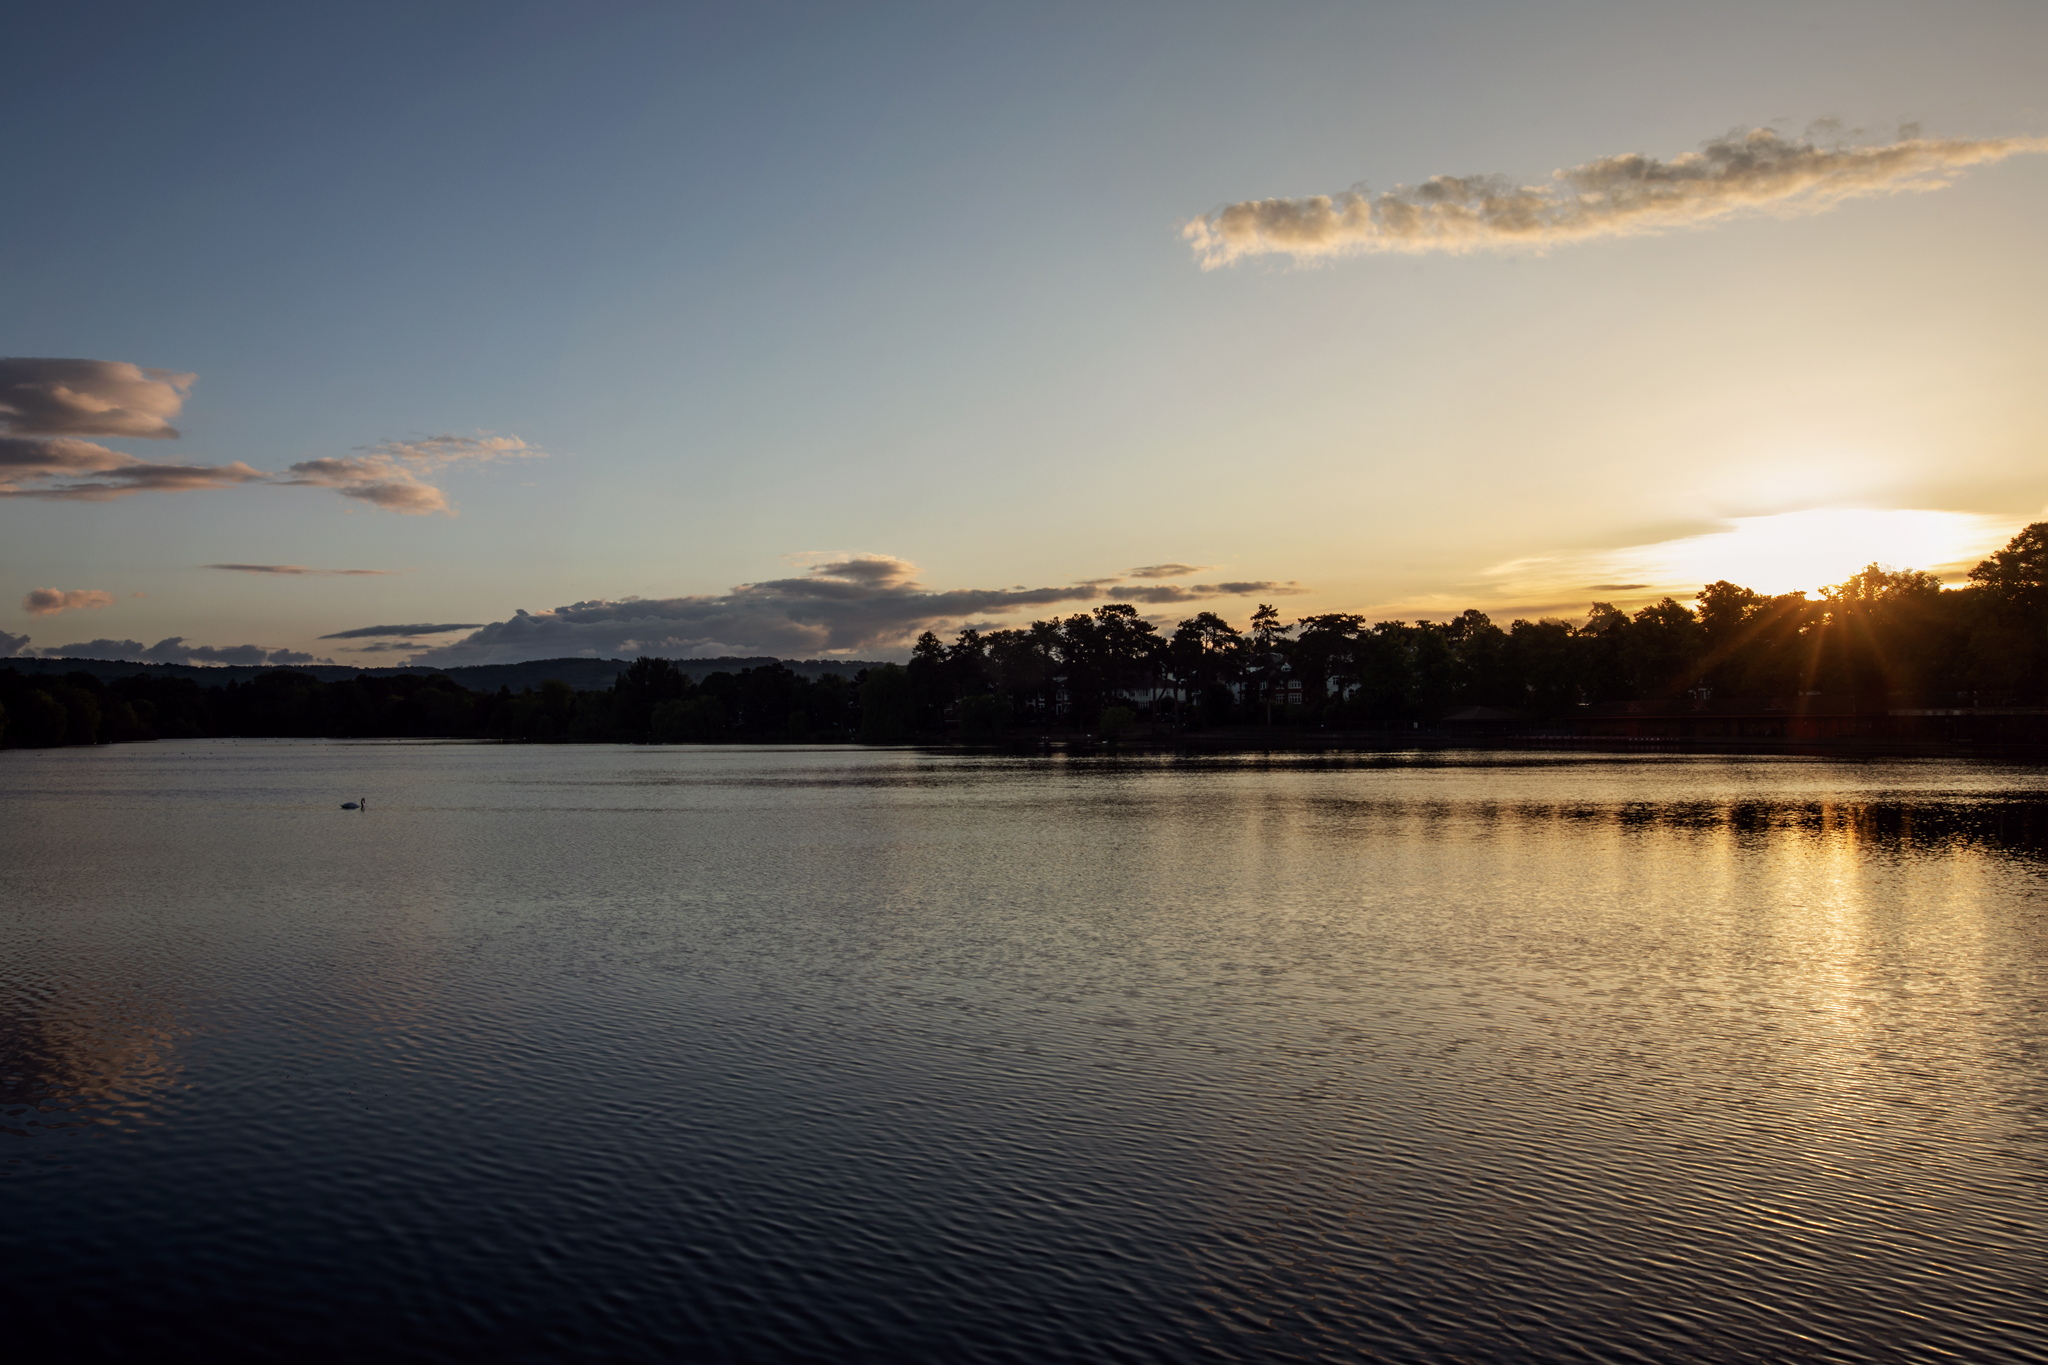
In the top one your eye goes to the bright sunburst on the left and then follows the light out across the lake. In the bottom your eye again goes first to the bright sunburst, but then gets confused going back across the image and isn’t quite sure what to do (at least this is what mine does!)
When you approach a scene that you want to capture, consider the elements within the scene and how you can use each of them to fit one or more of the compositional strategies I talk about below. Also consider where you’ll place the horizon and/or your main subject or feature. Make use of the rule of thirds or the golden ratio, or if your image has strong symmetry, such as a reflection, then a central composition can be very powerful.
Landscape Composition – Framing
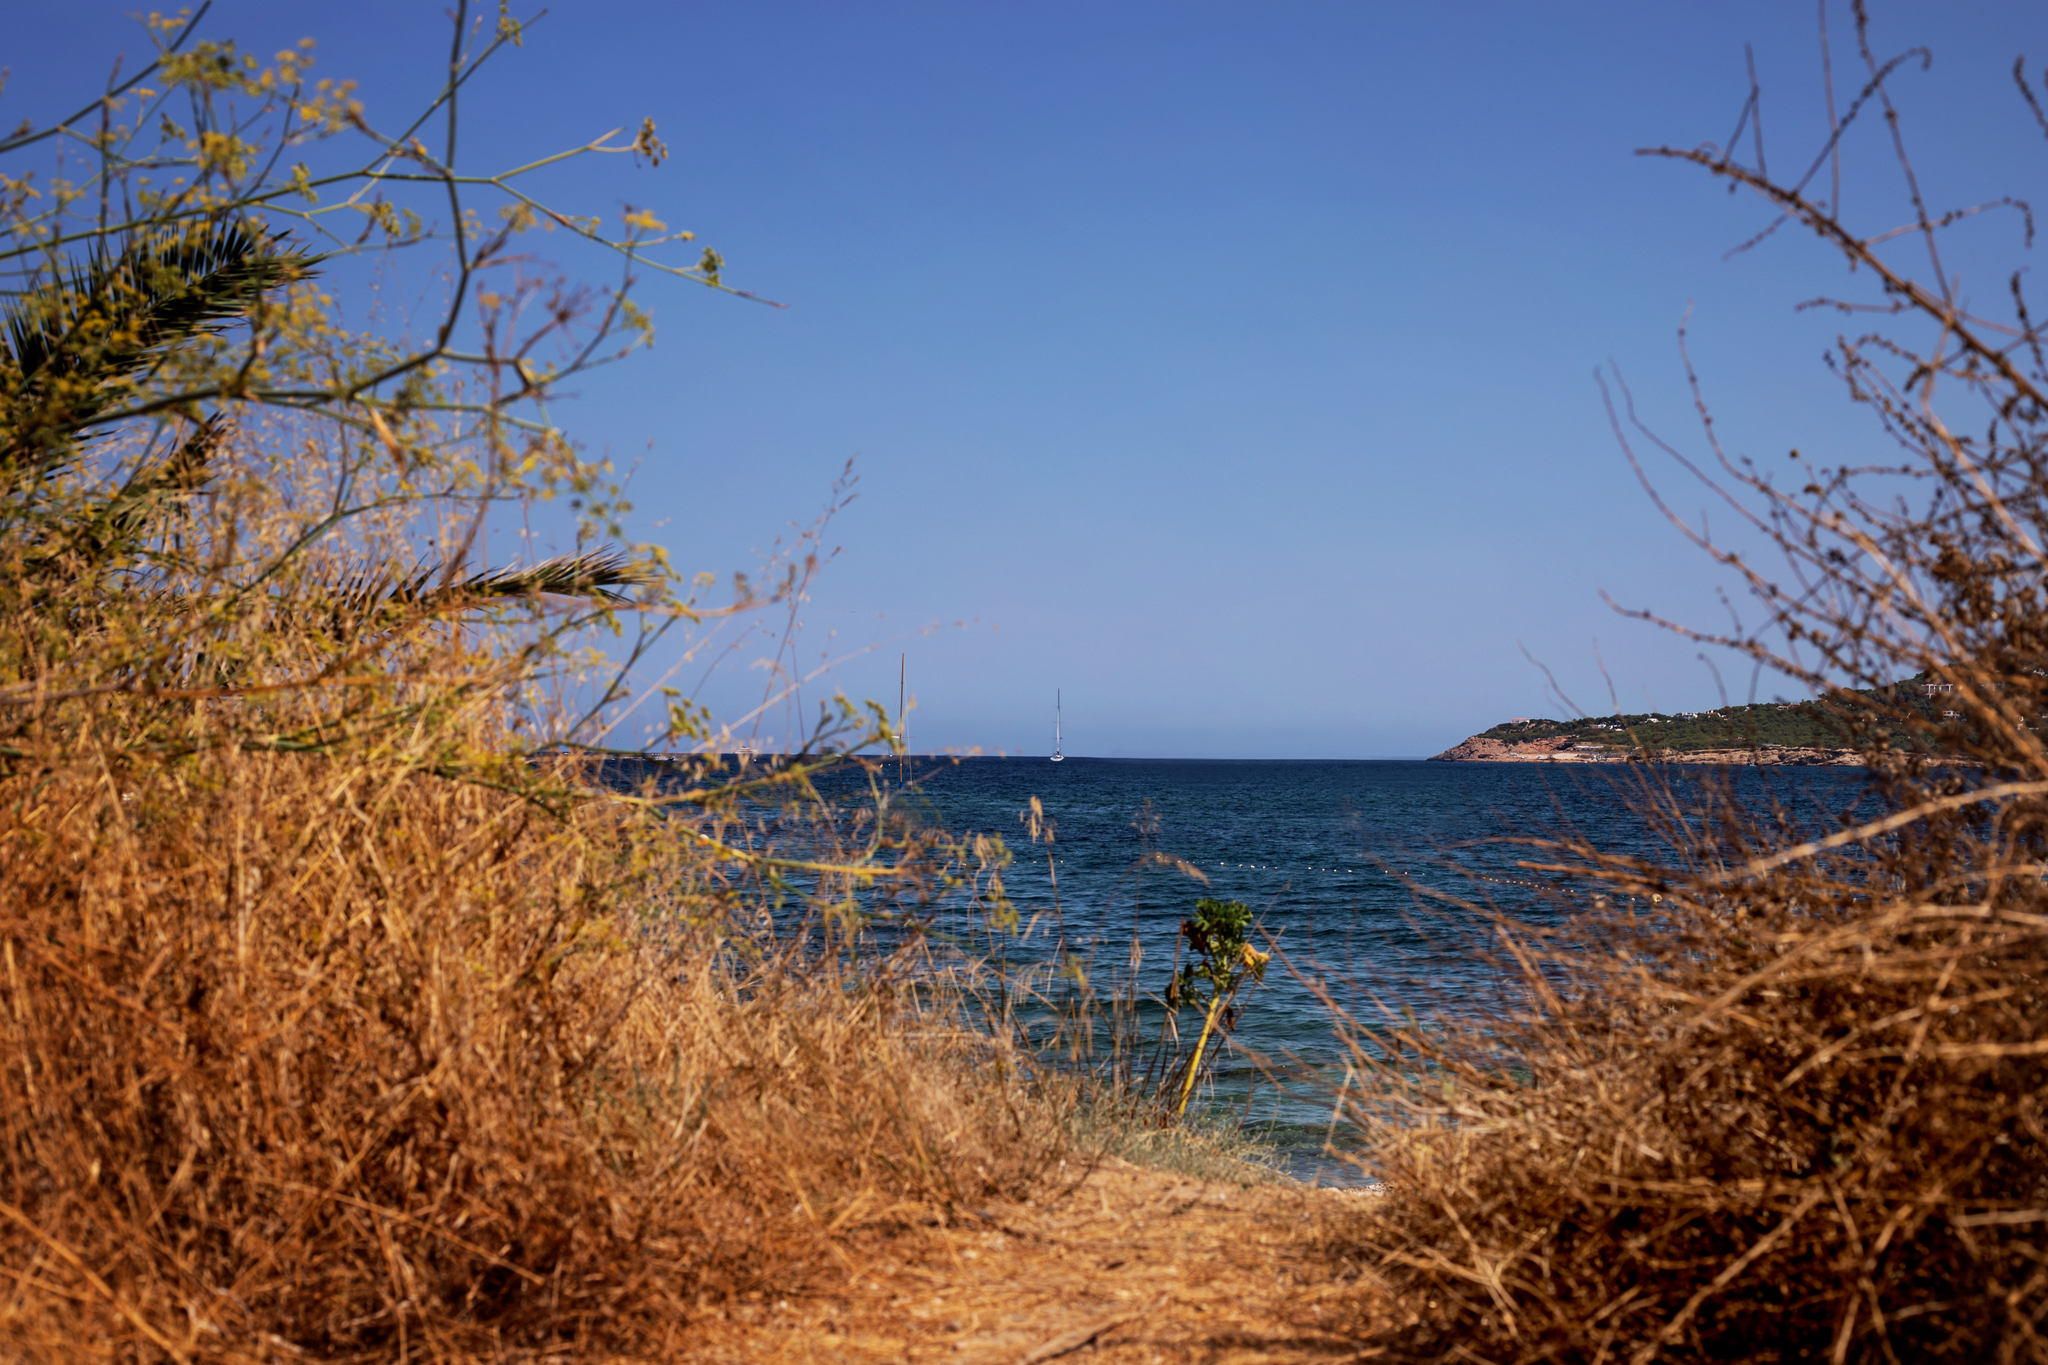
Use elements such as trees, foliage, buildings, shadows etc… to provide a frame for your landscape. It helps stabilise the image and drawn the eye in. The framing doesn’t need to be on all sides, even just one or two can be effective.
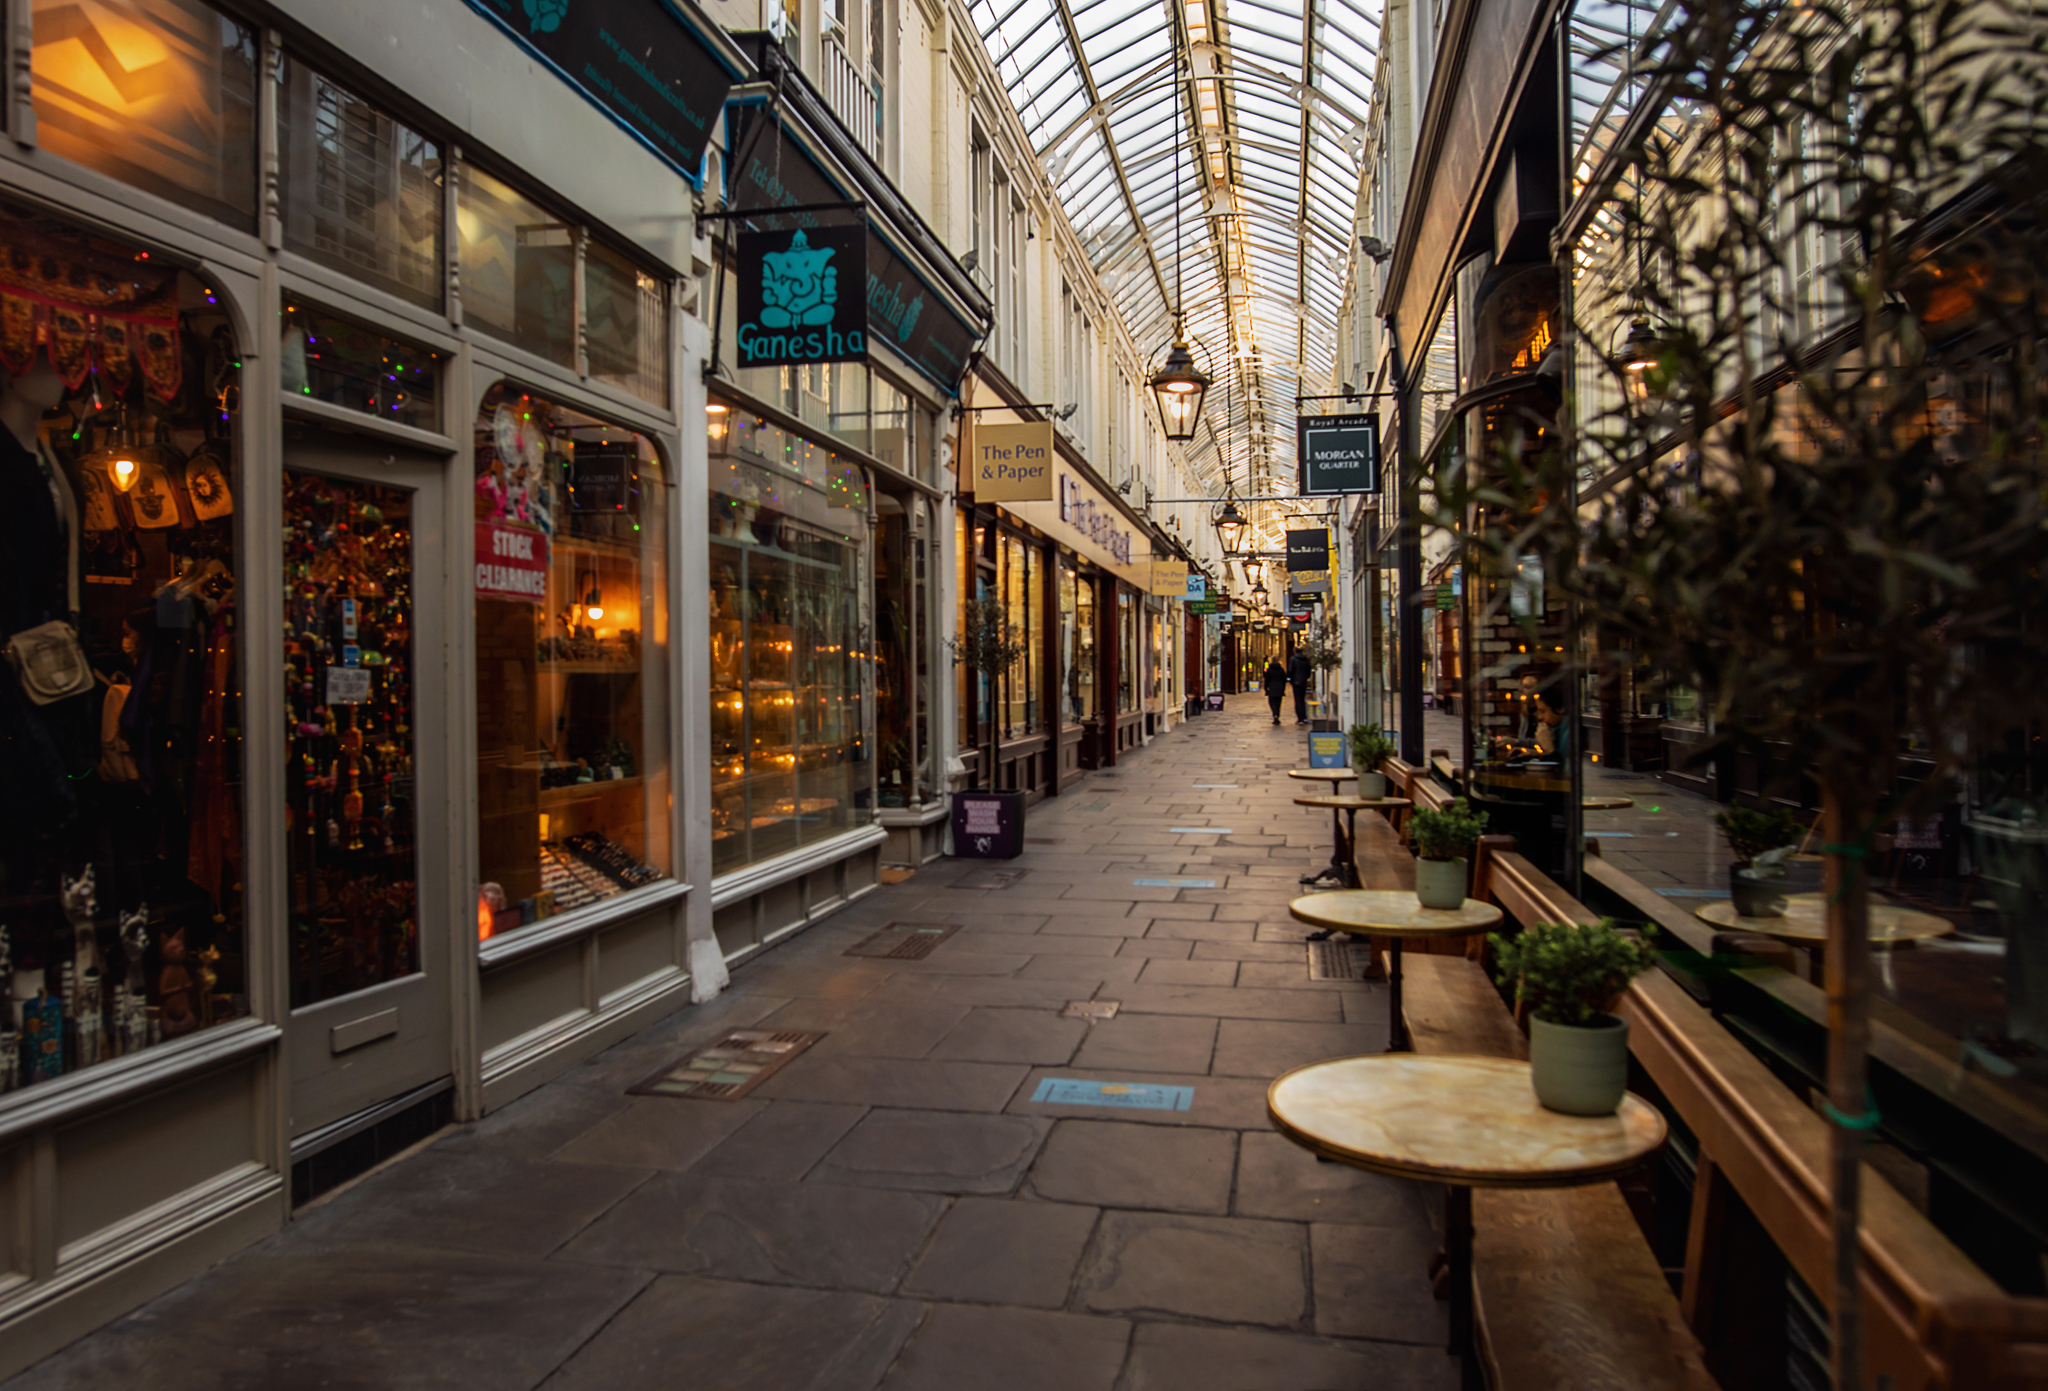
Landscape Composition – Leading Lines
Use any lines within your image, such as paths, sun rays, water ripples, fences etc… as a tool to guide the eye. Sometimes these lines are real physical structures within your image, other times they are implied lines, such as the line of a bird’s flight. Lines can be horizontal, vertical, diagonal, converging, intersecting, curved. Experiment with the placement of these lines to determine the best composition; use symmetry, rule of thirds etc…
Landscape Composition – Layering
Consider the foreground, the middle ground and the background of your scene. These add depth to your image. Where will you put the focus? Which layers do you want blurry or will it all be in focus?
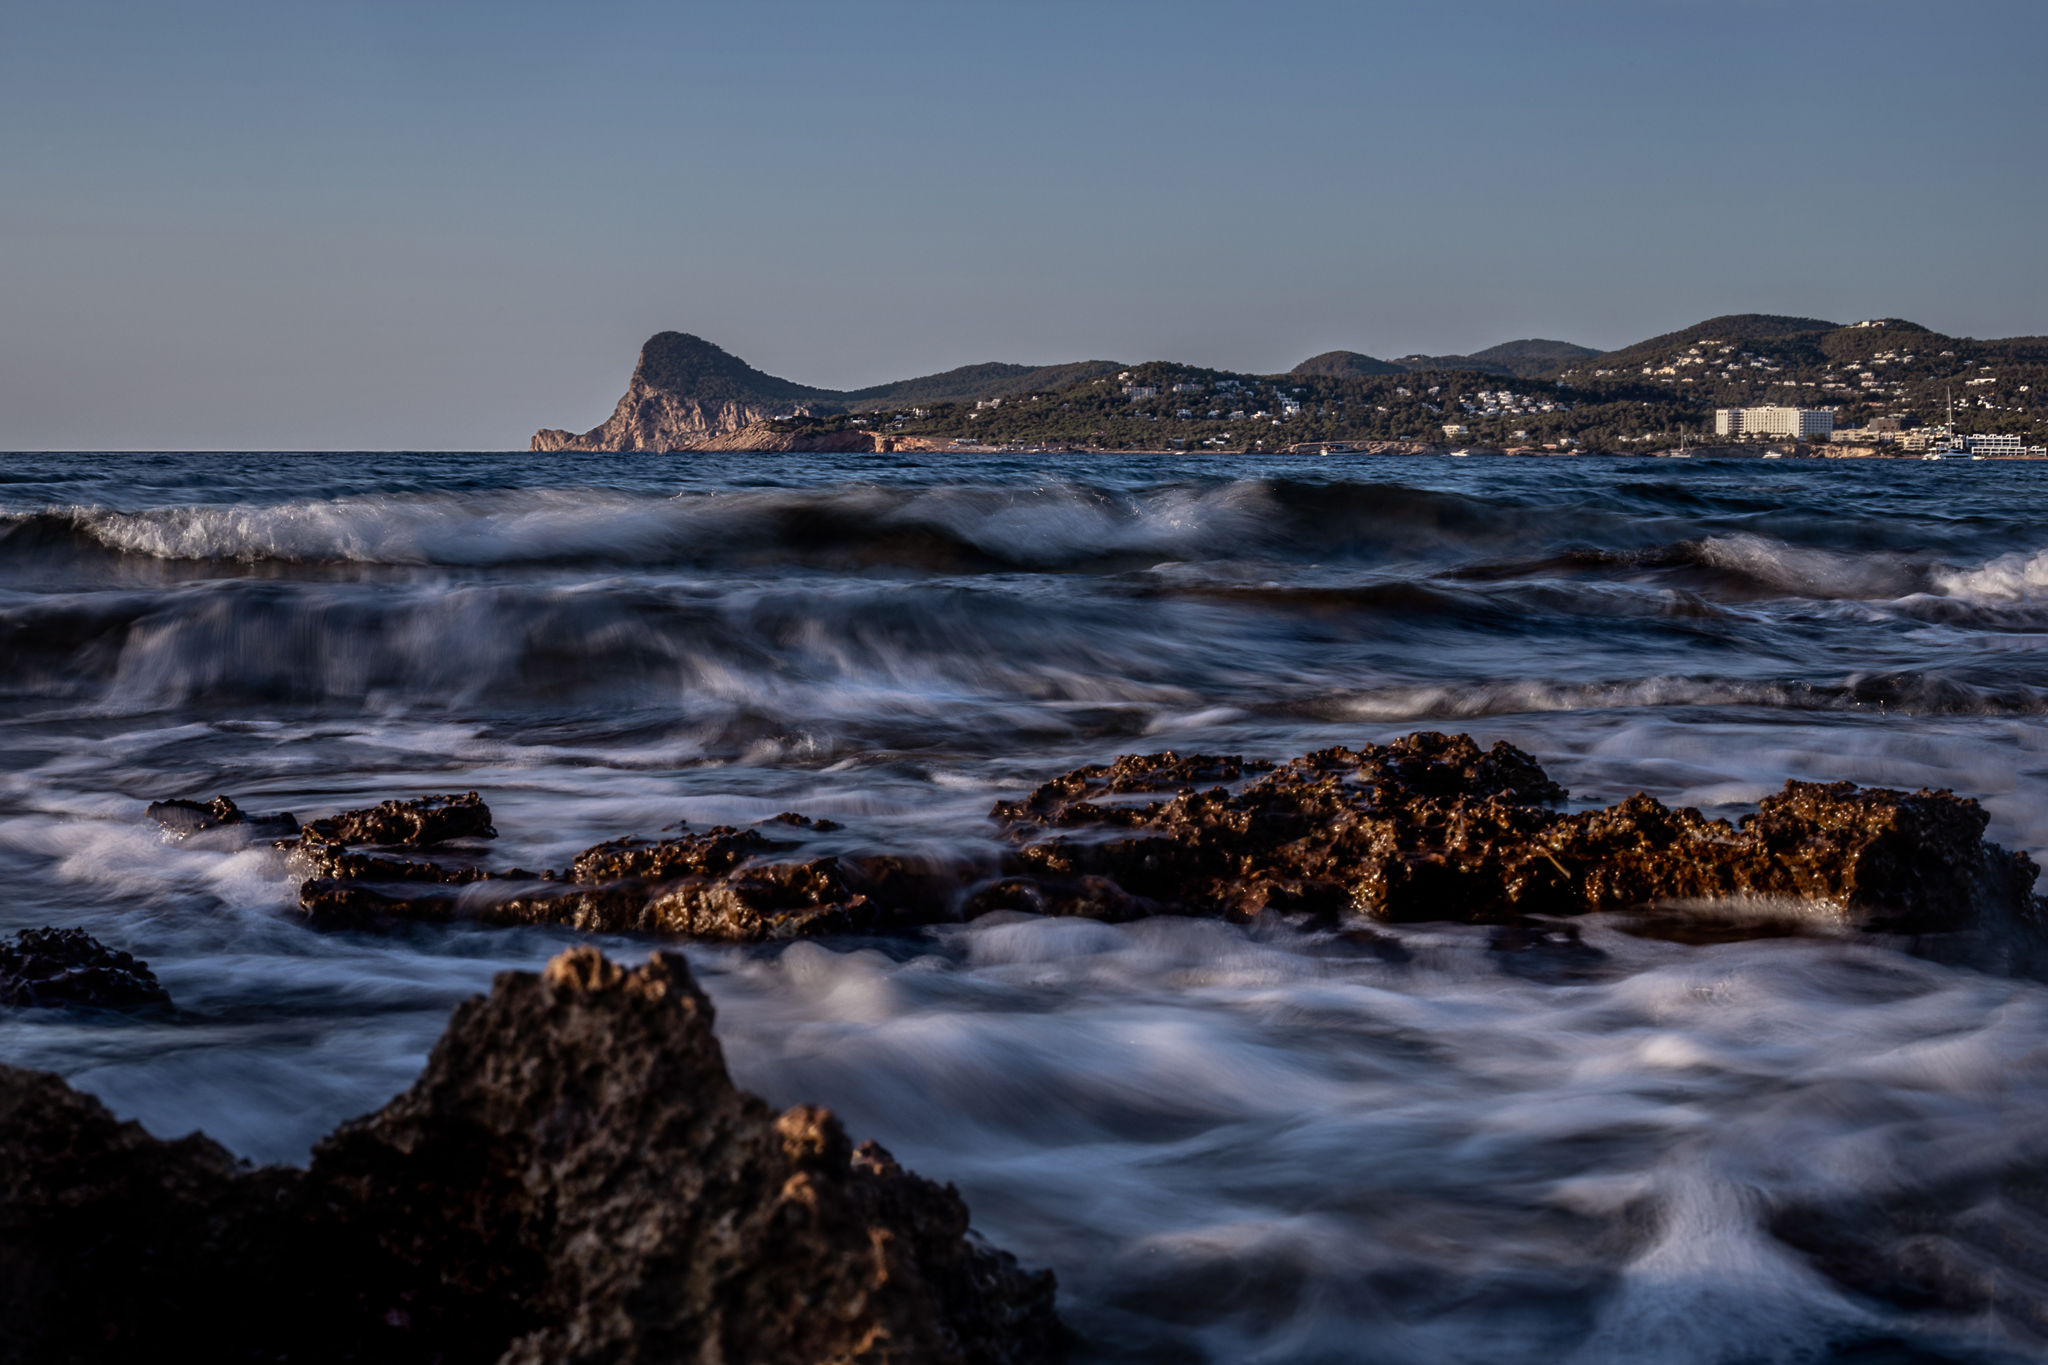
If it’s all in focus the size of the objects can help contribute to the depth. Here the foreground rock would obviously be much smaller than the land in the background, yet the shape is repeated and in the image they are a similar size.
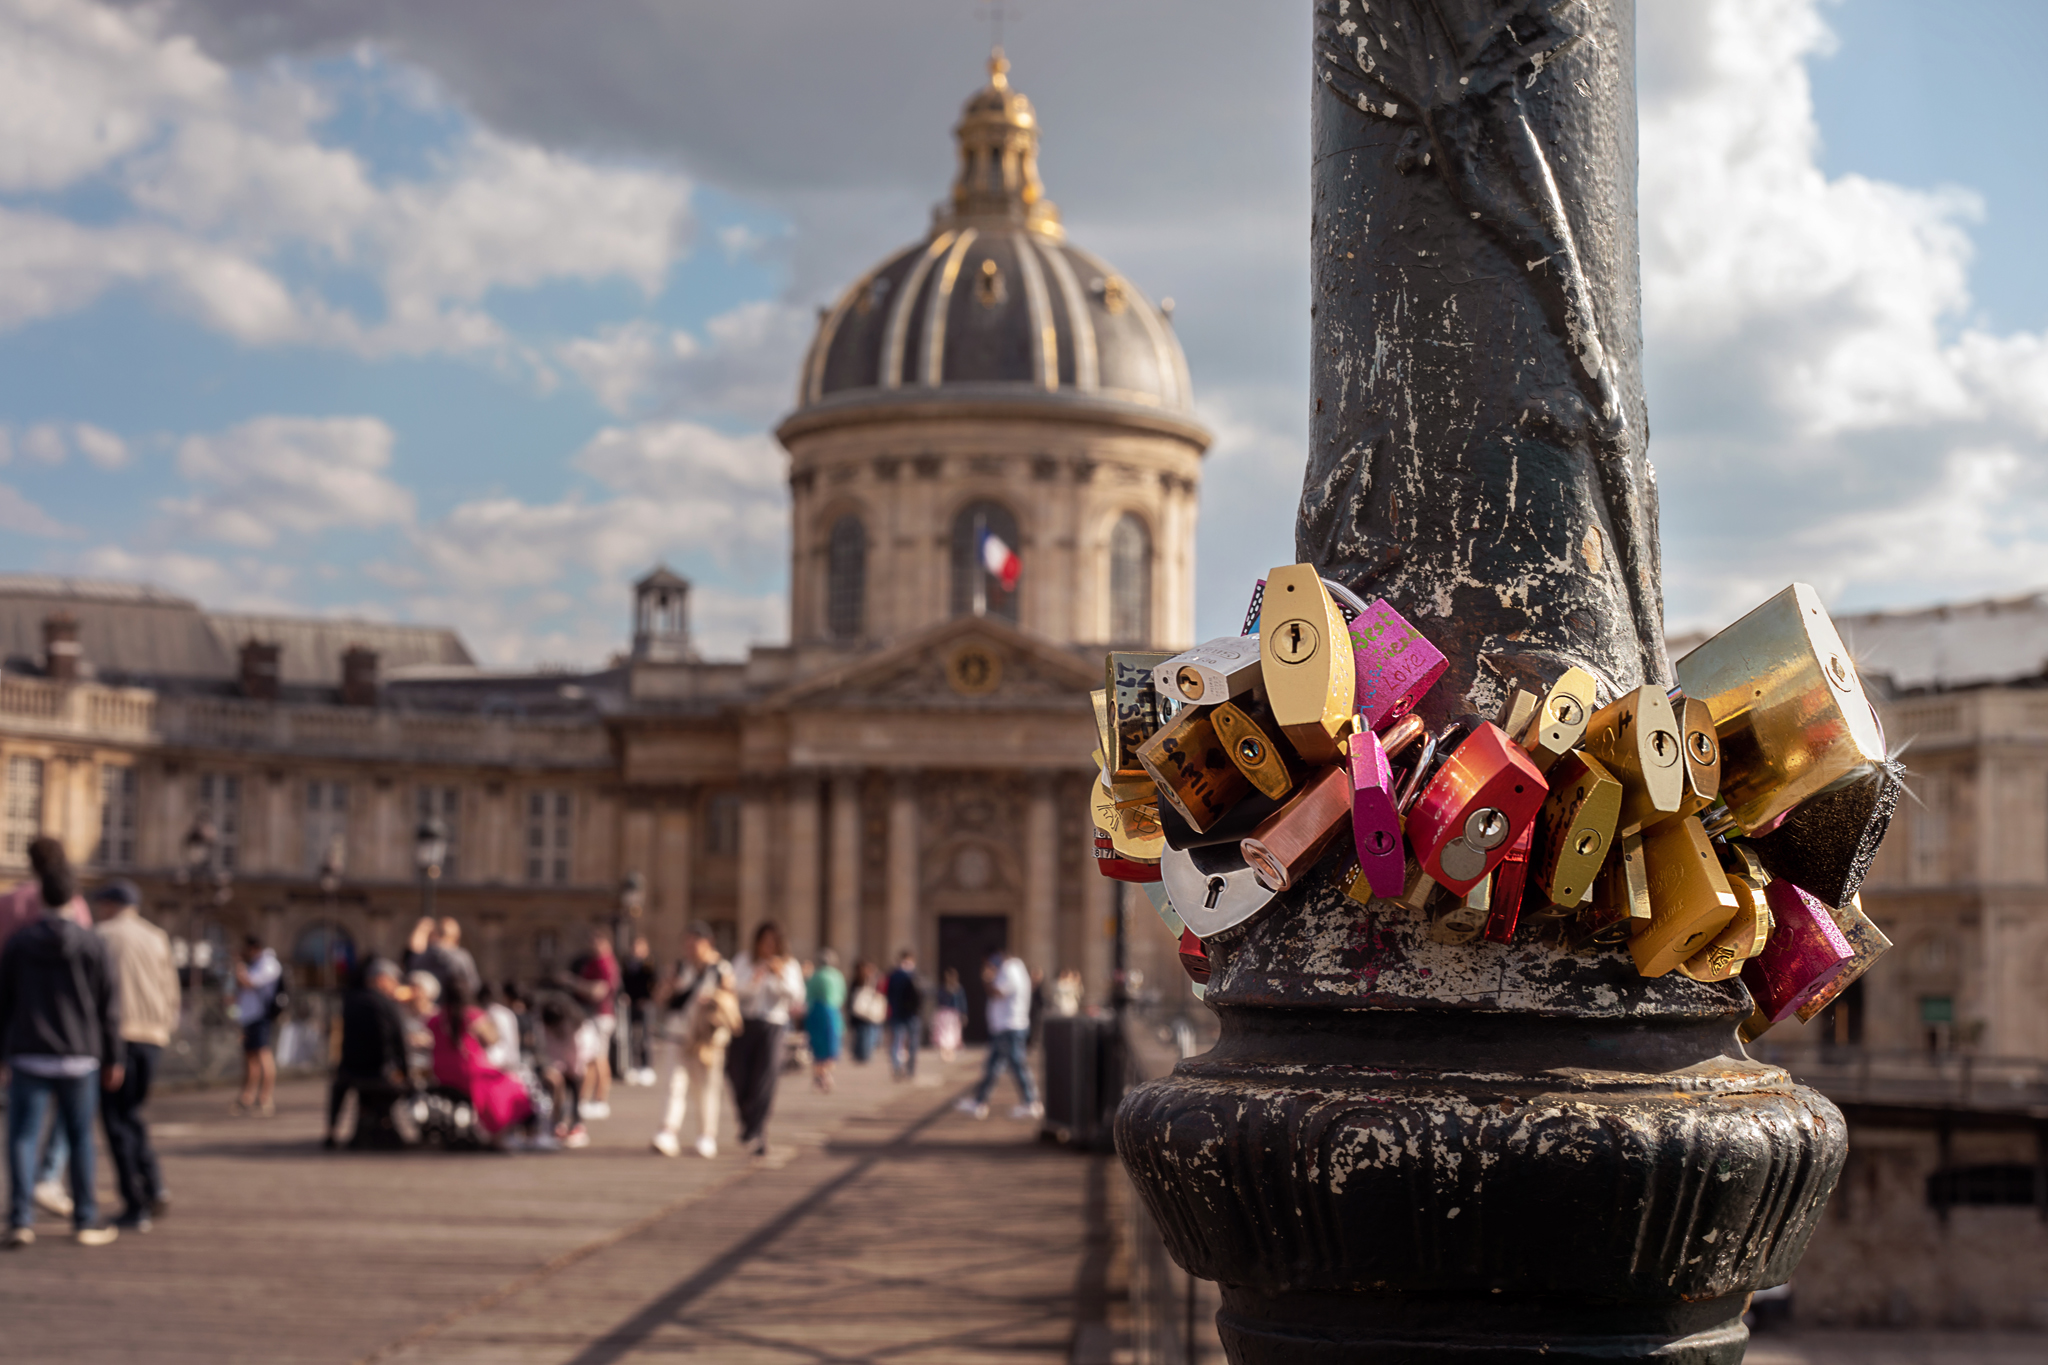
In this one I wanted the story to be about the locks, so I put the focus on those in the foreground. The middle ground – the people, and the background – the building, are blurry, yet you can make out the French flag to add context to the image. The shadow of the railings provides a line leading to the building.
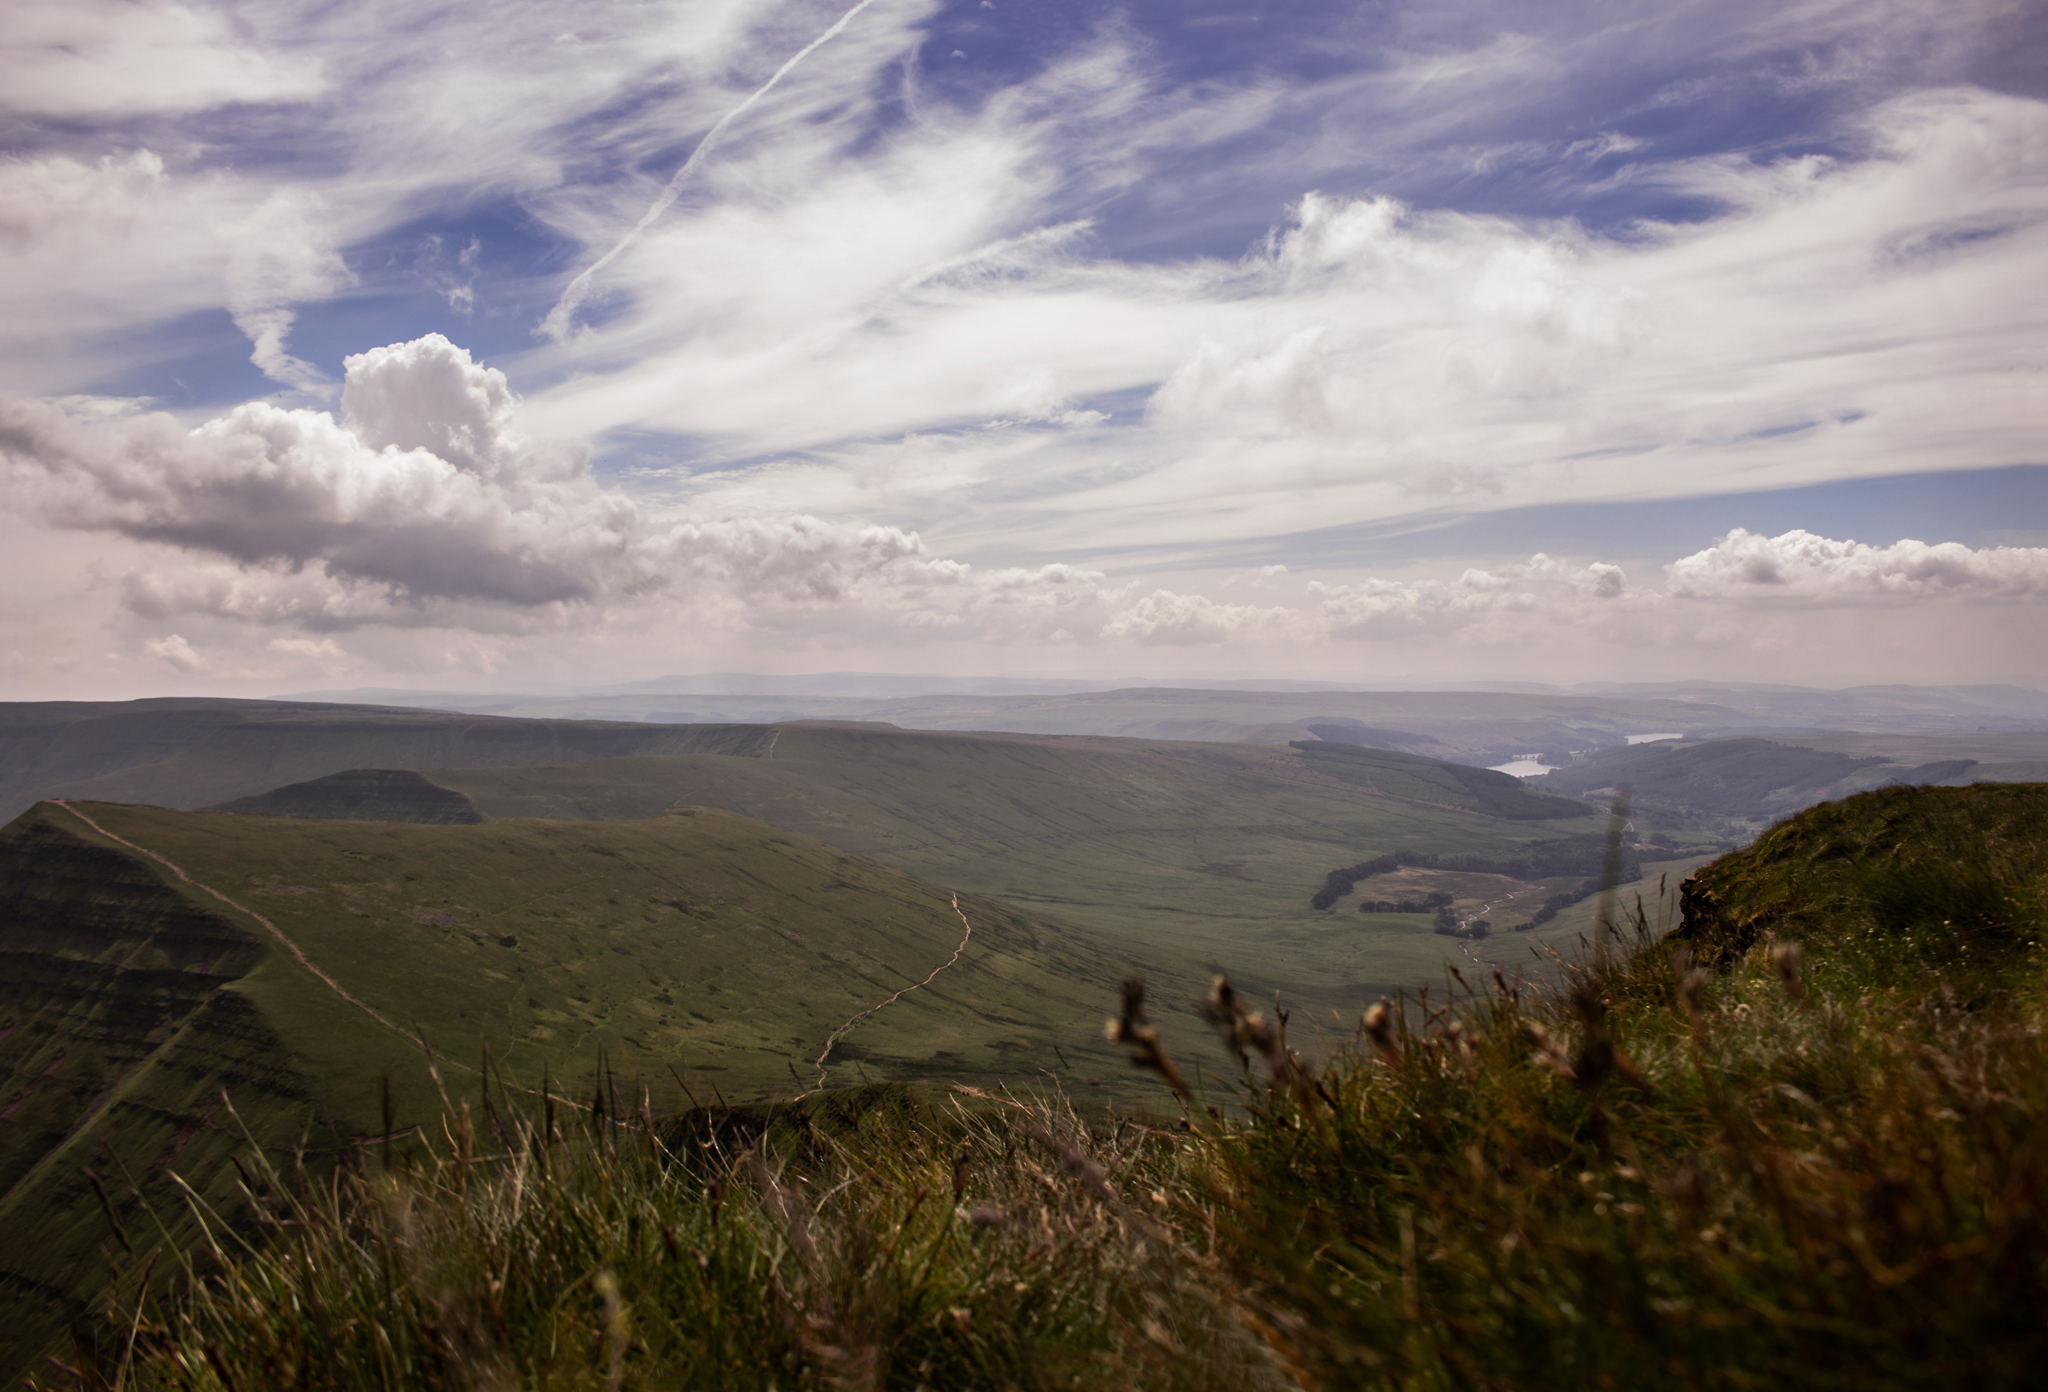
Here I wanted the story about the middle and background – the mountains and the sky. I got down low and shot through the grass such that it appeared blurry in the foreground adding depth.
Check out these other great courses:
Composition for Storytellers
The Art of Location
Looking Up
Diary of a Creative Storyteller
Elements Within the Image
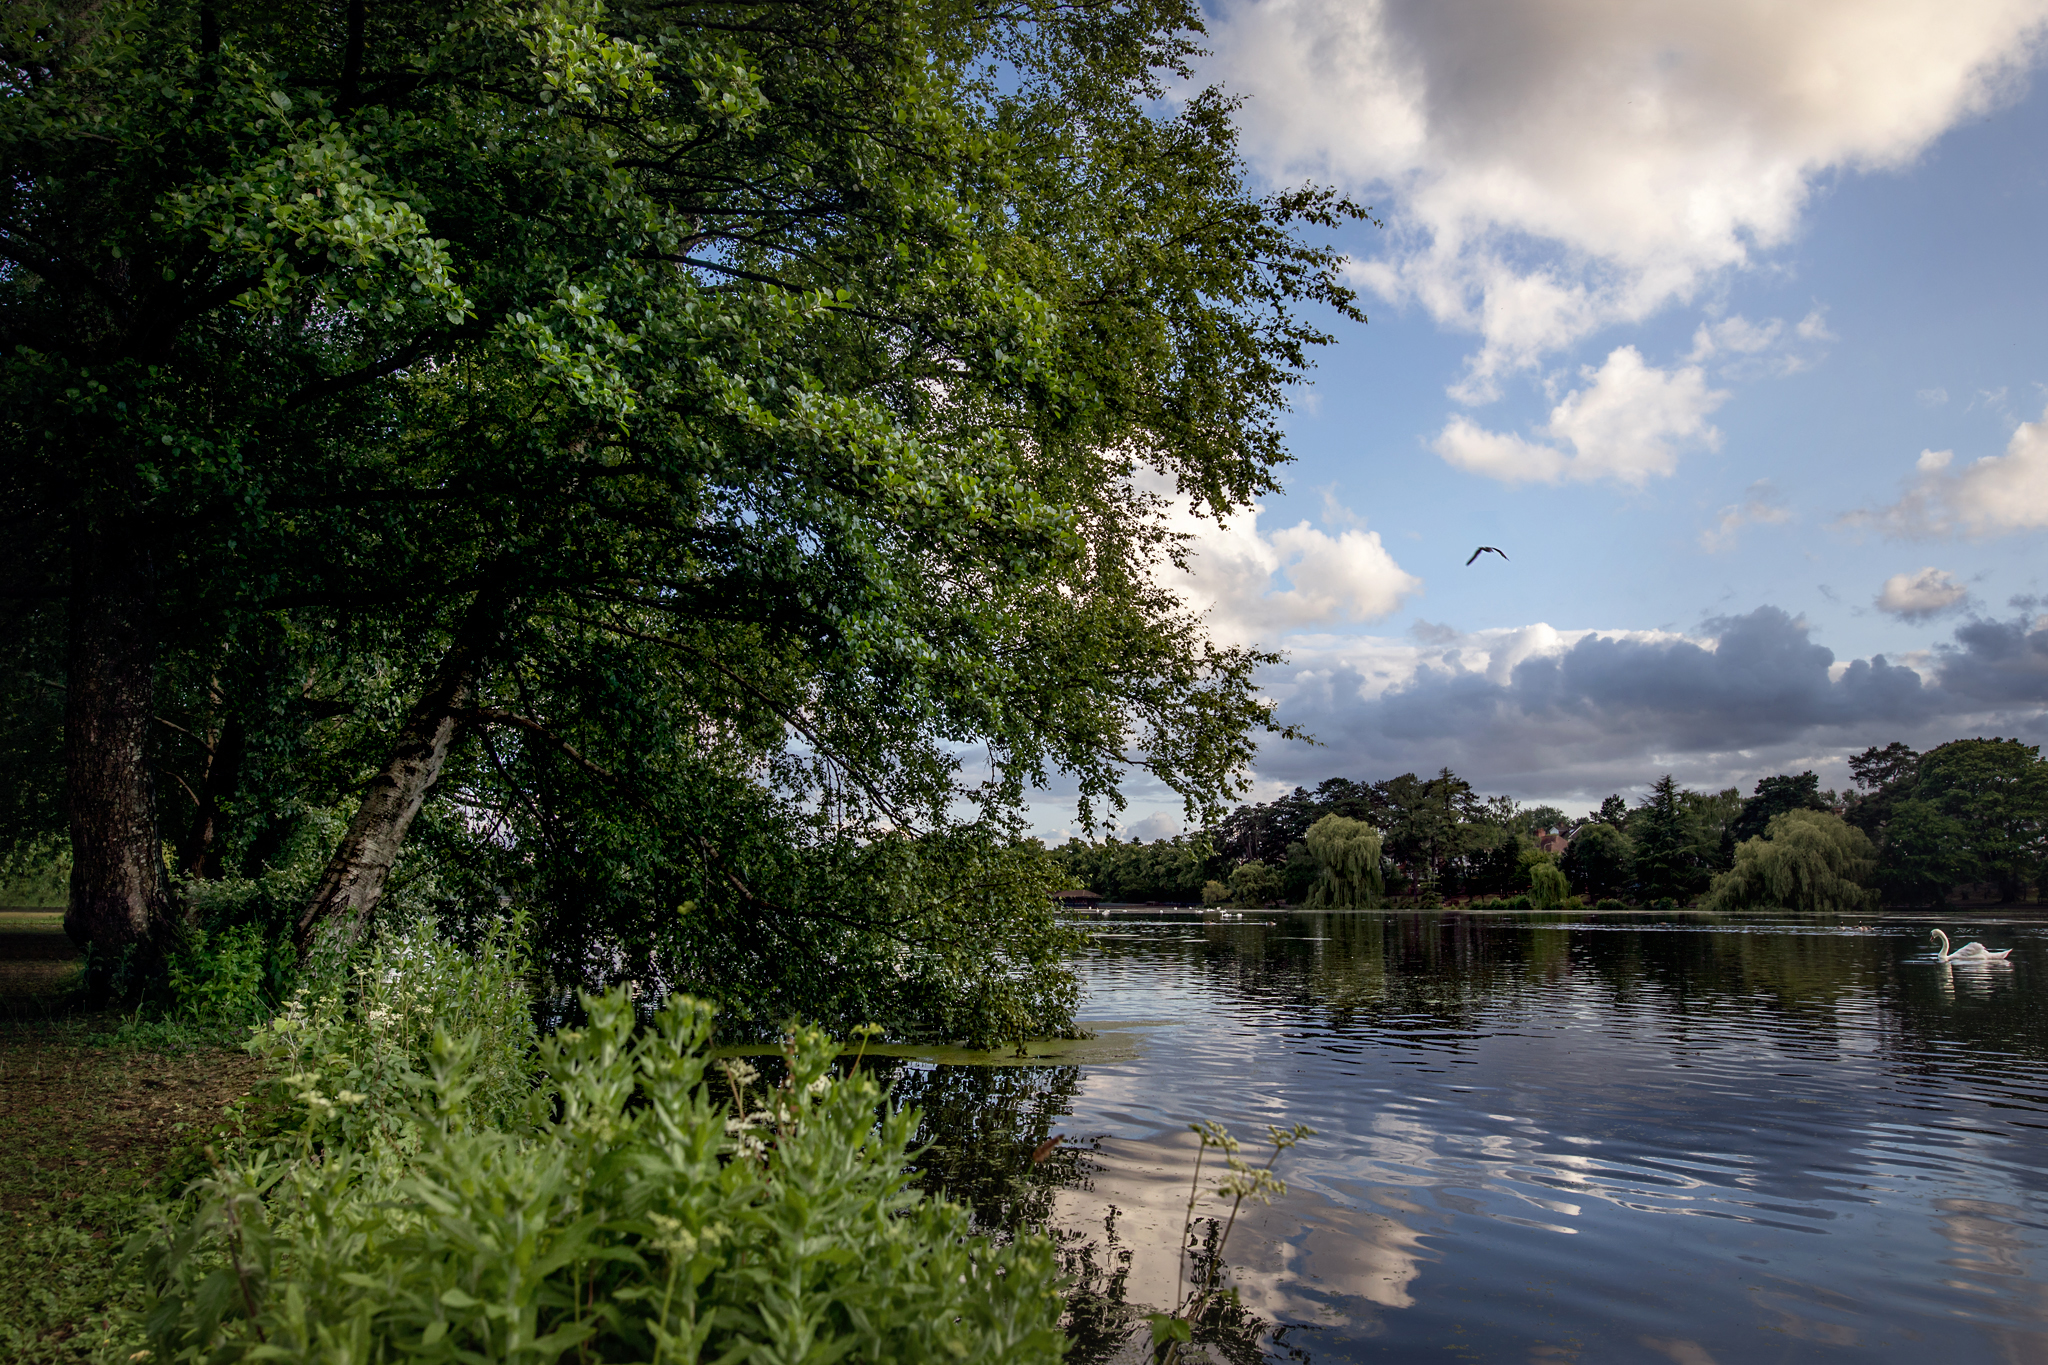
Think about the elements within your scene and how they are positioned. As with the leading lines, you want your eye to be led around the scene and our eye likes shapes. Here the tree, bird and swan here form a triangle. A triangle is a very strong shape to use within your photography work.
Our eyes also like repeated shapes, odd numbers of things and negative space, so try to bear all these things in mind when you’re taking a landscape shot and include them if possible.
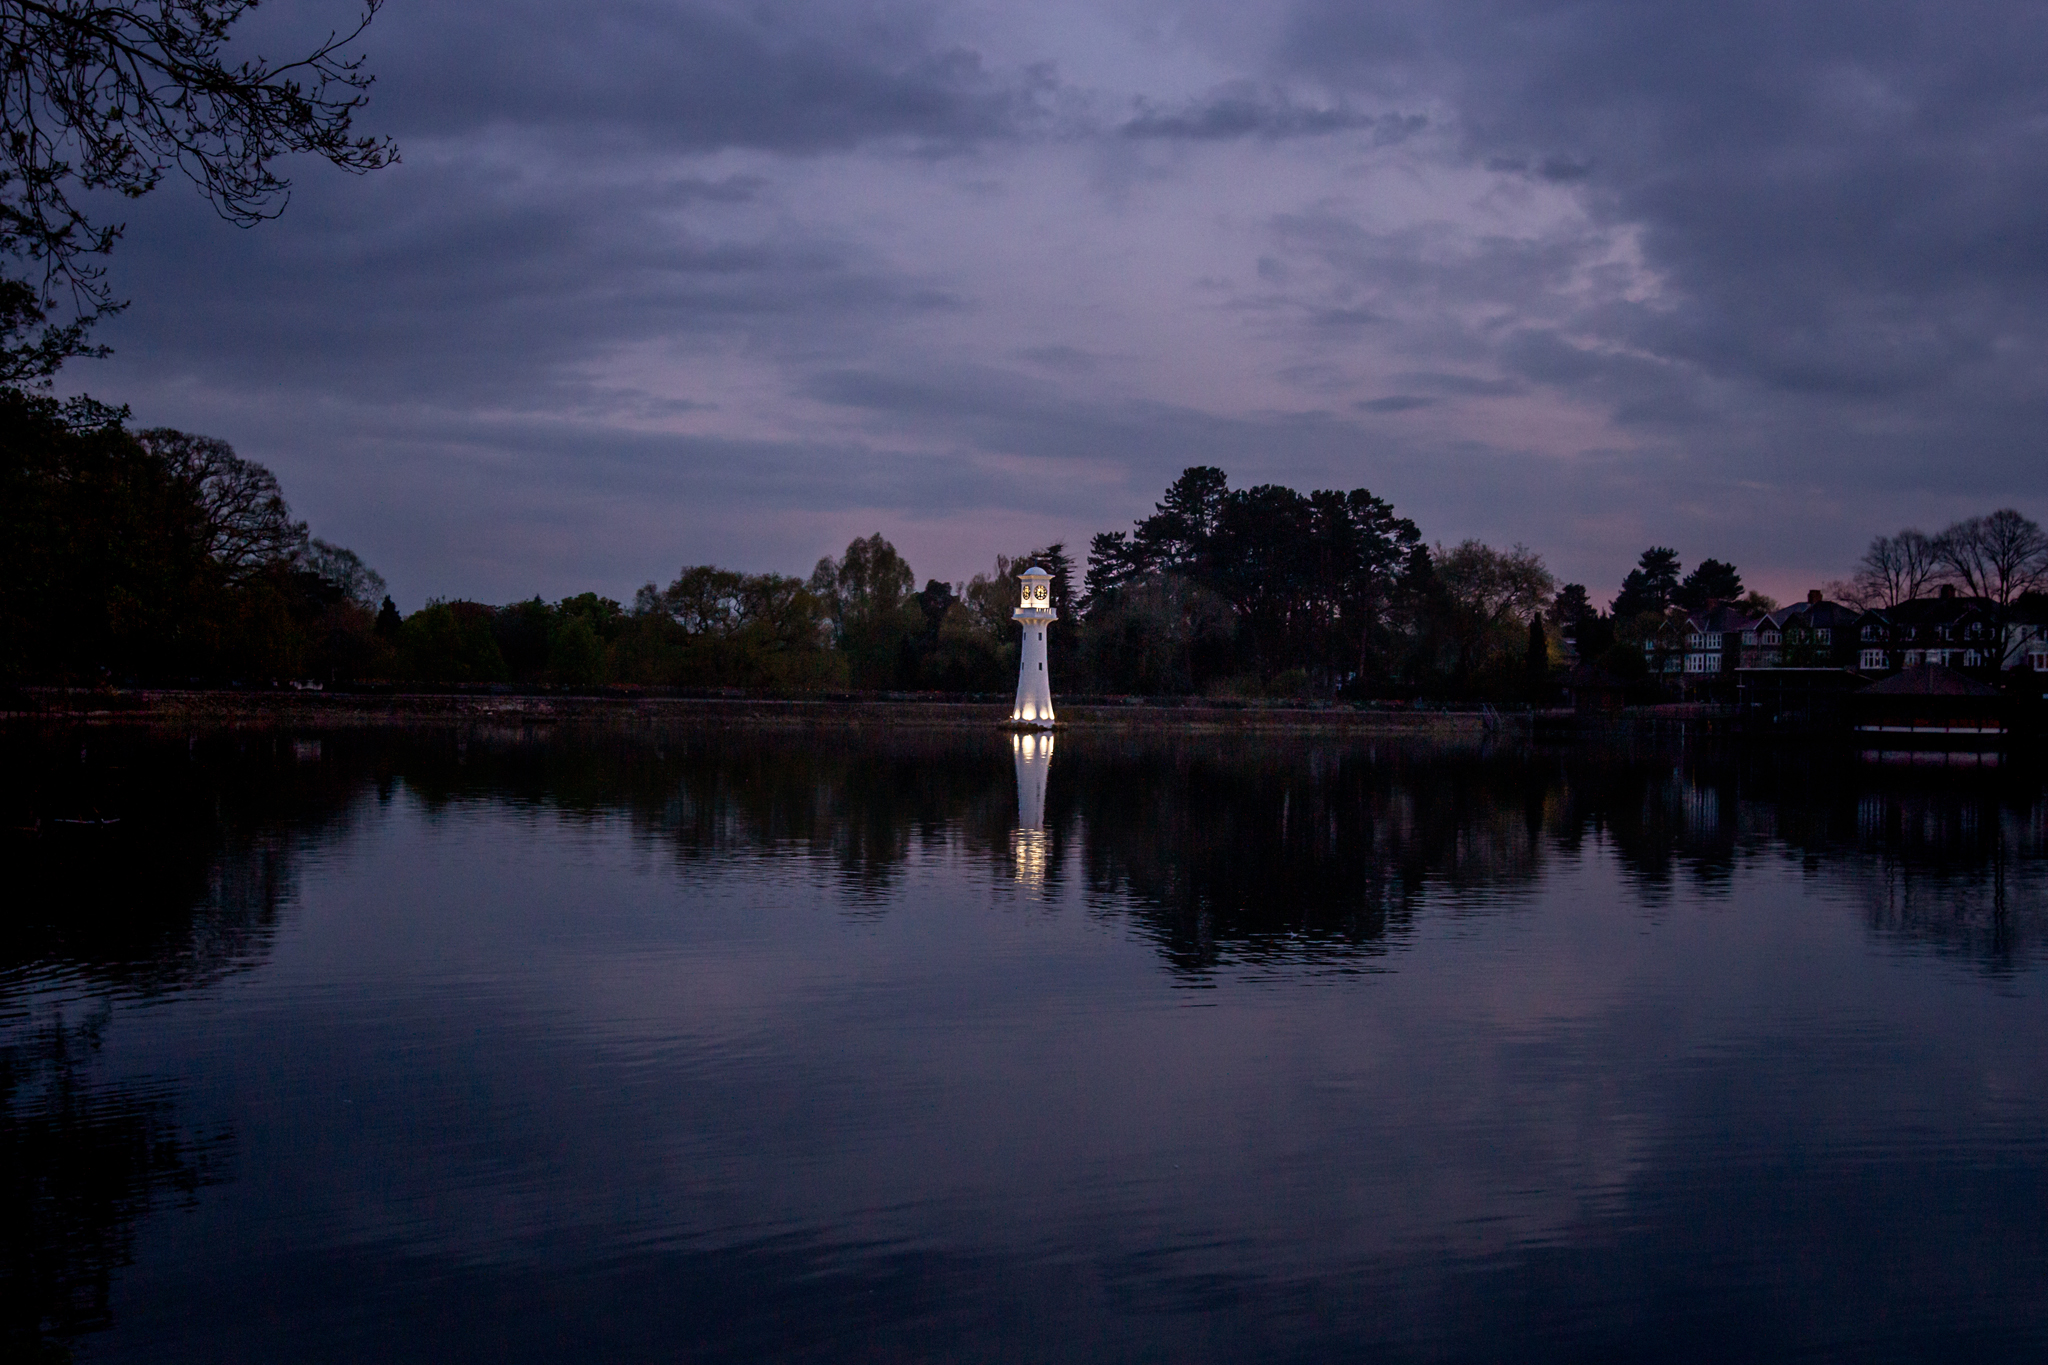
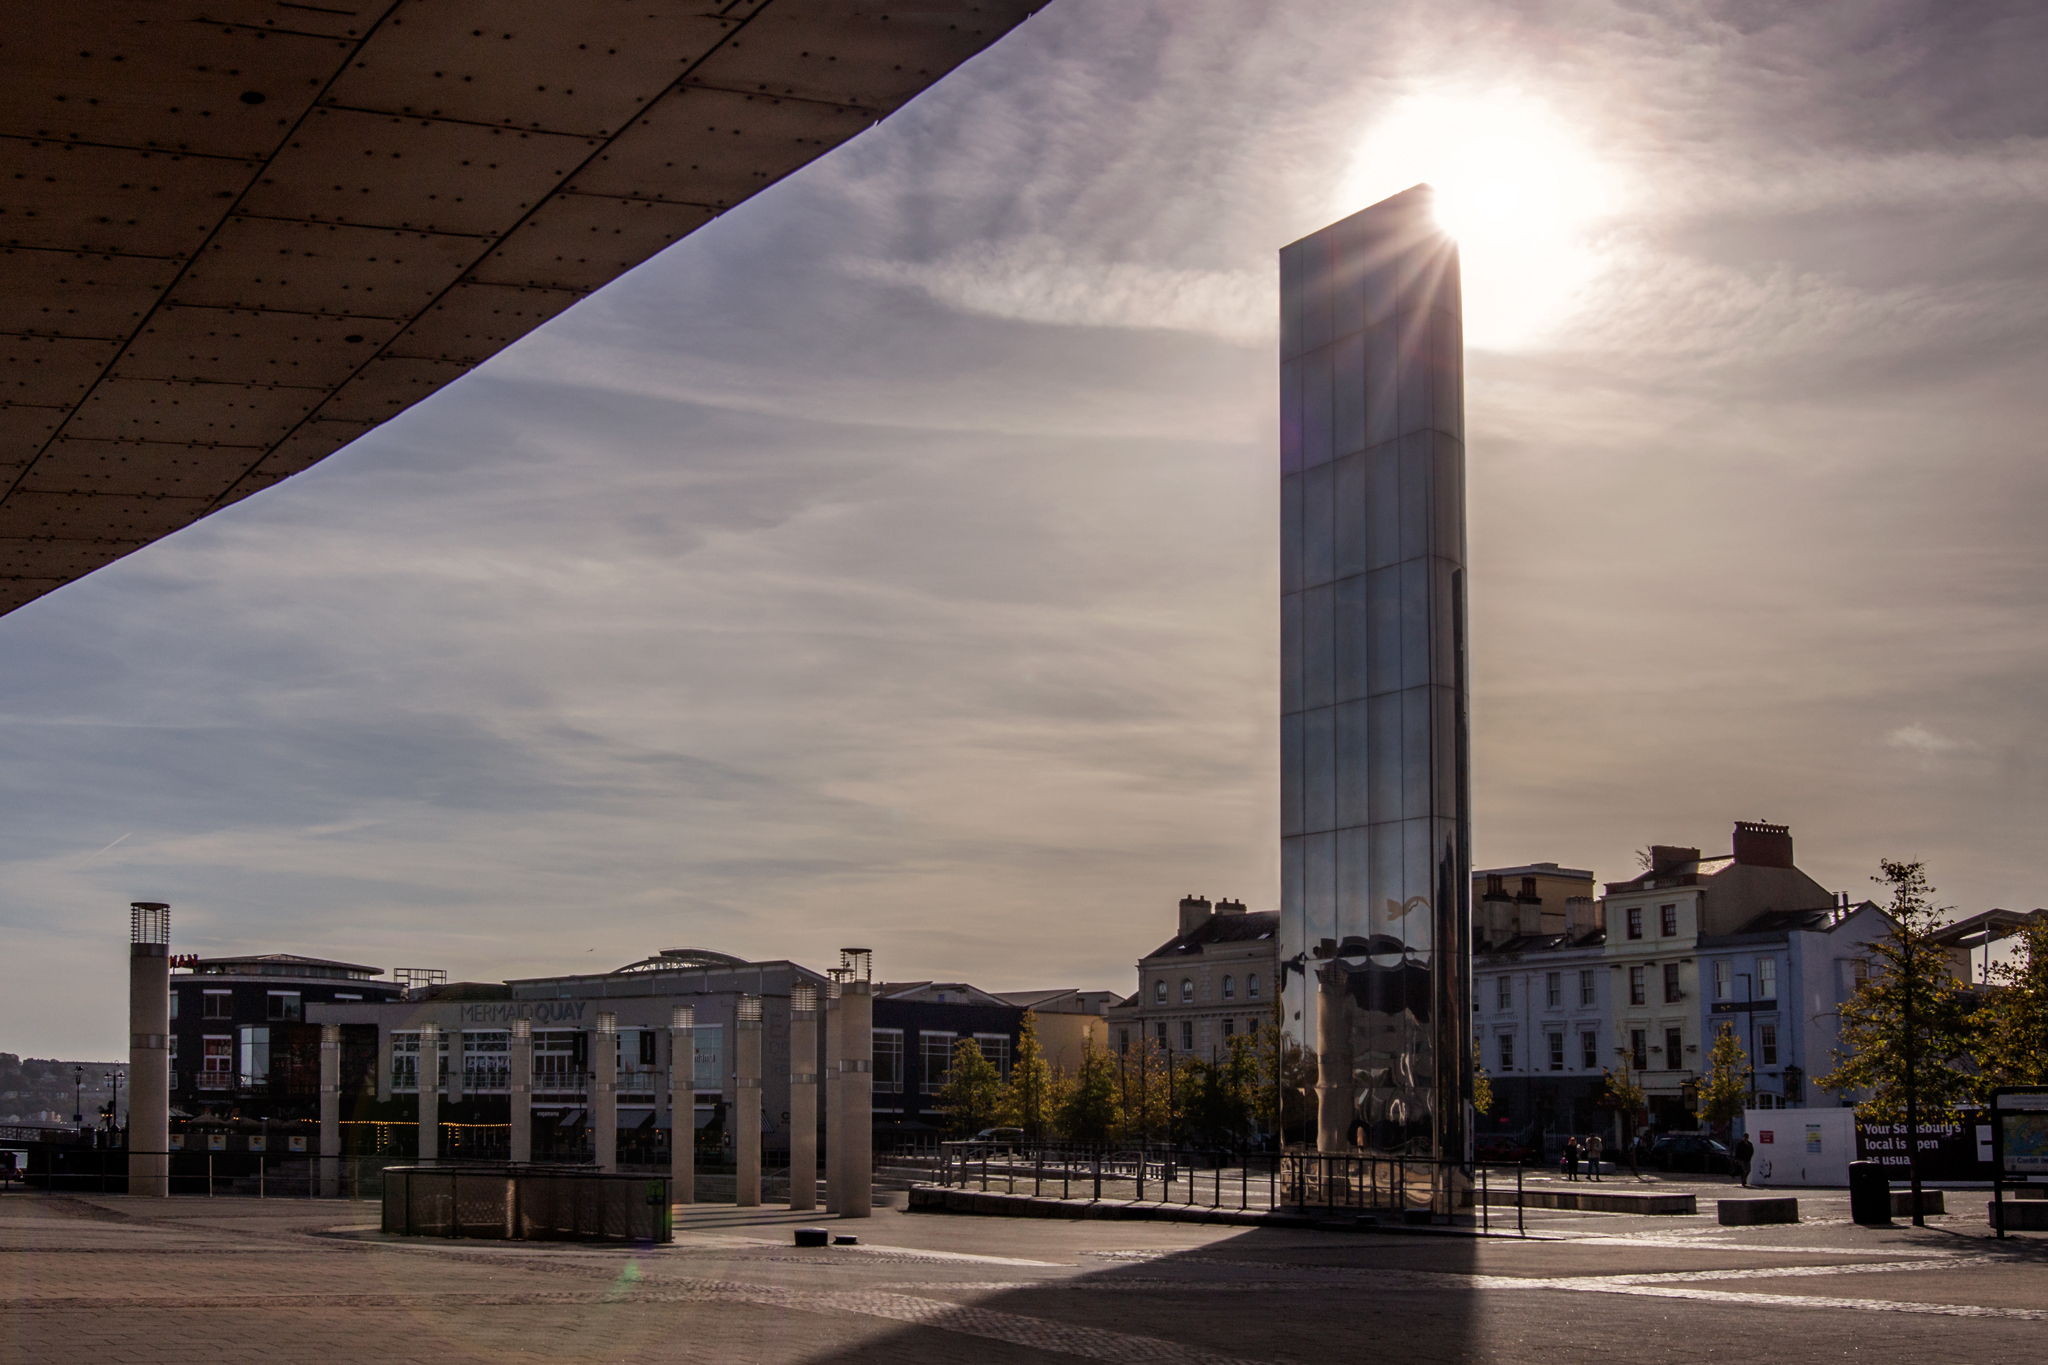
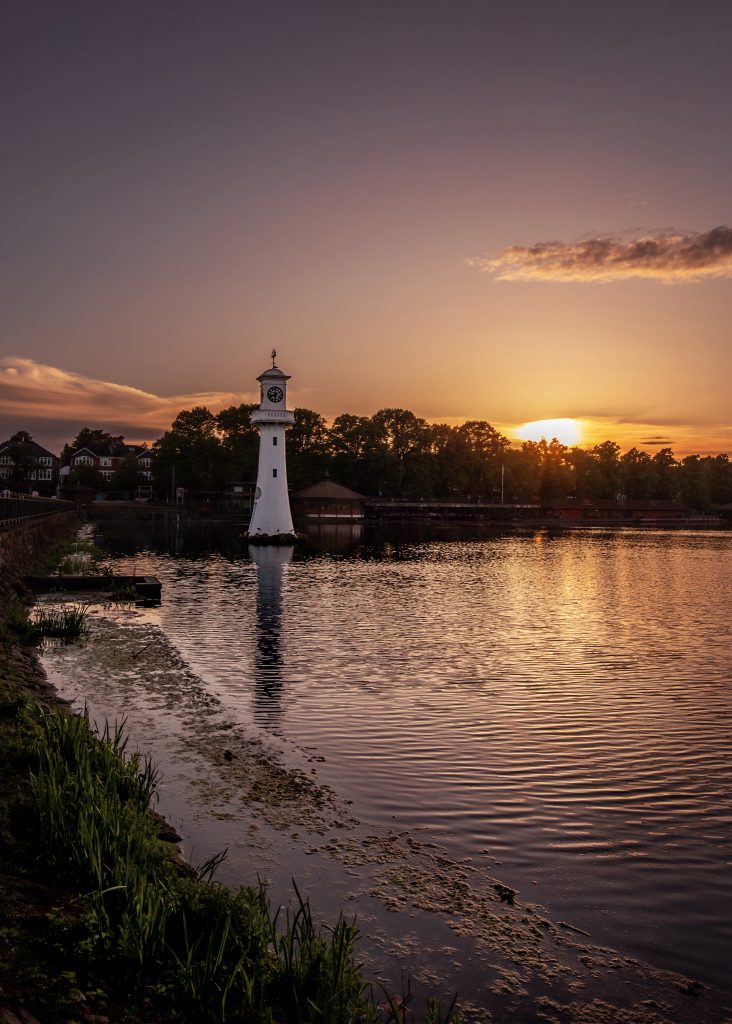
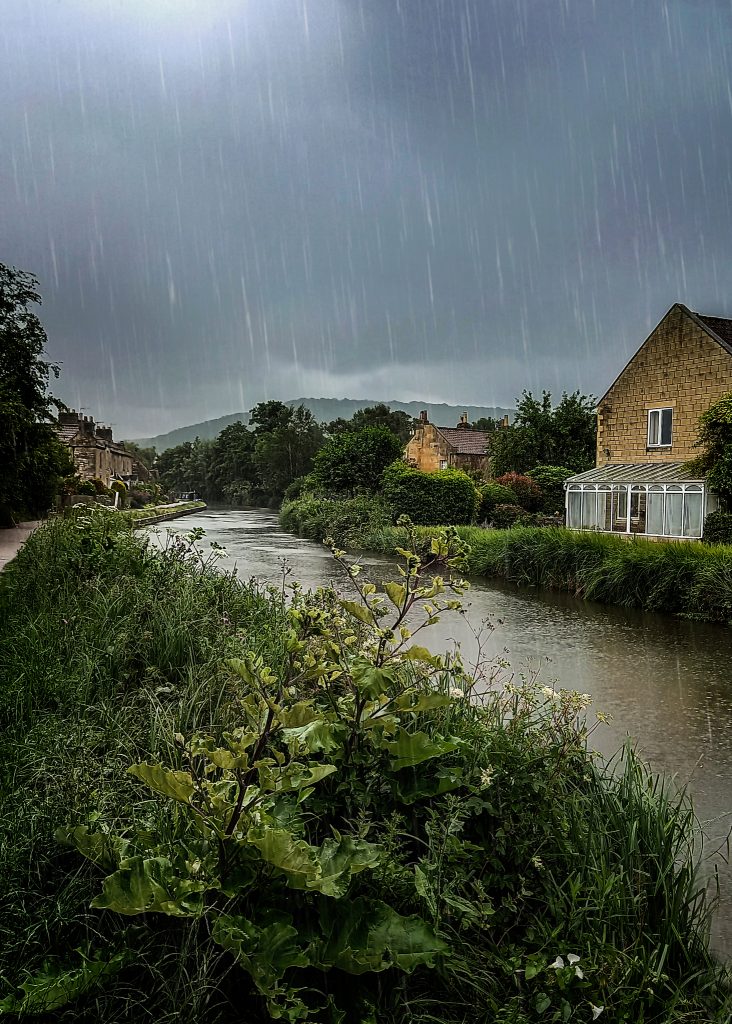
Landscapes don’t have to be “Landscape”
If there are elements within your image that are vertical, such as this lighthouse, or a tree, buildings, long shadows or even the rain, it can be very effective to have your landscape image in portrait orientation.
I hope this has given you some inspiration to get outside and shoot some landscapes, and remember you don’t have to travel miles and go to amazing exotic places, the sights you see everyday are new and interesting for the rest of us who don’t live there. And now you know how you can capture those locations with a strong composition! I can’t wait to see what you create – please share on the Hello Storyteller Facebook page and tag us on Instagram.